V tomto dokumente pomocníka sa dozviete, ako nakonfigurovať účet — firemný profil, bankové údaje, daňové údaje, používateľov, pravidlá pre dokumenty, schvaľovanie, upozornenia, formátovanie a fakturáciu.
Nastavenia sa vzťahujú na jeden účet. Hodnoty nastavené na tomto mieste sa zobrazujú v dokumentoch a určujú správanie platné pre celý účet. Otvorte **Nastavenia** v bočnom paneli; rozbalia sa do deviatich oblastí zoskupených do kategórií základné (Môj účet), bankové (Bankové údaje) a pokročilé (všetky ostatné).
Môj účet #
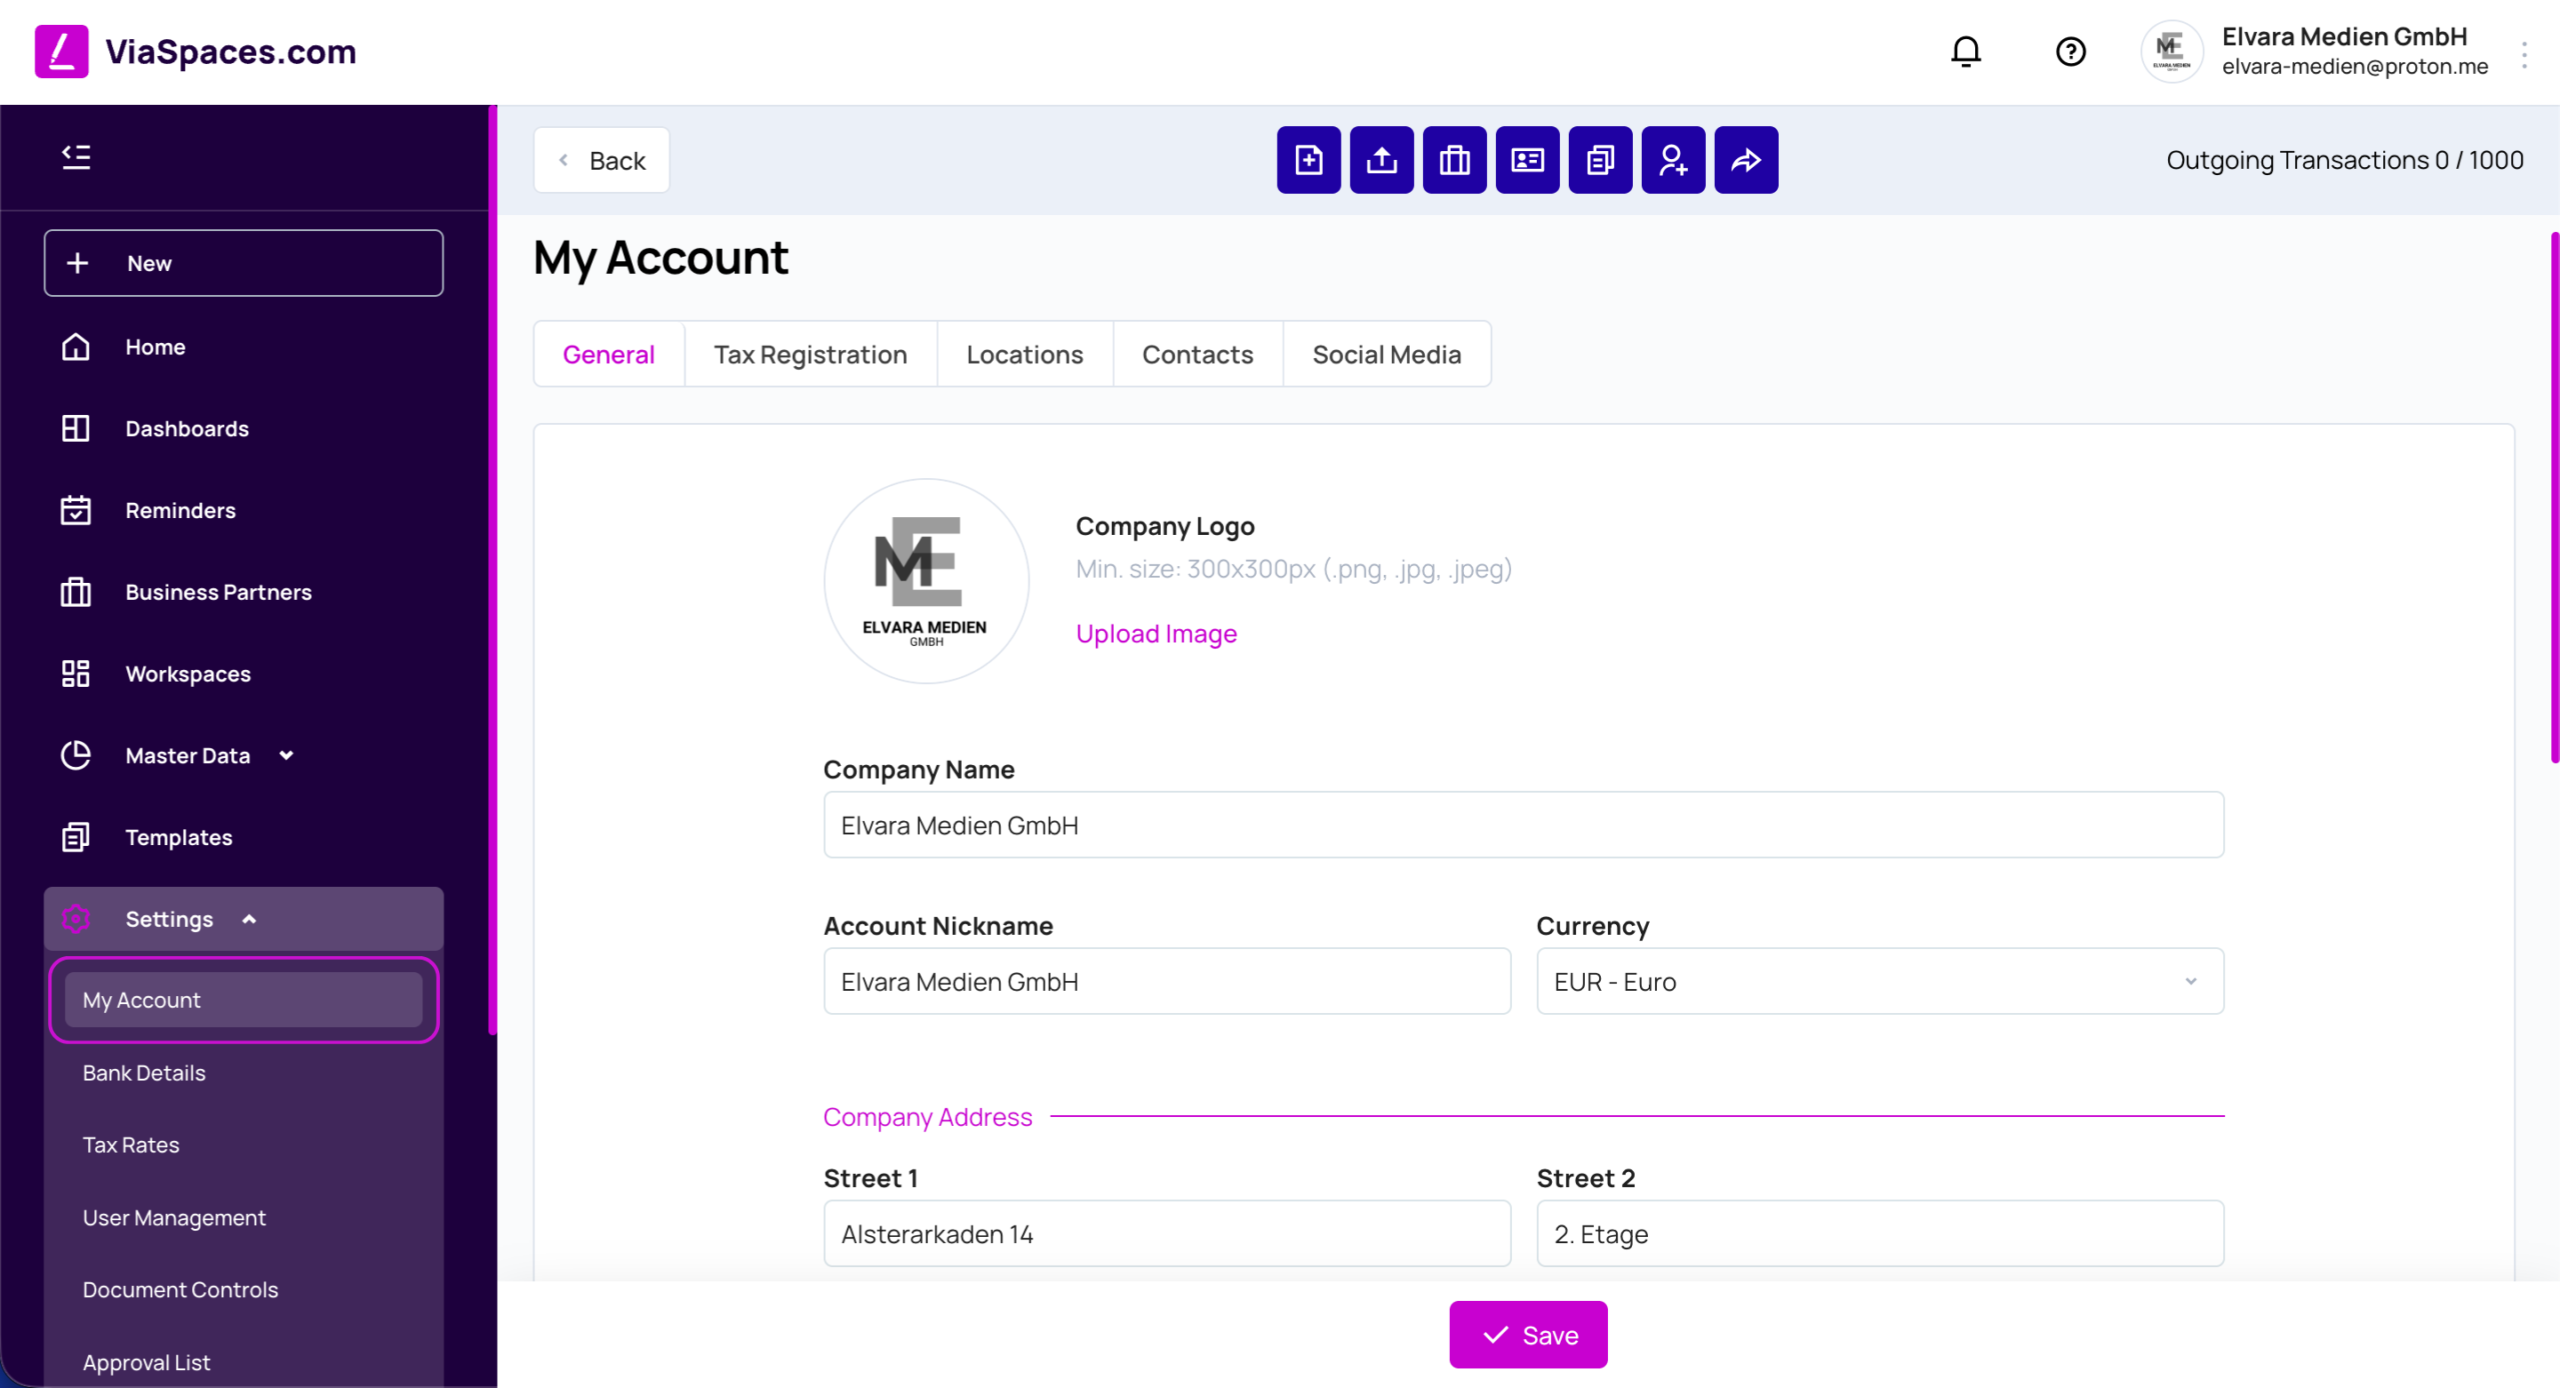
Môj účet je firemný profil — základné identifikačné údaje, ktoré sa zobrazujú na dokumentoch. Je rozdelený do kariet: Všeobecné, Daňová registrácia, Prevádzky, Kontakty a Sociálne médiá.
Karta Všeobecné obsahuje:
| Pole | Hodnota |
|---|---|
| Logo spoločnosti | Obrázok v dokumentoch. Minimálne 300 × 300 px; .png, .jpg, .jpeg. |
| Názov spoločnosti | Registrovaný názov spoločnosti. |
| Prezývka účtu | Označenie zobrazené v zozname účtov. |
| Predvolená mena | Mena používaná v celom účte a pre súhrny na nástenke. |
| Adresa | Adresa spoločnosti. |
| Číslo registrácie spoločnosti | Registračné číslo spoločnosti. |
| Daňová registrácia / IČO | Daňové identifikačné číslo. |
| Kód daňovej jurisdikcie | Kód krajiny pre daňové účely (napríklad DE). |
| Zobraziť uvítaciu obrazovku | Zobrazí alebo skryje uvítaciu obrazovku. |

Poznámka: Akcie na uzamknutie a odstránenie sa nachádzajú v dolnej časti karty Všeobecné v sekcii Správa firemného účtu. Pozrite si nižšie uvedenú časť Uzamknutie a odstránenie účtu.
Uzamknutie a odstránenie účtu #
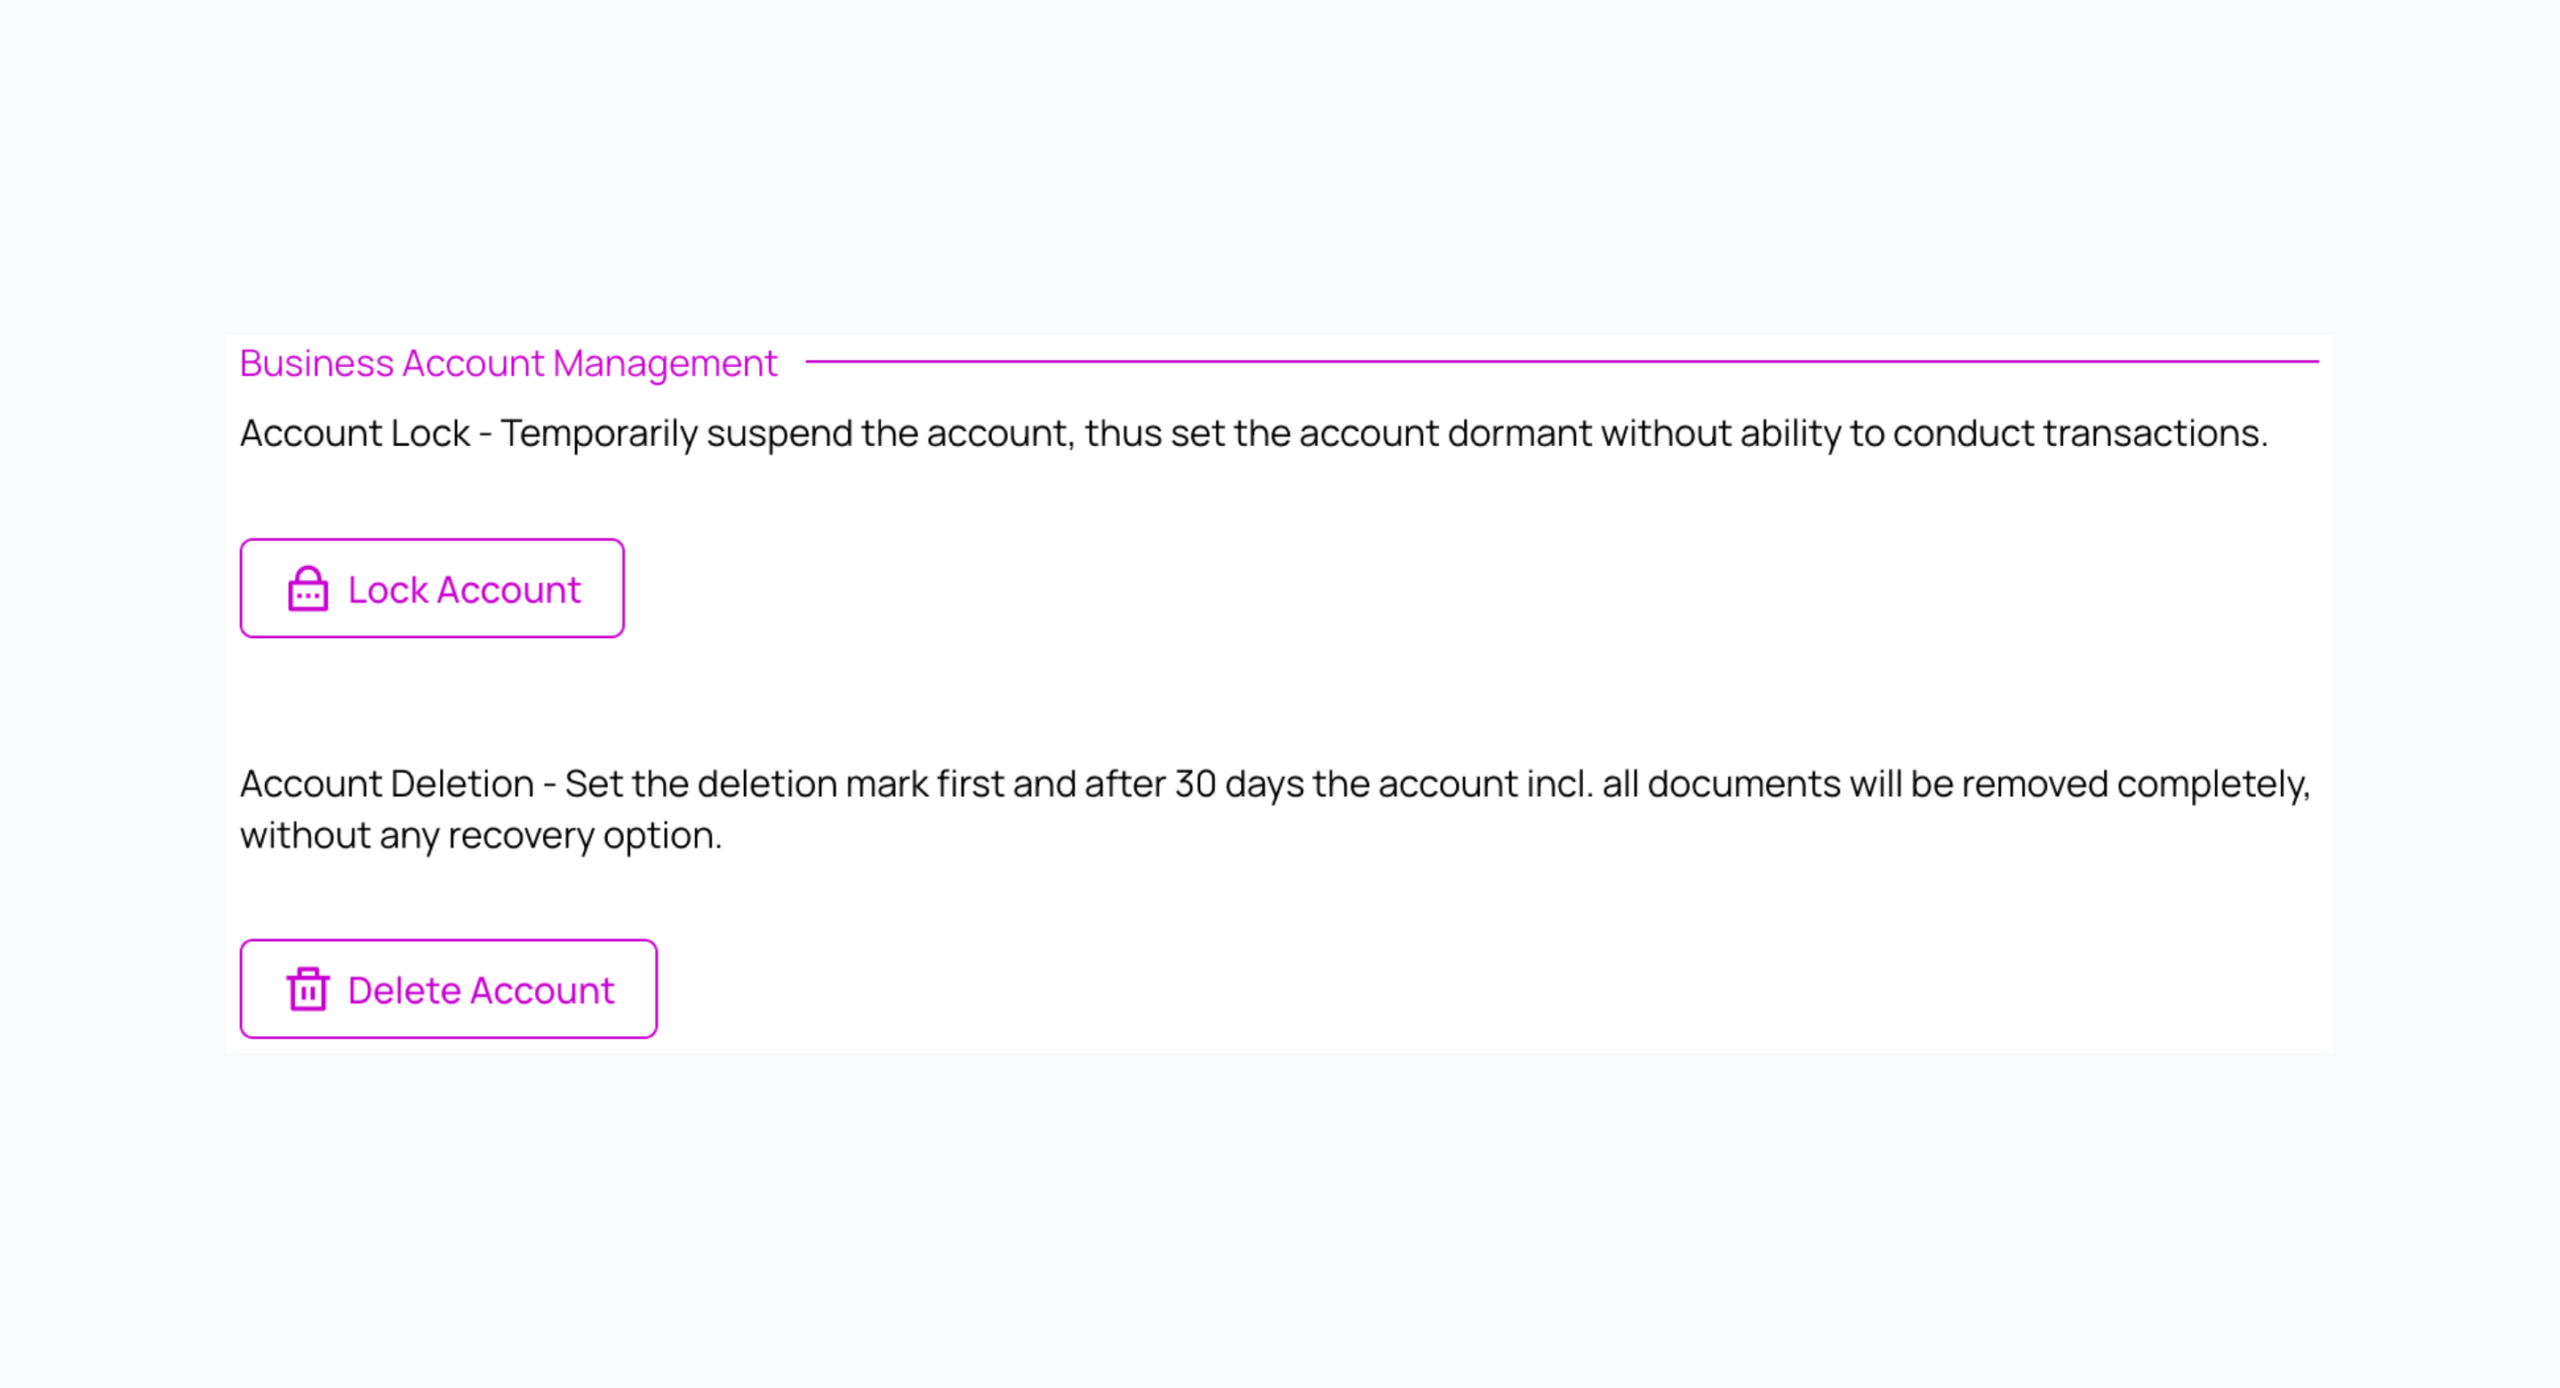
Správa firemného účtu obsahuje dve akcie na úrovni účtu.
| Akcia | Účinok |
|---|---|
| Uzamknúť účet | Dočasne pozastaví účet a nastaví ho do neaktívneho stavu bez možnosti vykonávať transakcie. Odomknutie vykonáva Administrátor. |
| Odstrániť účet | Nastaví označenie na odstránenie. Po 30 dňoch sa účet a všetky dokumenty odstránia bez možnosti obnovenia. |
Zostávajúce karty:
| Karta | Obsah |
|---|---|
| Daňová registrácia | Daňové registrácie podľa krajiny a typu. |
| Prevádzky | Dodatočné adresy: Názov prevádzky, Ulica, Mesto, PSČ, Krajina. |
| Kontakty | Kontaktné osoby s údajmi: Celé meno, Funkcia, E-mail, Telefónne číslo a označenie Primárny kontakt. |
| Sociálne médiá | Odkazy na webovú stránku a profily na sociálnych sieťach. |
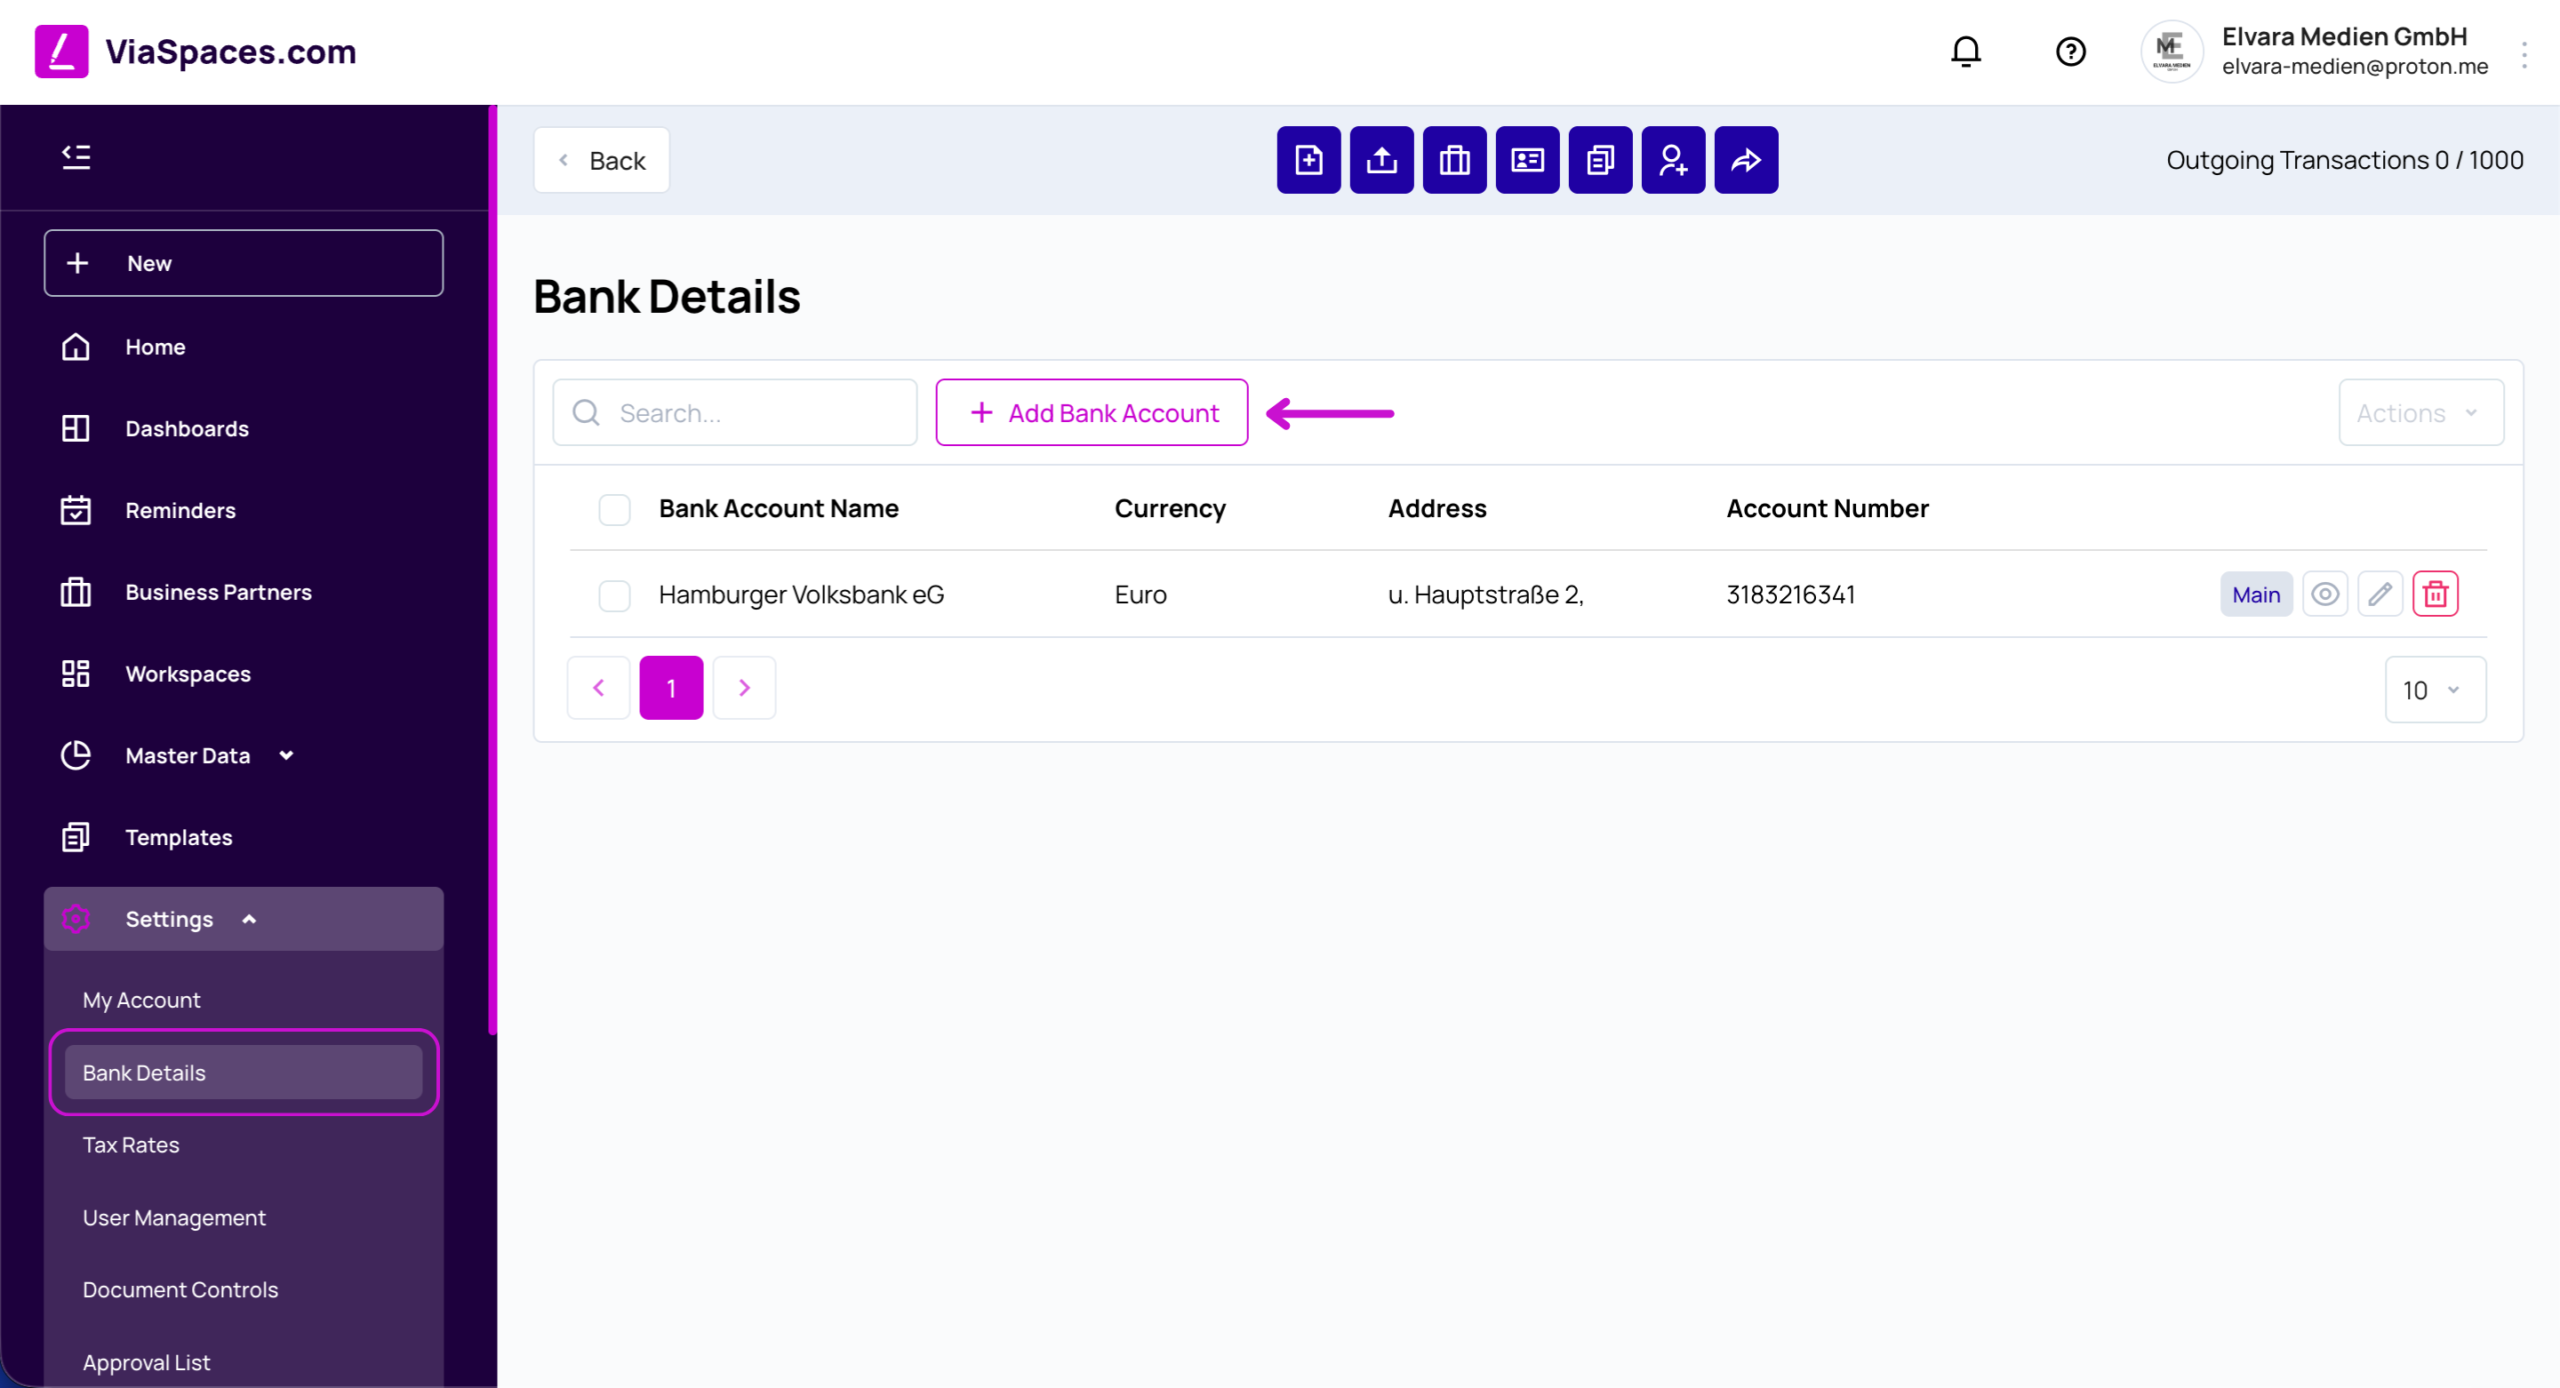
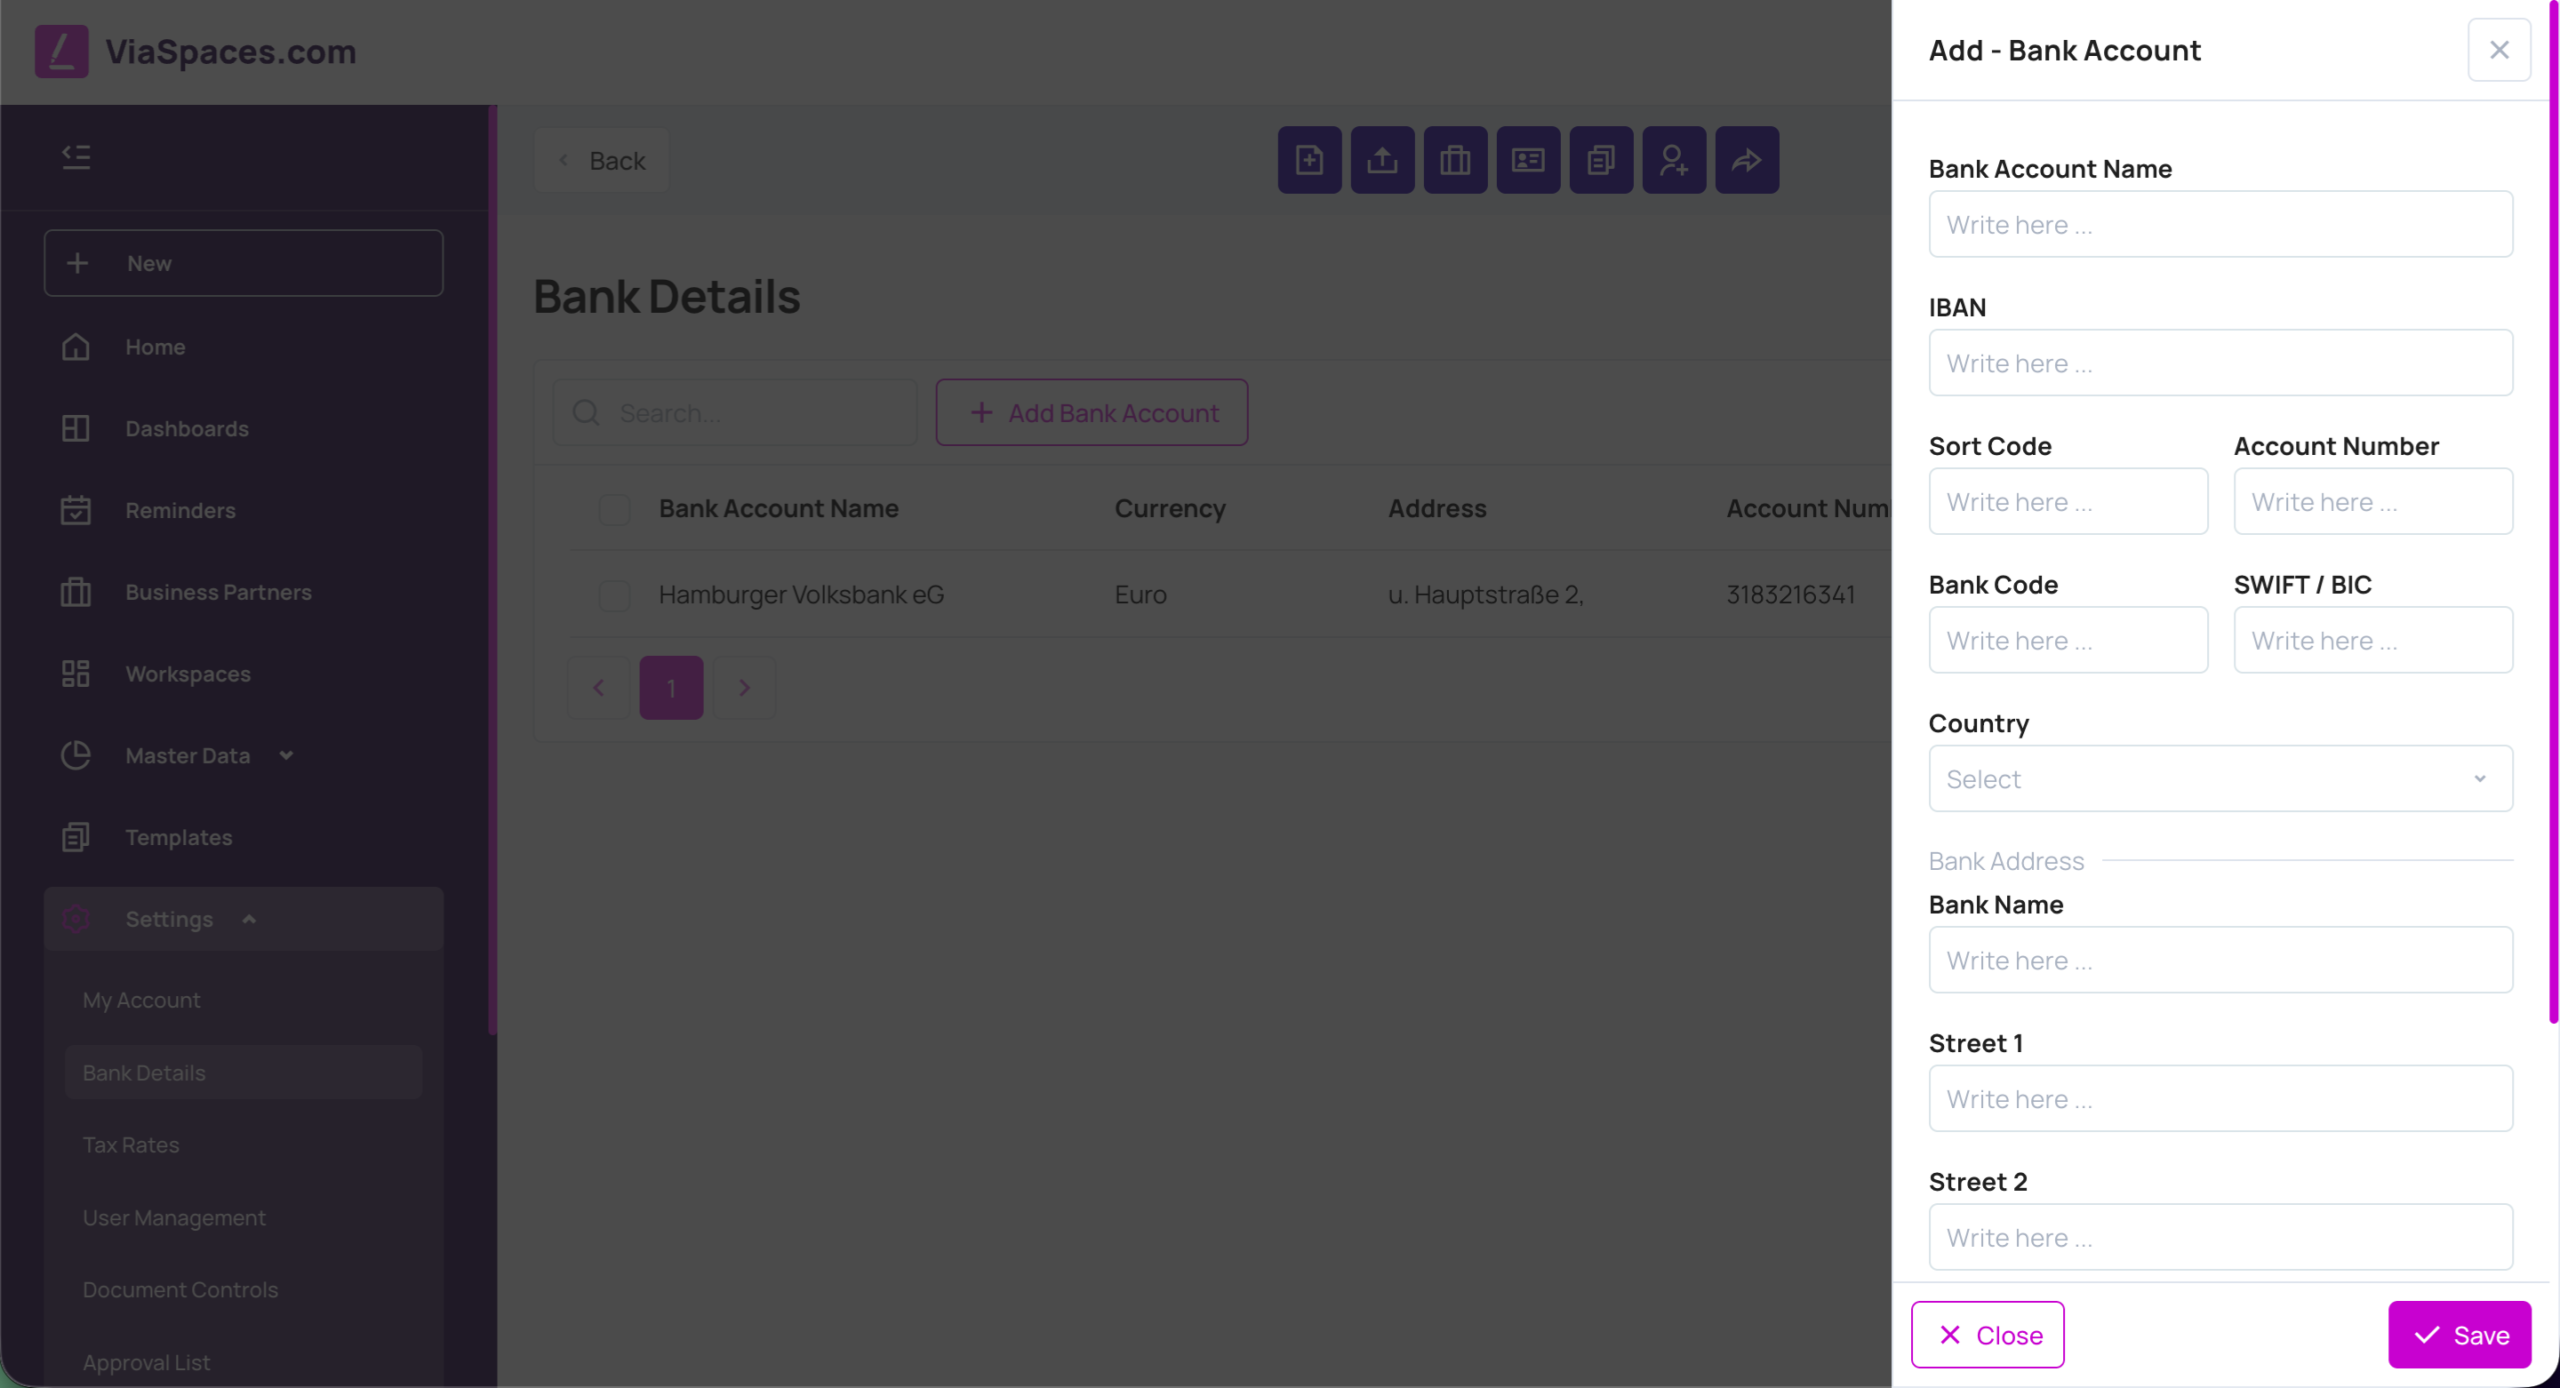
Bankové údaje #
Bankové údaje obsahujú bankové účty, ktoré sa zobrazujú na dokumentoch. Každá položka obsahuje:
| Pole | Hodnota |
|---|---|
| Názov bankového účtu | Názov účtu. |
| Mena | Mena účtu. |
| Číslo účtu | Číslo účtu. |
| Adresa | Adresa banky. |
| Hlavný | Označuje predvolený účet používaný v dokumentoch. |
Pridajte účet pomocou Pridať nový.
Daňové sadzby #
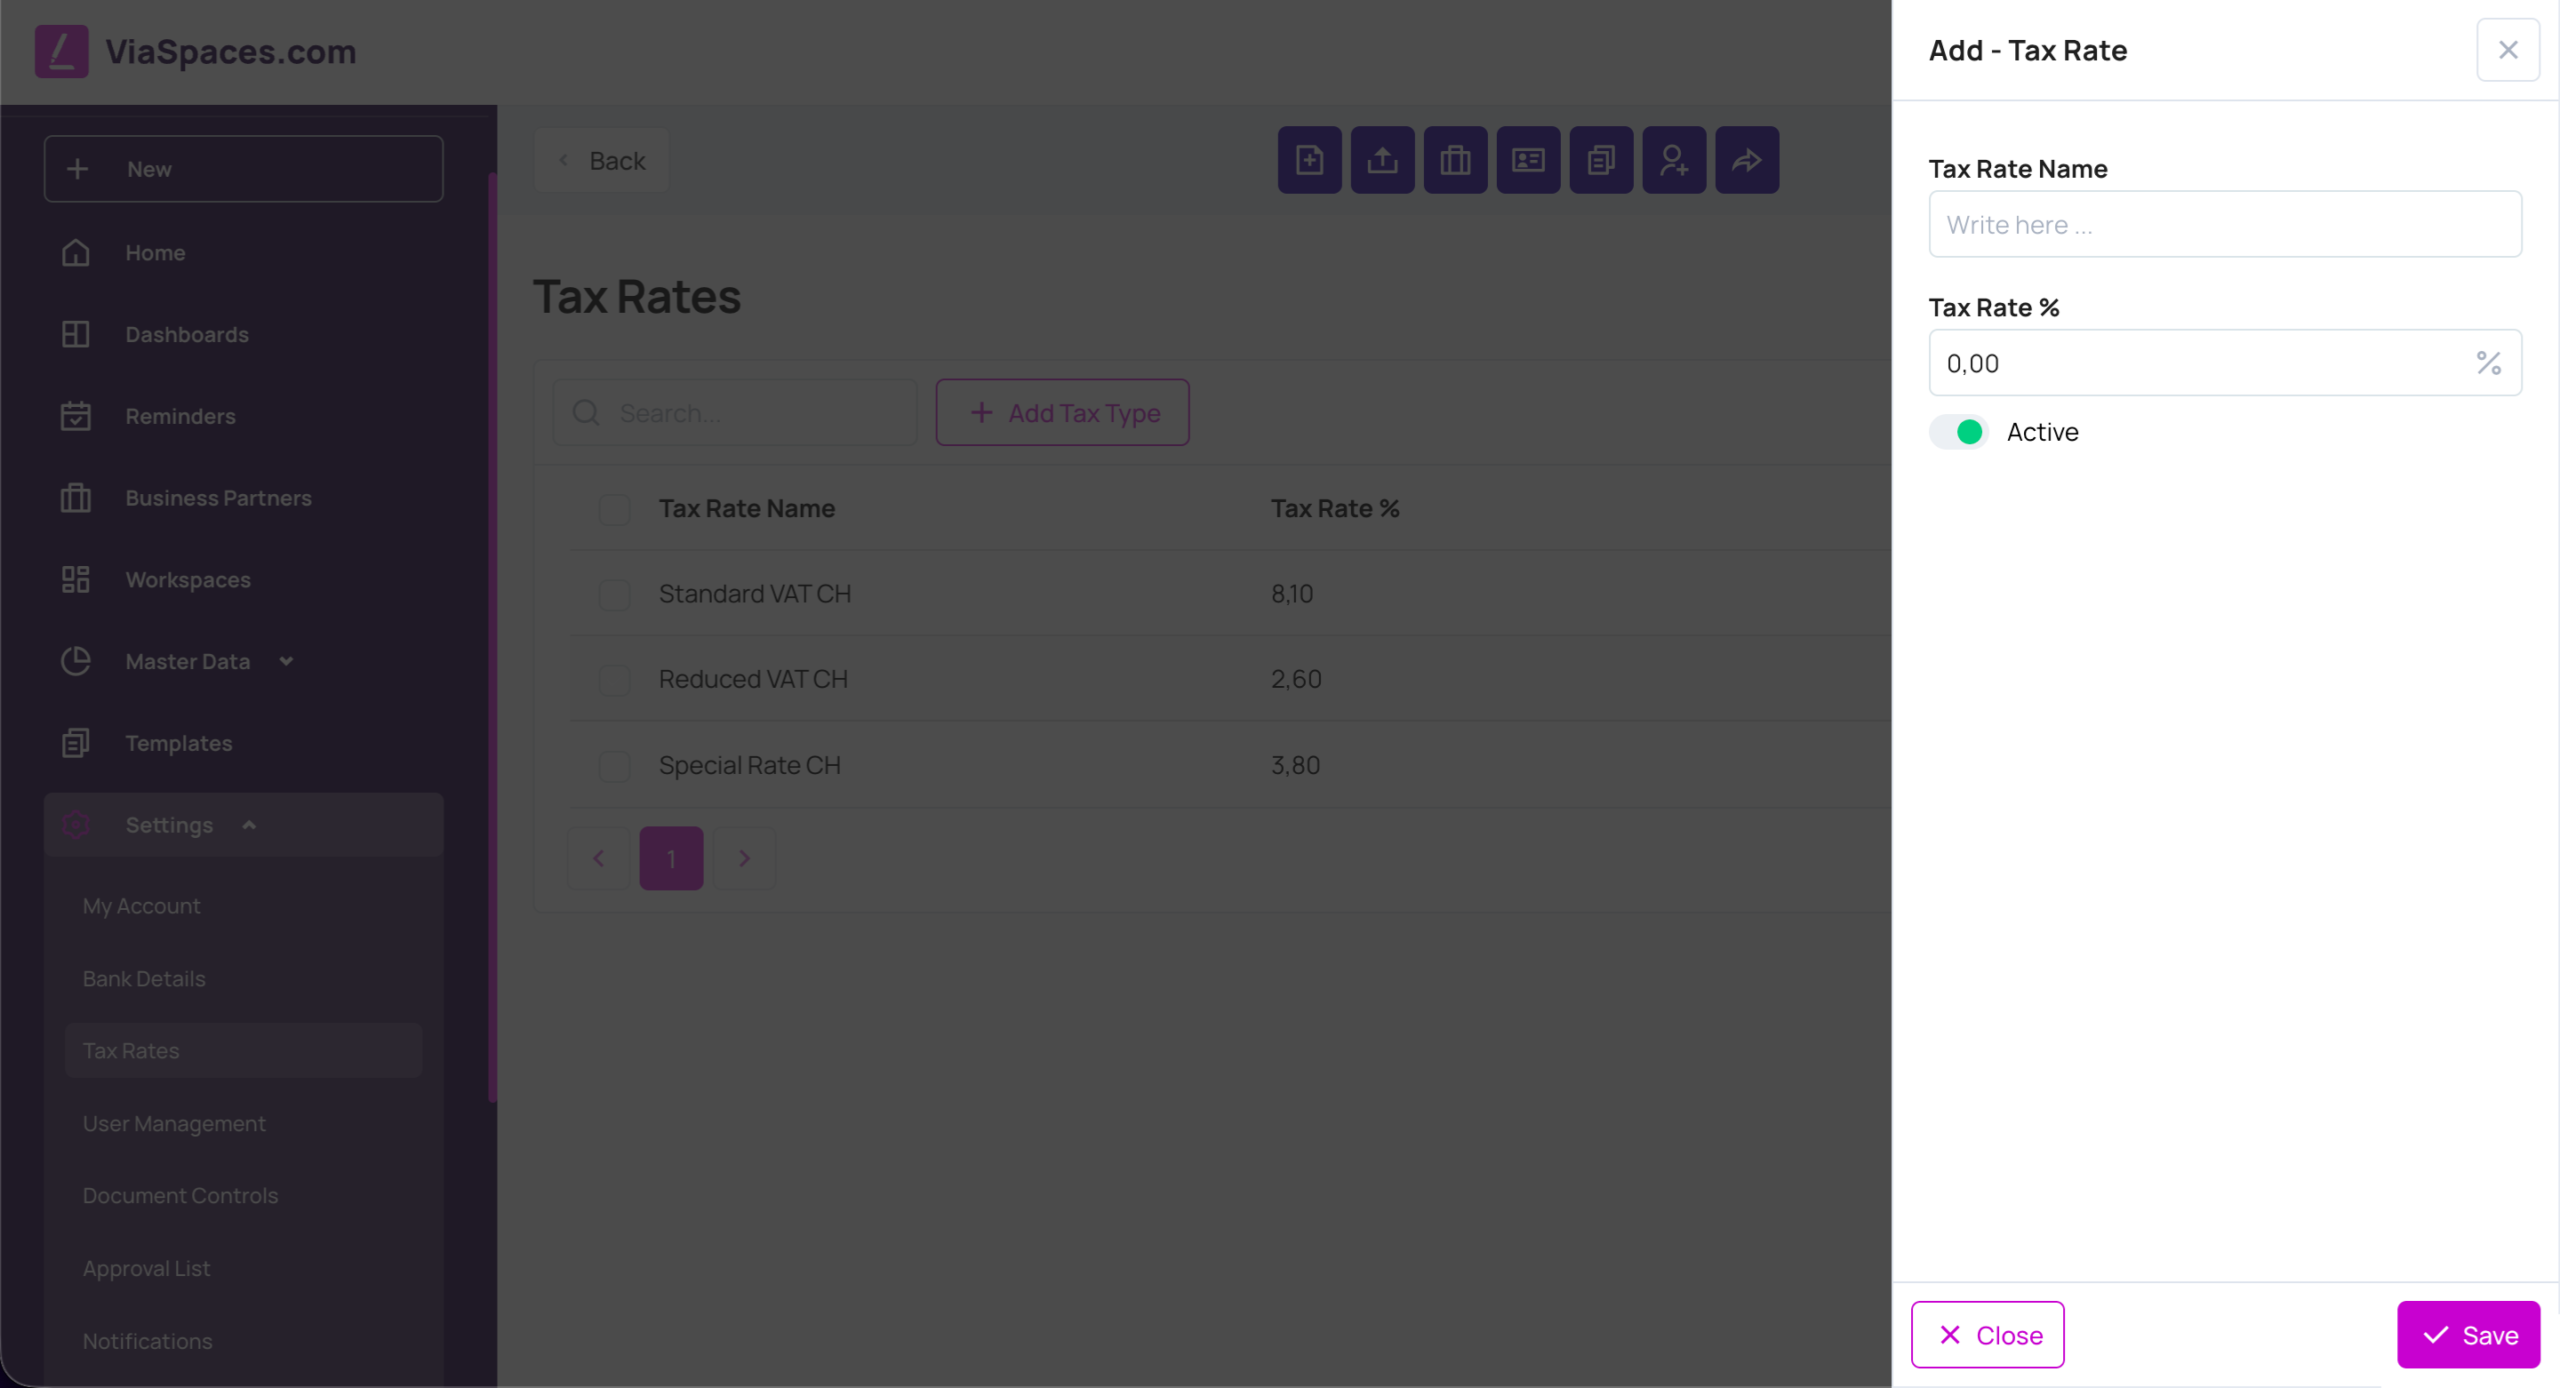
Daňové sadzby určujú percentuálne sadzby daní používané pri výpočtoch v dokumentoch. Každá sadzba má Názov daňovej sadzby, percentuálnu hodnotu Daňová sadzba a stav Aktívna alebo Zakázaná. Zakázaná sadzba zostáva zachovaná, ale pri vytváraní nových dokumentov sa neponúka. Sadzbu pridáte pomocou Pridať nový.
Správa používateľov #
Správa používateľov určuje, kto môže vstúpiť do účtu a čo môže vykonávať. Obsahuje tri karty: Používatelia, Skupiny a Roly.
Používatelia #
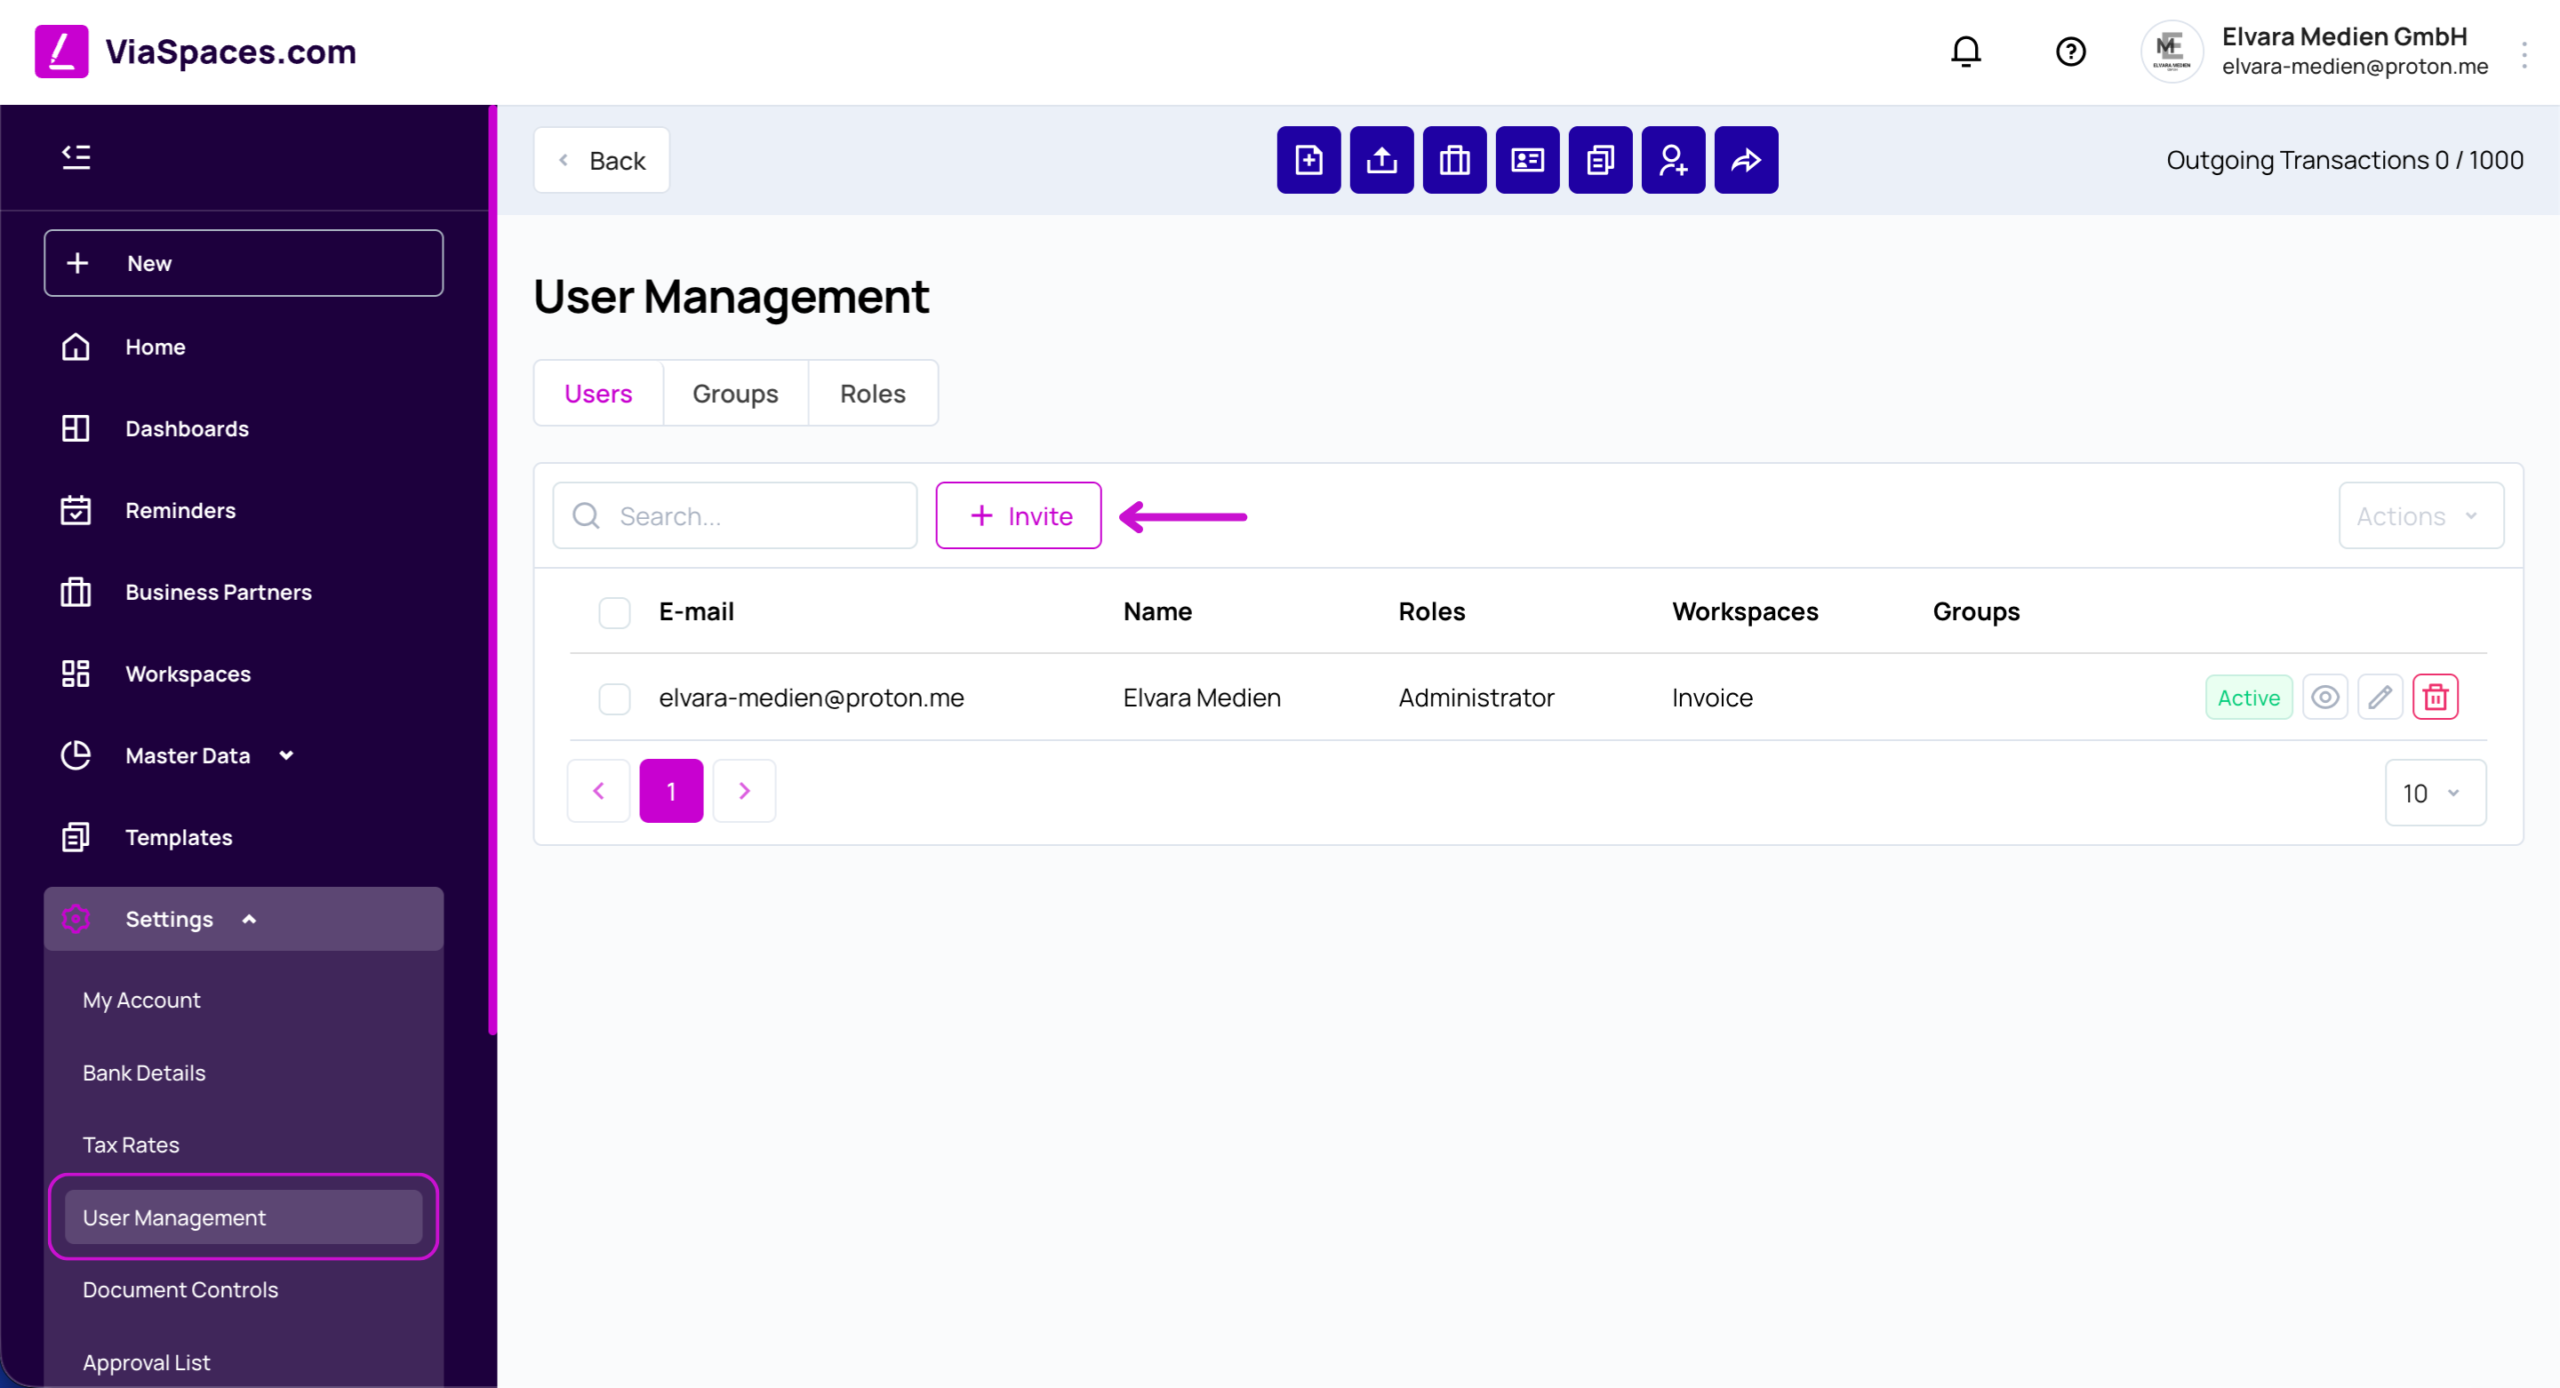
Karta Používatelia obsahuje zoznam používateľov s údajmi E-mail, Meno, Roly, Pracovné priestory, Skupiny a stav (Aktívny alebo Neaktívny). Každý riadok je možné zobraziť, upraviť alebo odstrániť.
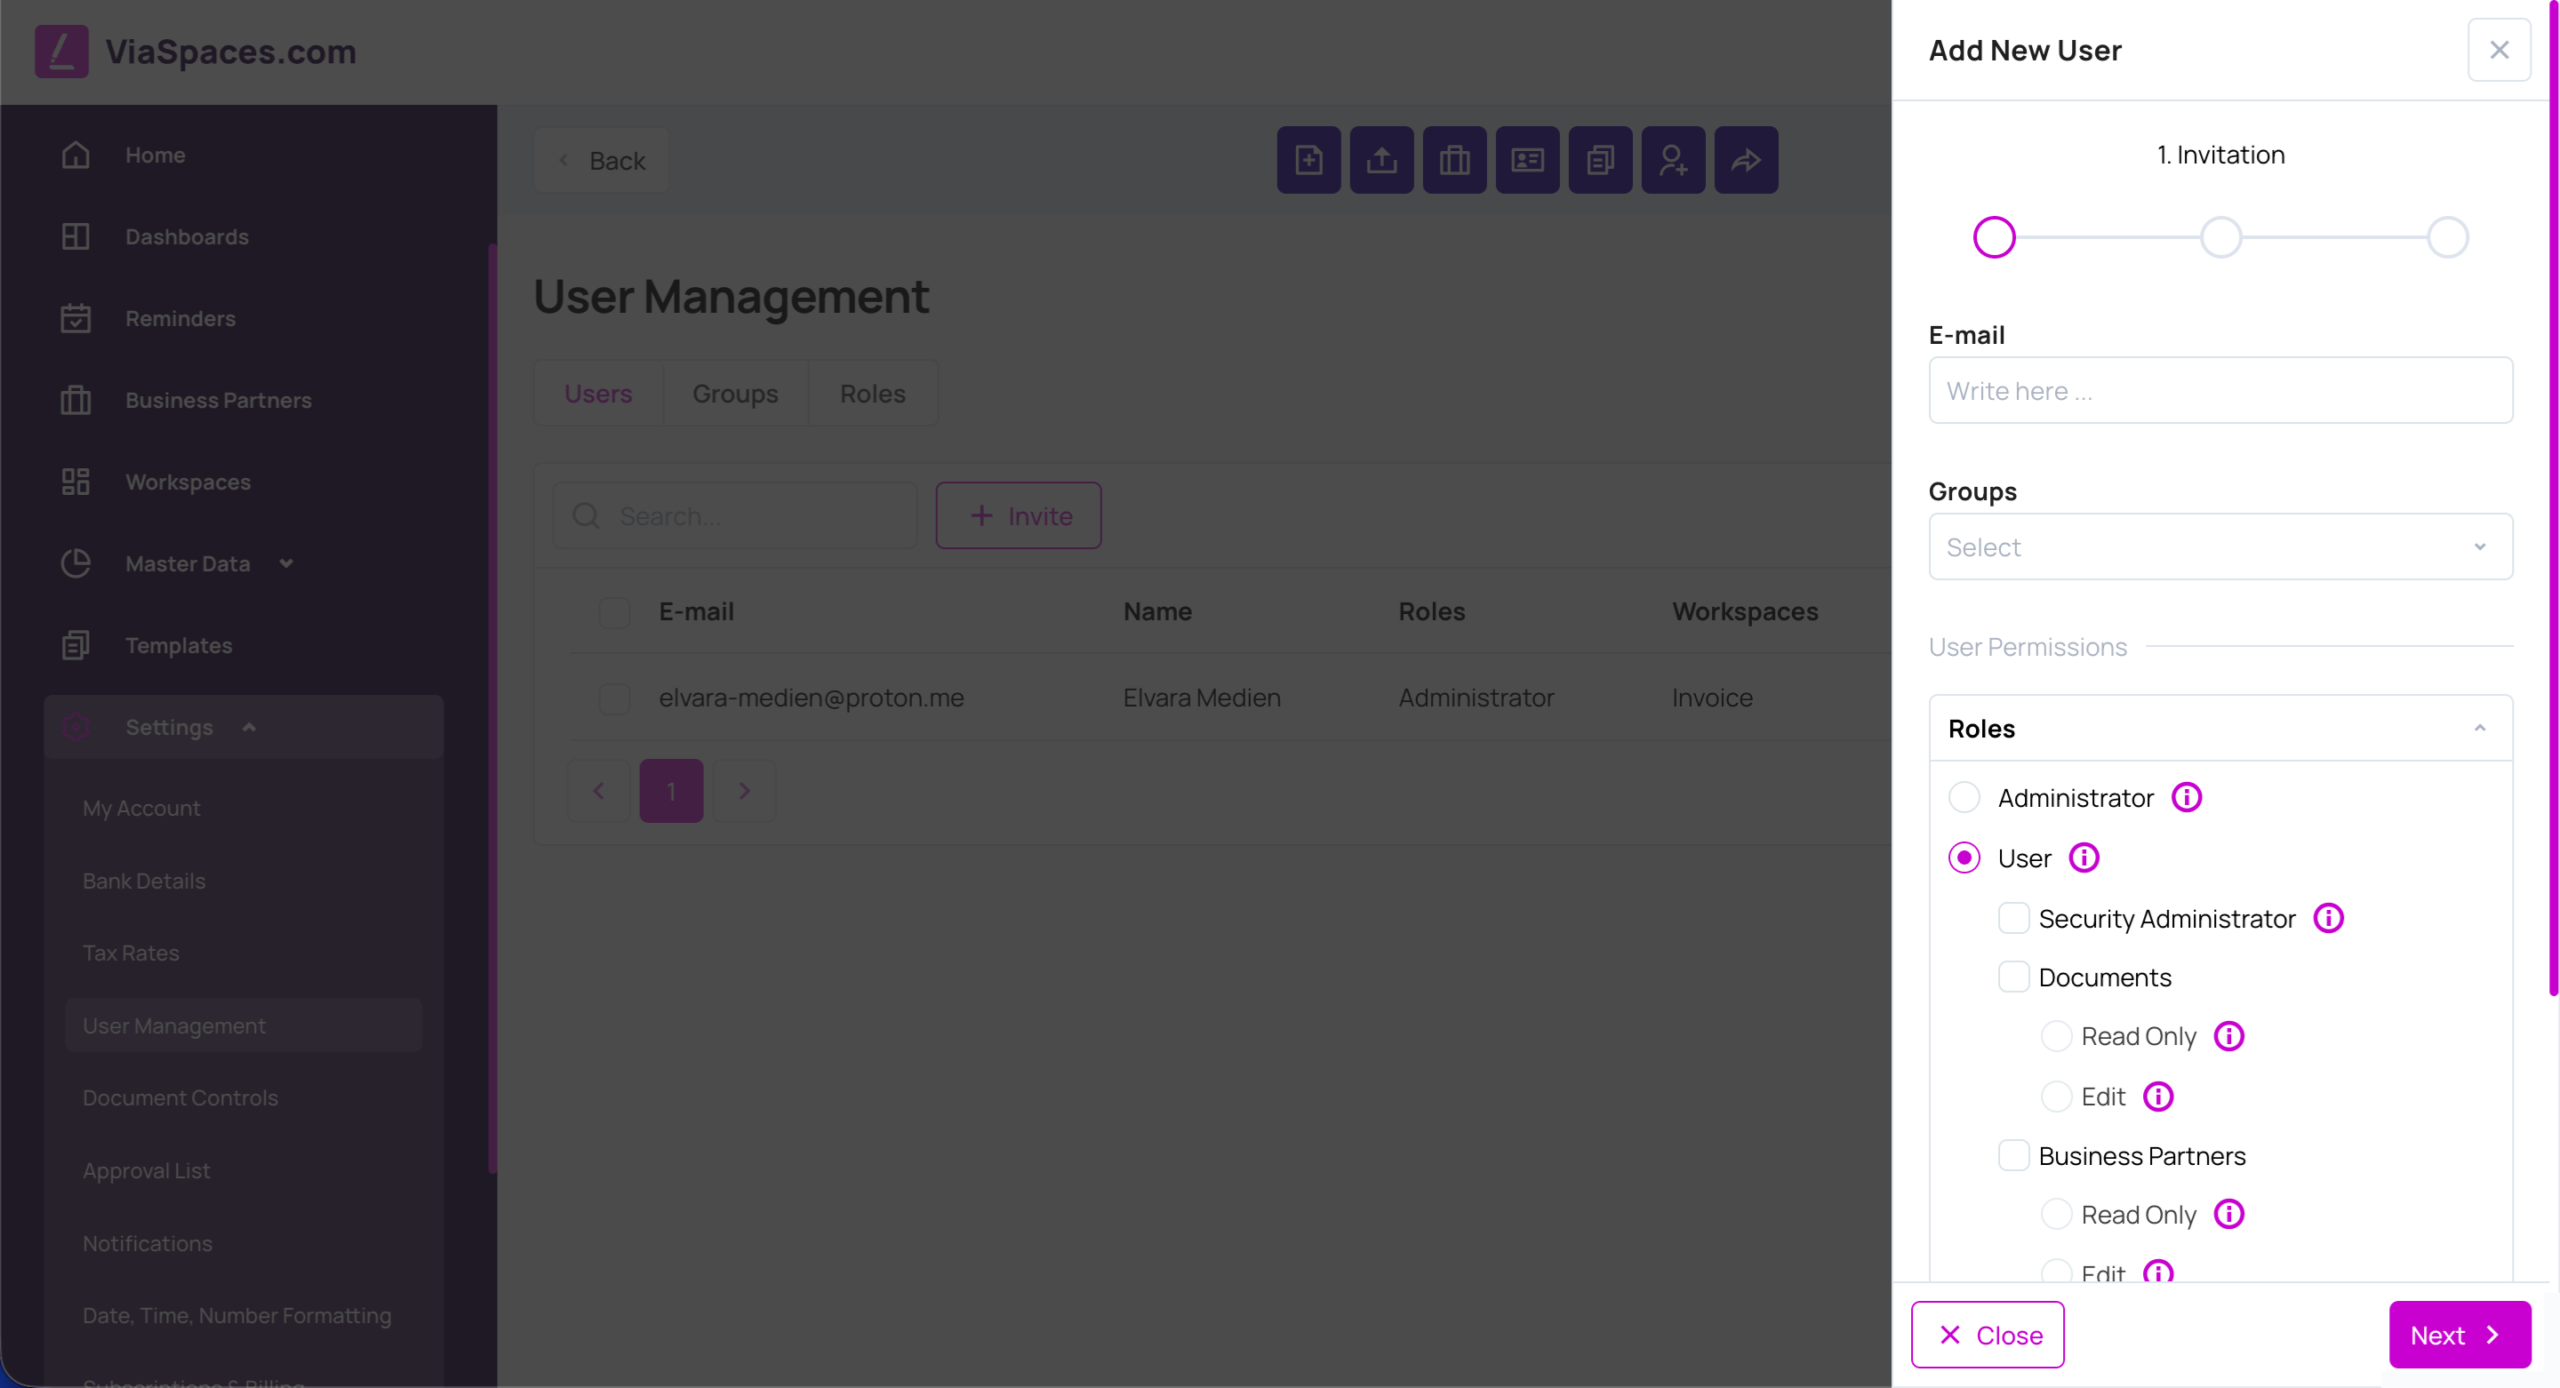
Pridajte používateľa pomocou možnosti Upraviť, ktorá pozostáva z troch krokov:
- Pozvánka — zadajte E-mail, vyberte Skupiny a nastavte Používateľské oprávnenia (Roly).
- Dokončite zostávajúce kroky.
- Odošlite pozvánku. Používateľ sa až do prijatia pozvánky zobrazuje so stavom **Pozvaný**.
Skupiny #
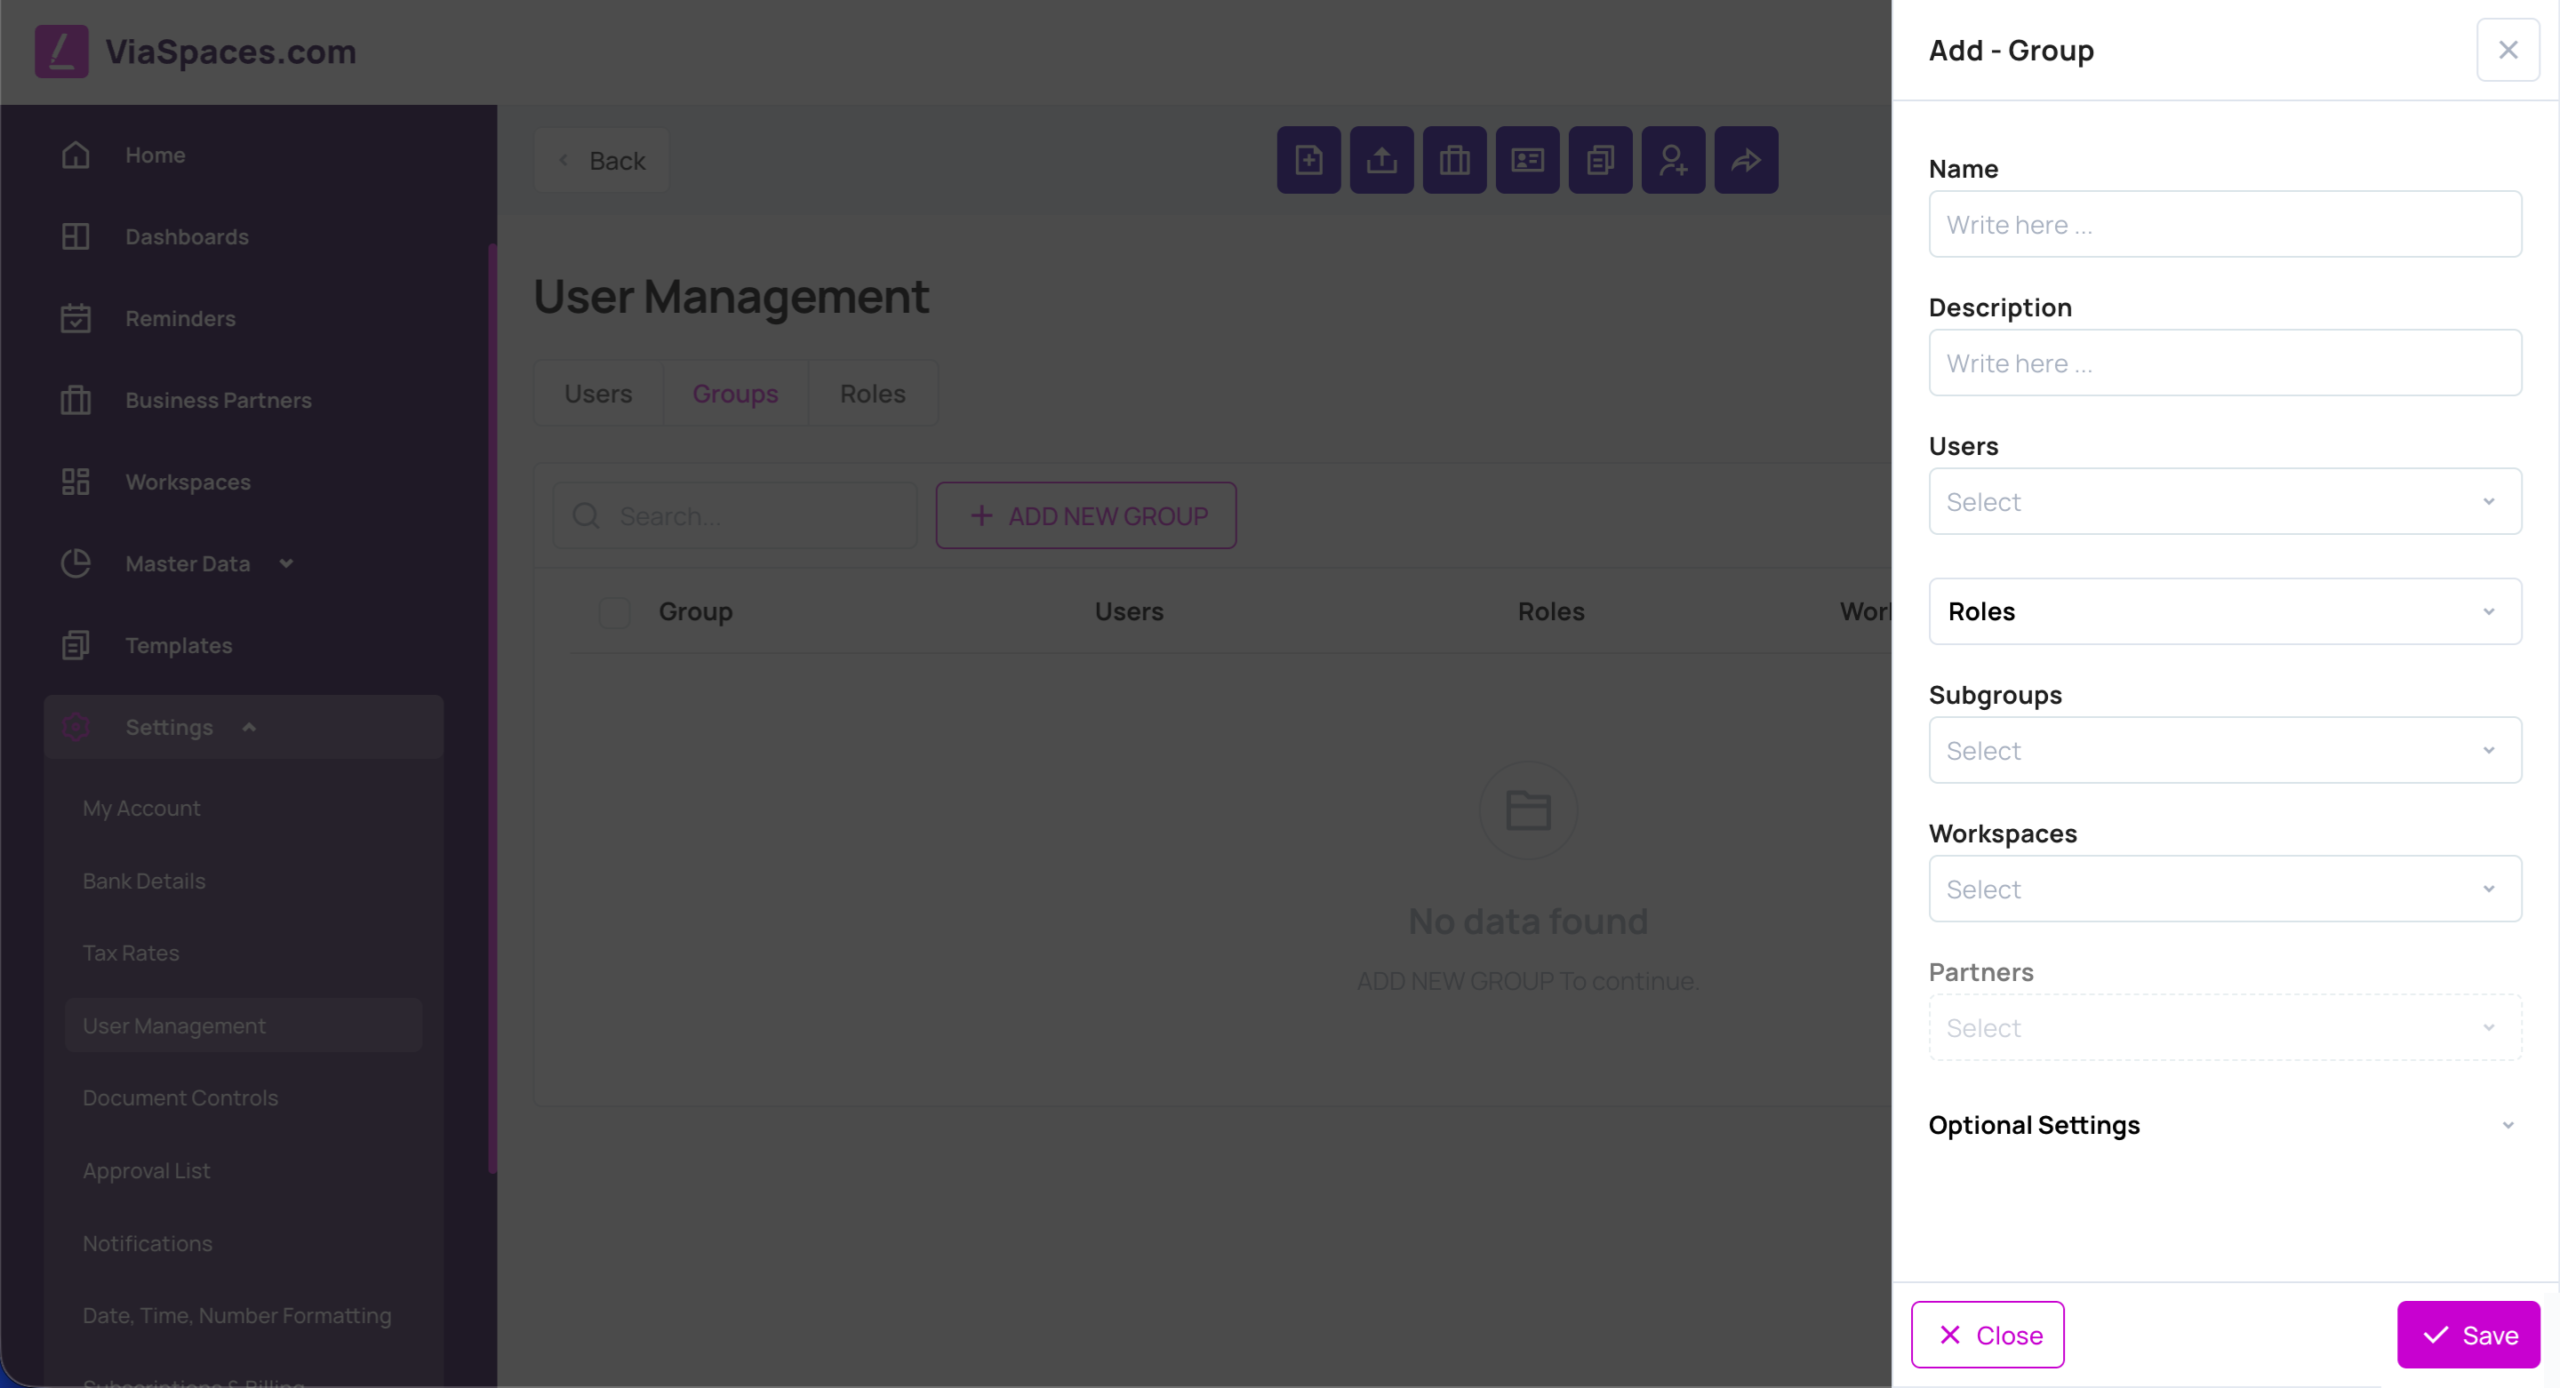
Karta Skupiny obsahuje zoznam používateľských skupín s údajmi Názov skupiny, Počet používateľov, Roly a Pracovné priestory. Skupinu pridáte pomocou možnosti Pridať novú skupinu.
| Pole | Hodnota |
|---|---|
| Názov | Názov skupiny. |
| Popis | Popis skupiny. |
| Používatelia | Členovia skupiny. |
| Role | Roly pridelené skupine. |
| Podskupiny | Groups nested inside this group. |
| Workspaces | Pracovné priestory pridelené skupine. |
| Partneri | Partneri pridelení skupine. |
| Voliteľné nastavenia | Vlastné filtre oprávnení — Názov filtra oprávnenia, Objekt oprávnenia a predikát pre prístup na úrovni polí. |
Role #
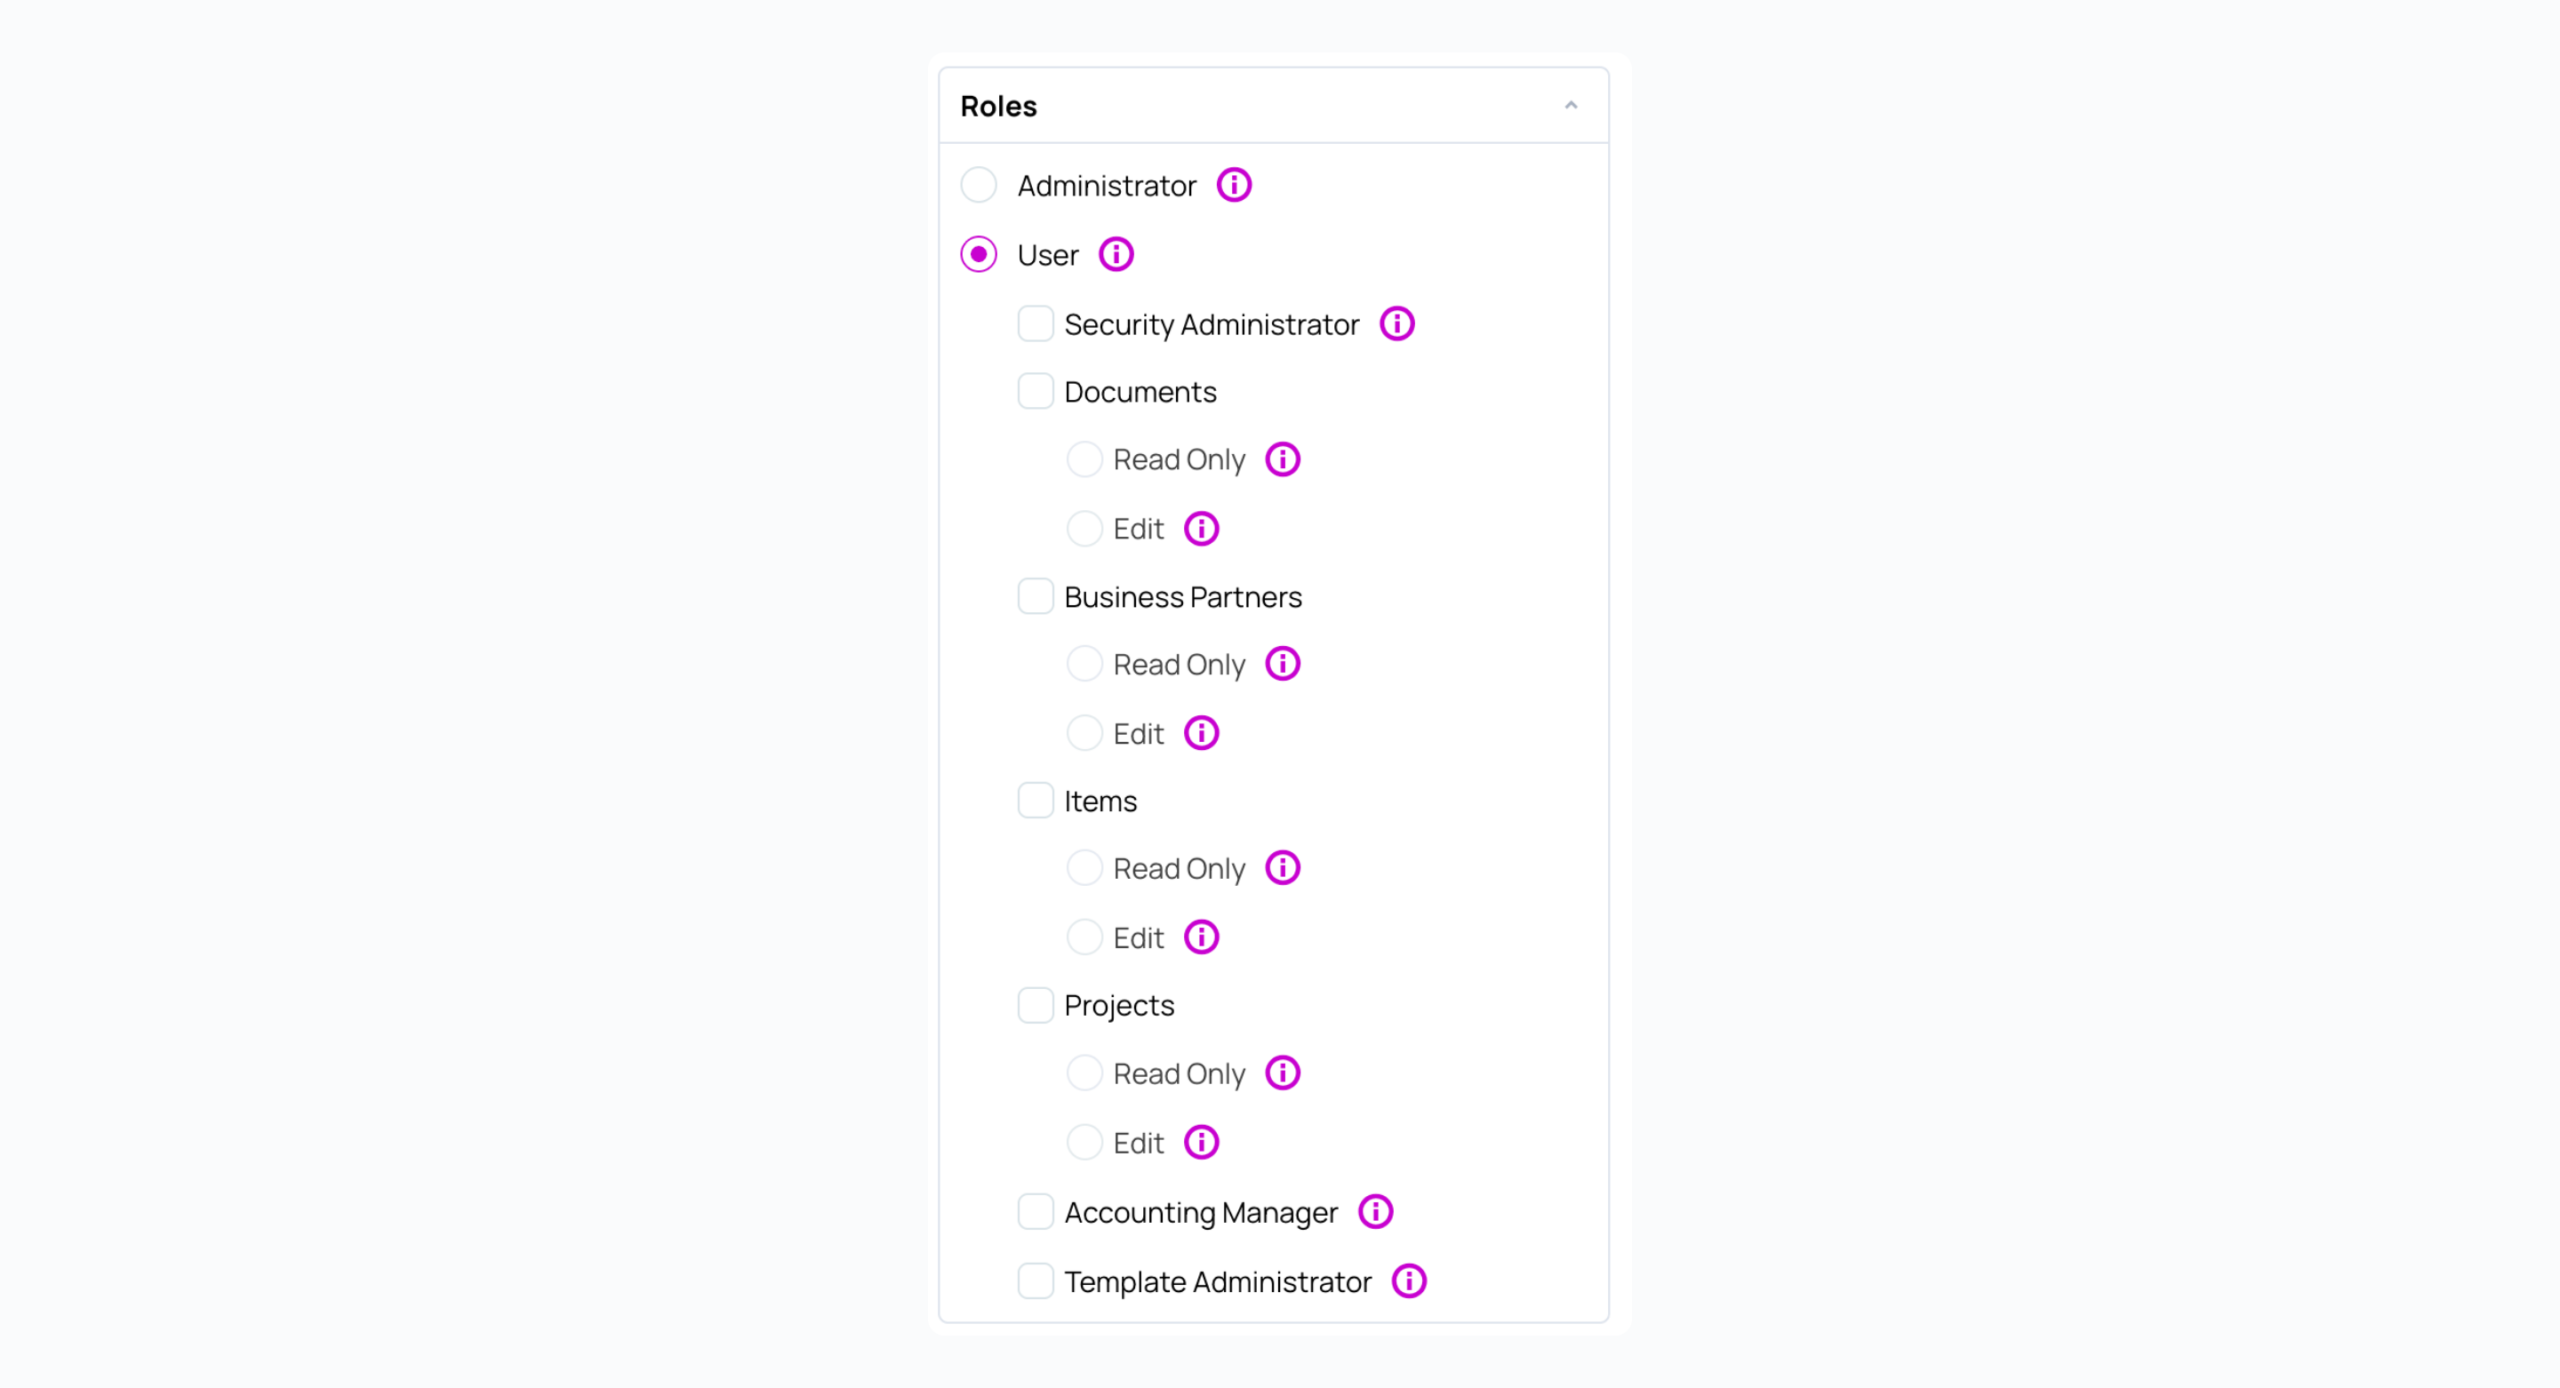
Karta Roly obsahuje zoznam rolí účtu s počtom používateľov a skupín, ktorým je každá rola pridelená. Roly sa tu prideľujú používateľom a skupinám.
Poznámka: Význam jednotlivých rolí nájdete na stránke Používatelia a prístupové práva.
Ovládacie prvky dokumentov #
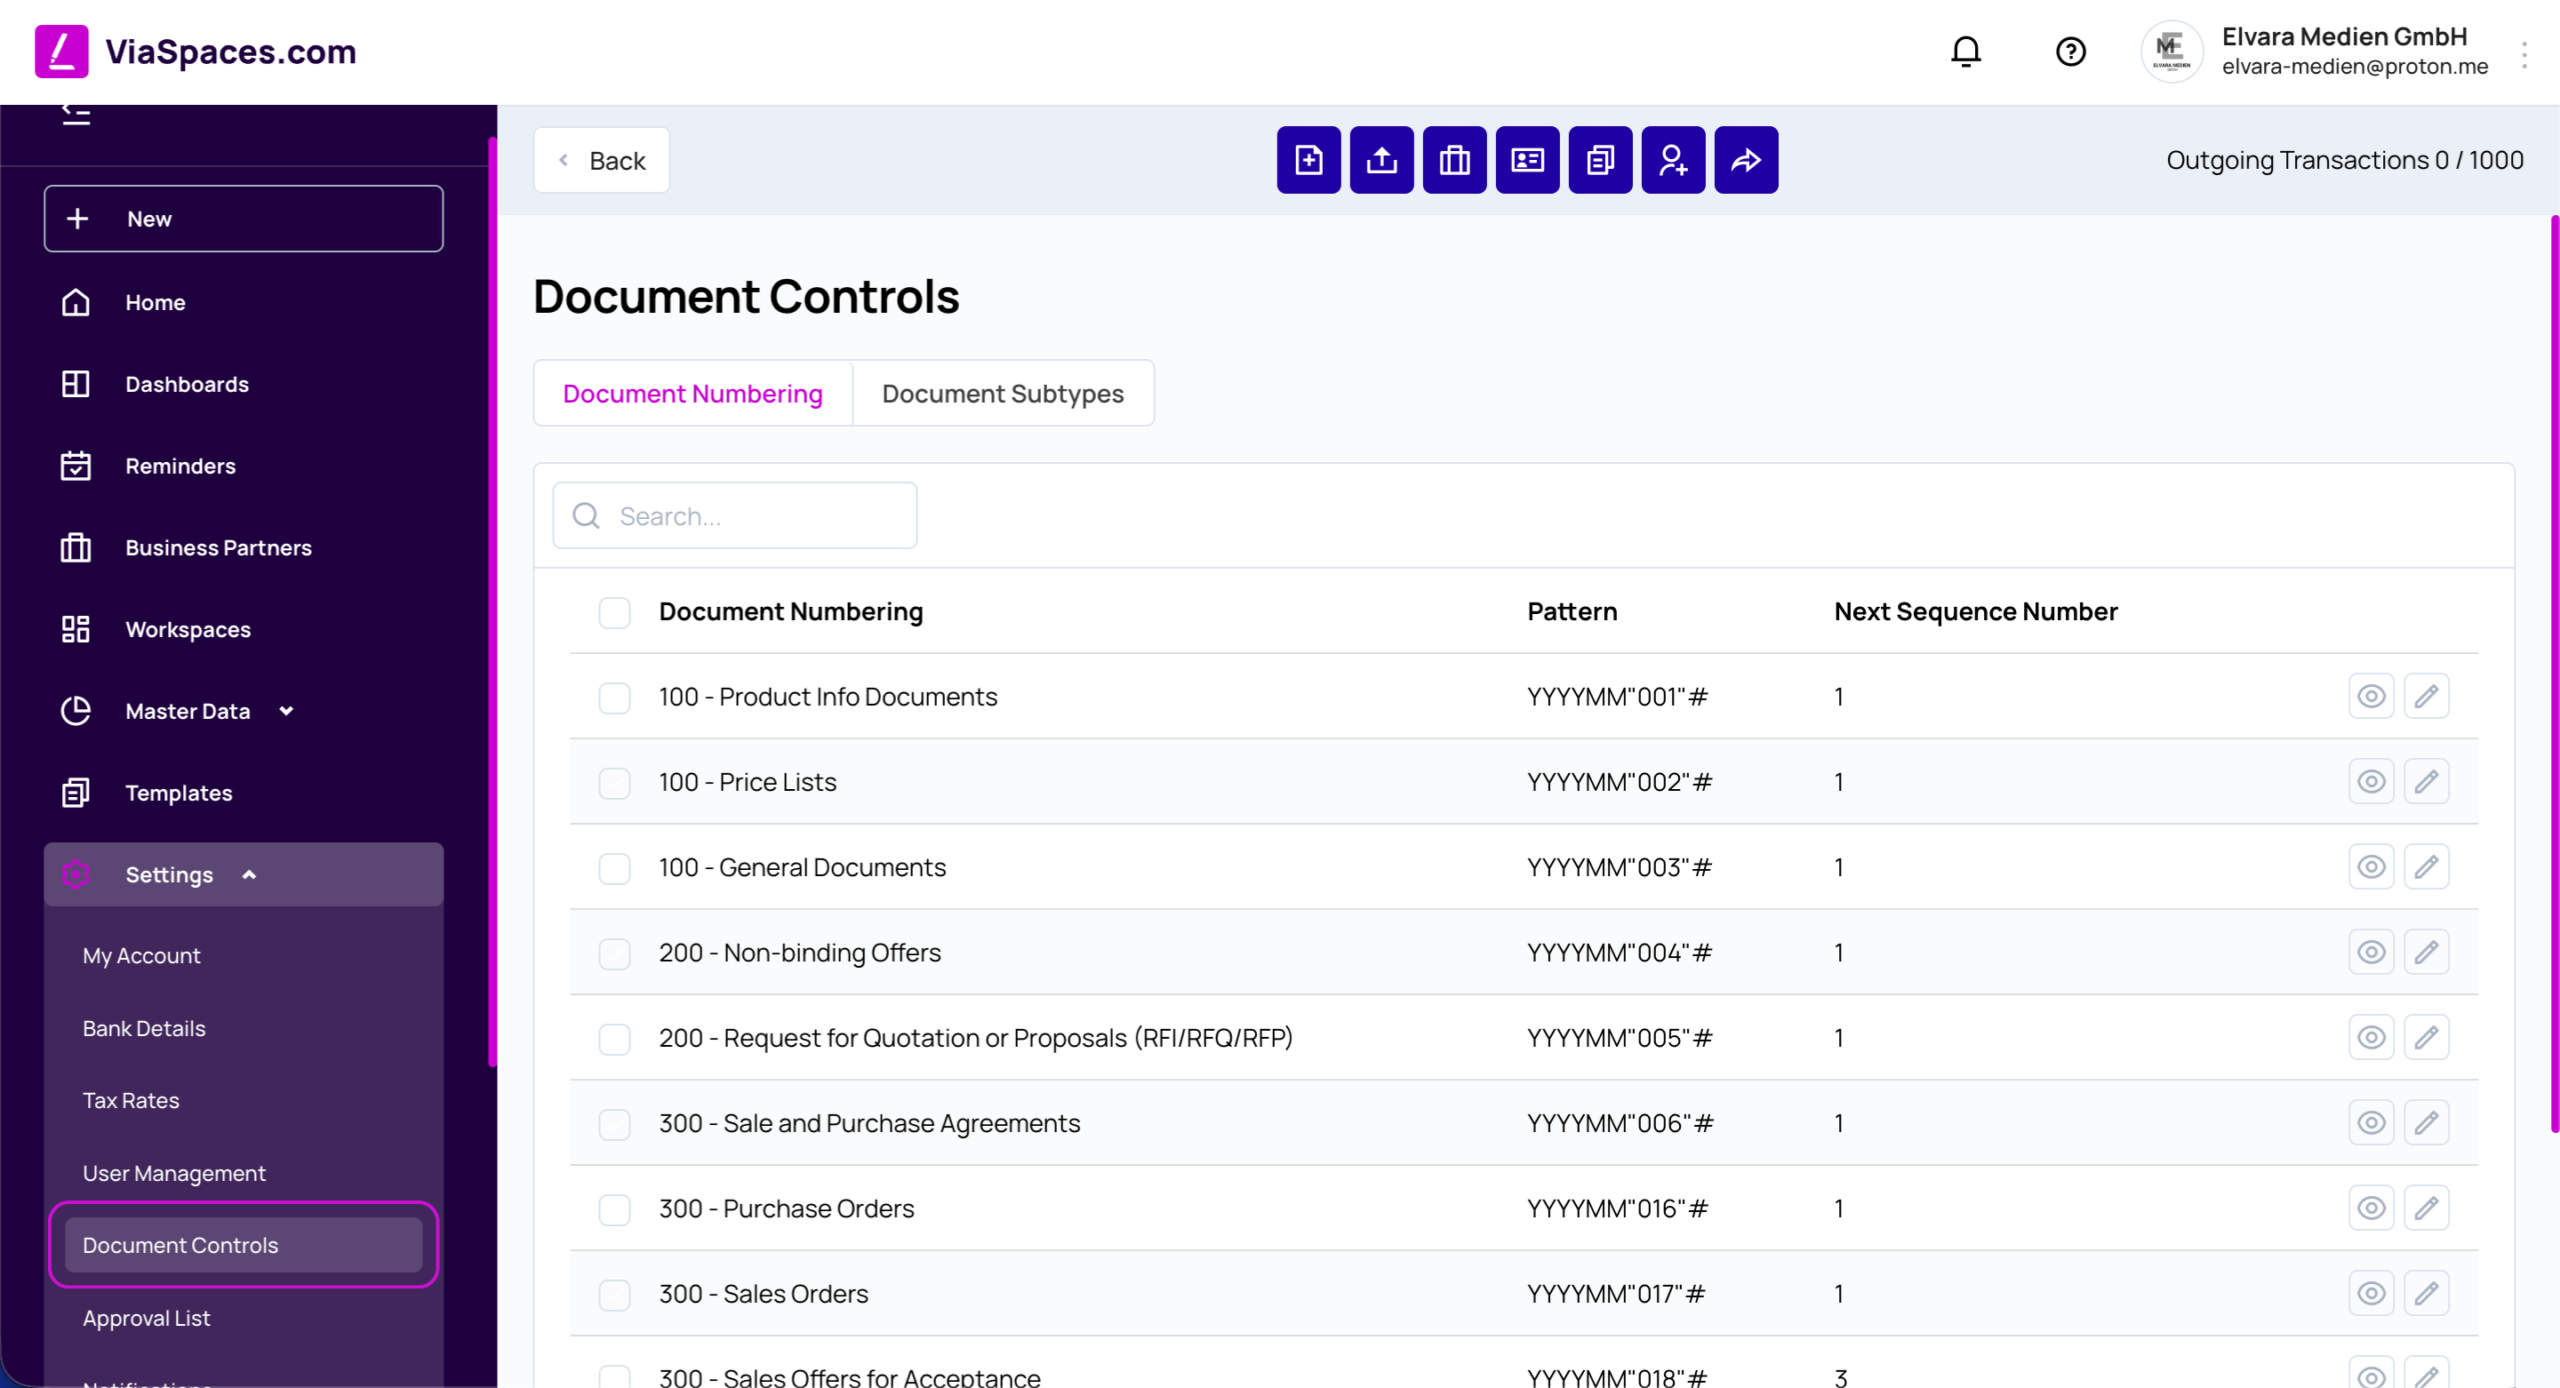
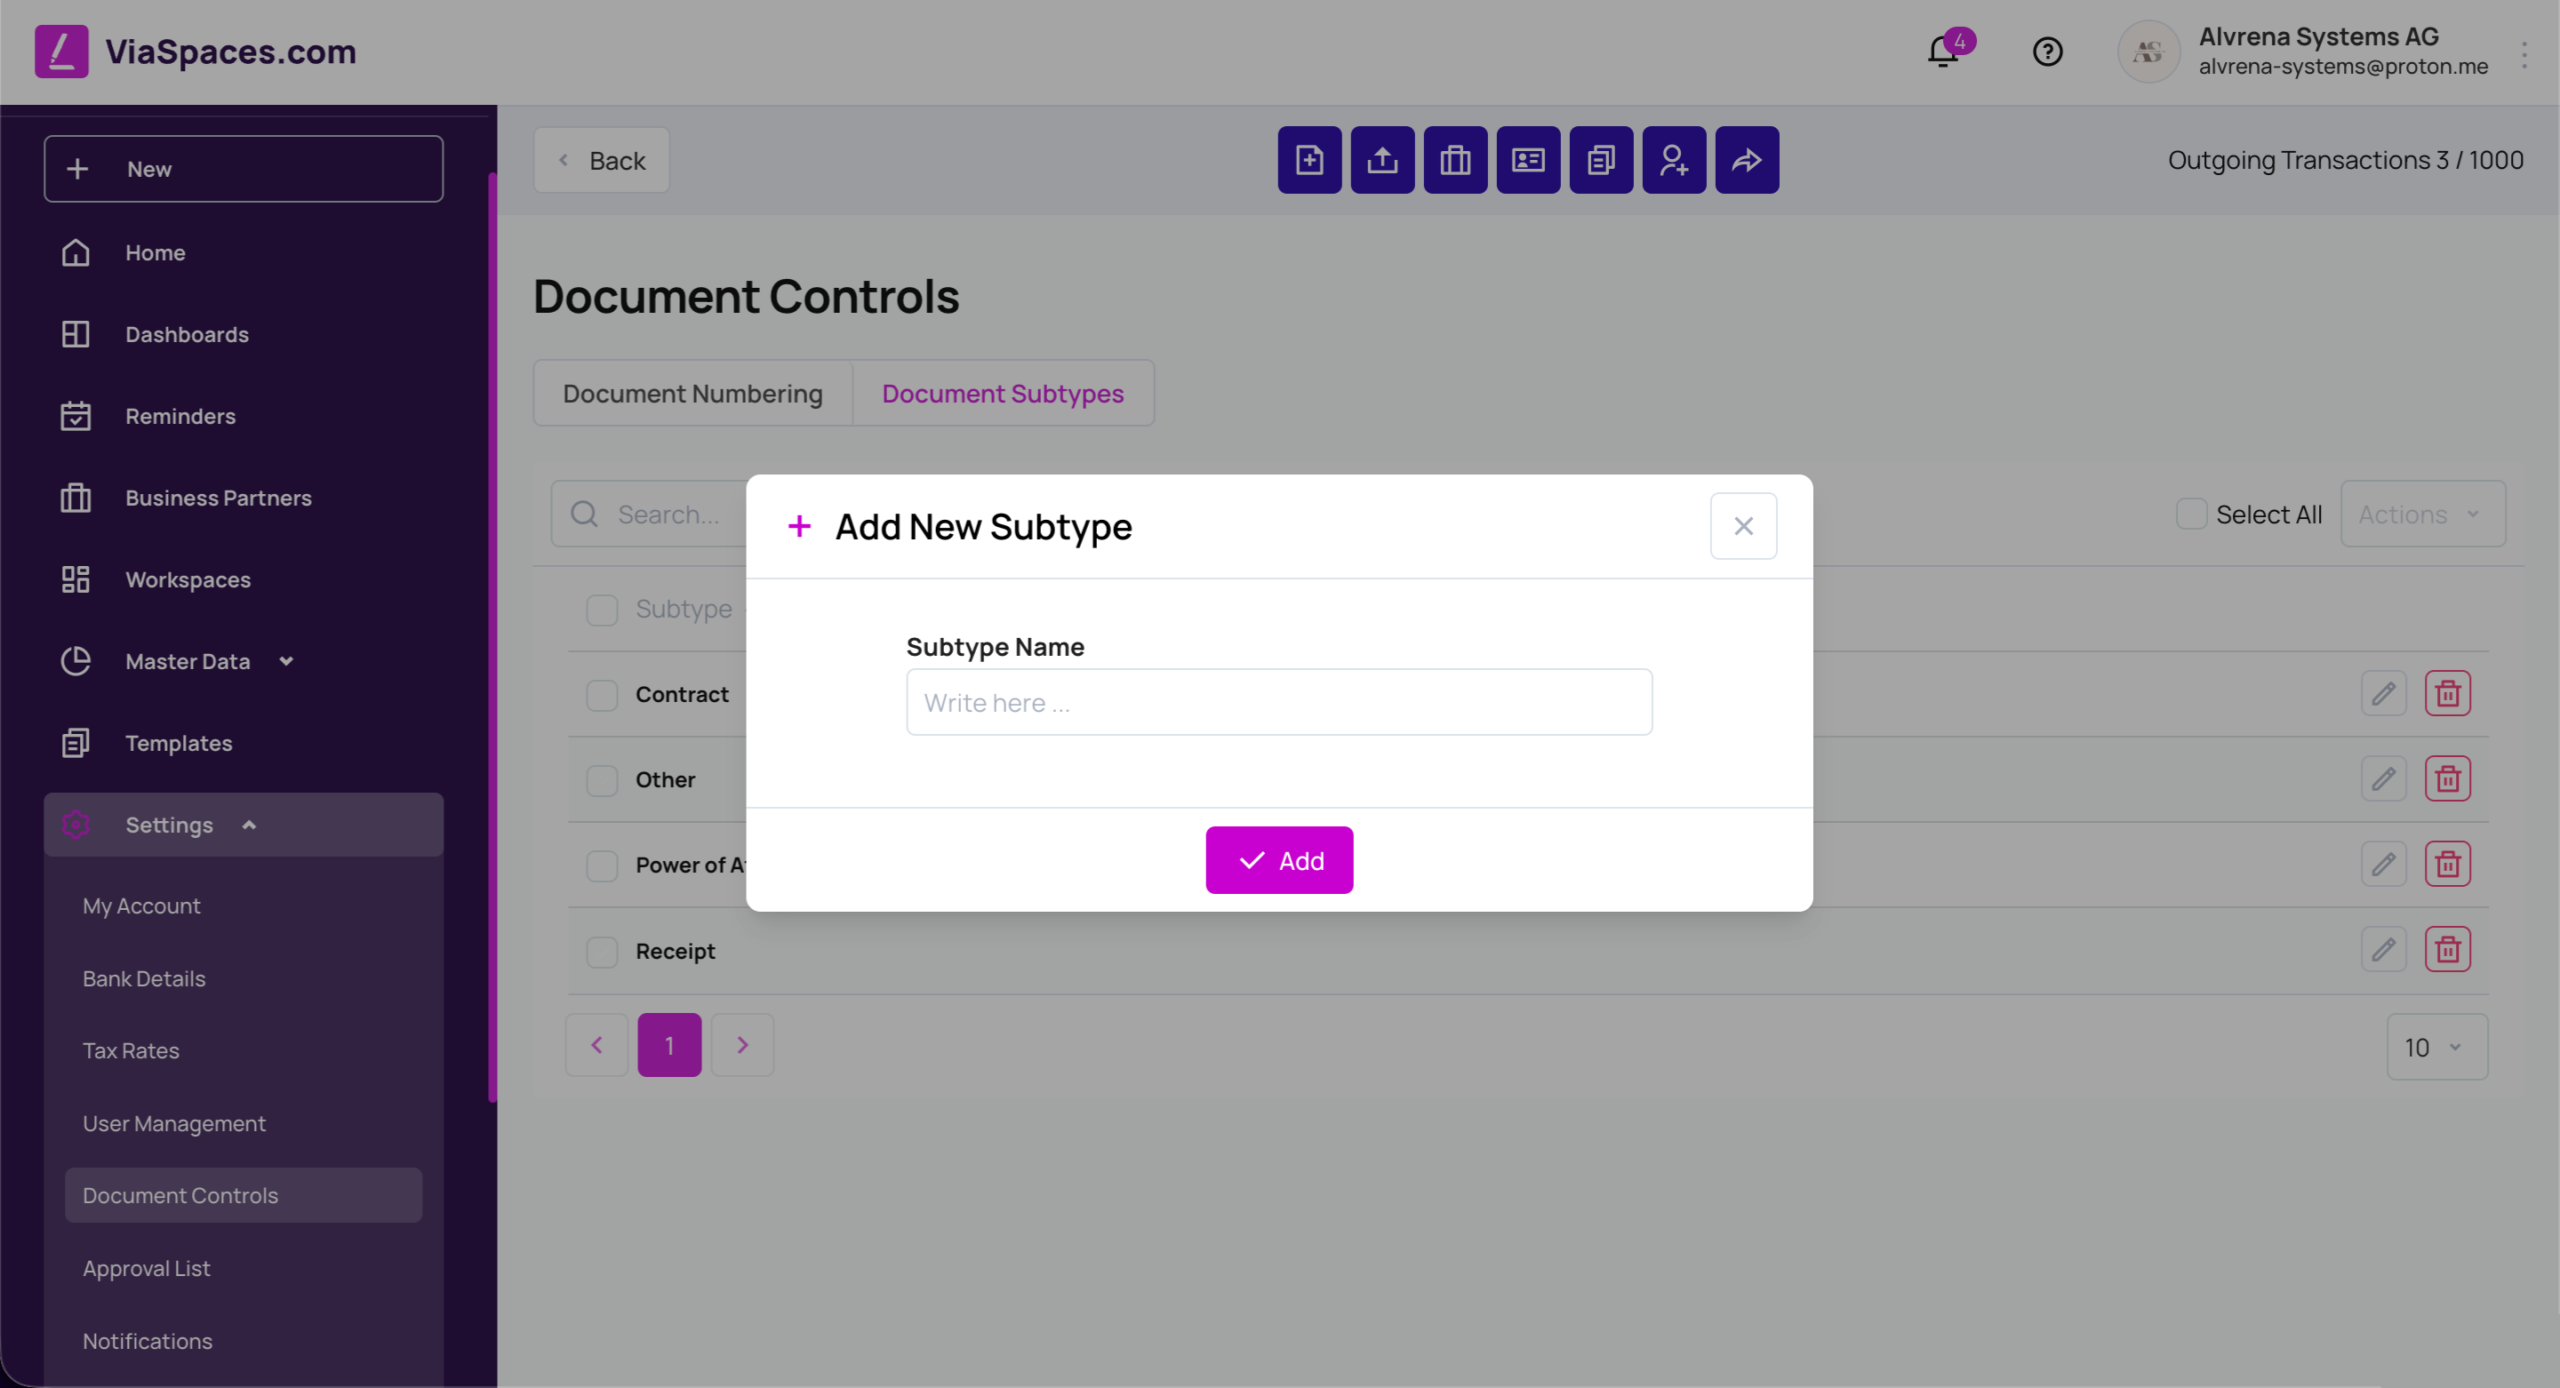
Ovládacie prvky dokumentov definujú pravidlá pre dokumenty v rámci celého účtu. Obsahujú dve karty: Číslovanie dokumentov a Podtypy dokumentov.
Číslovanie dokumentov #
Číslovanie dokumentov určuje formát číslovania pre každú kategóriu dokumentov. Kategórie sú vopred definované podľa účelu (napríklad 100 – Dokumenty s informáciami o produktoch, 300 – Objednávky, 500 – Fakturácia a účtovanie). Každý riadok zobrazuje Vzorec a Nasledujúce poradové číslo.
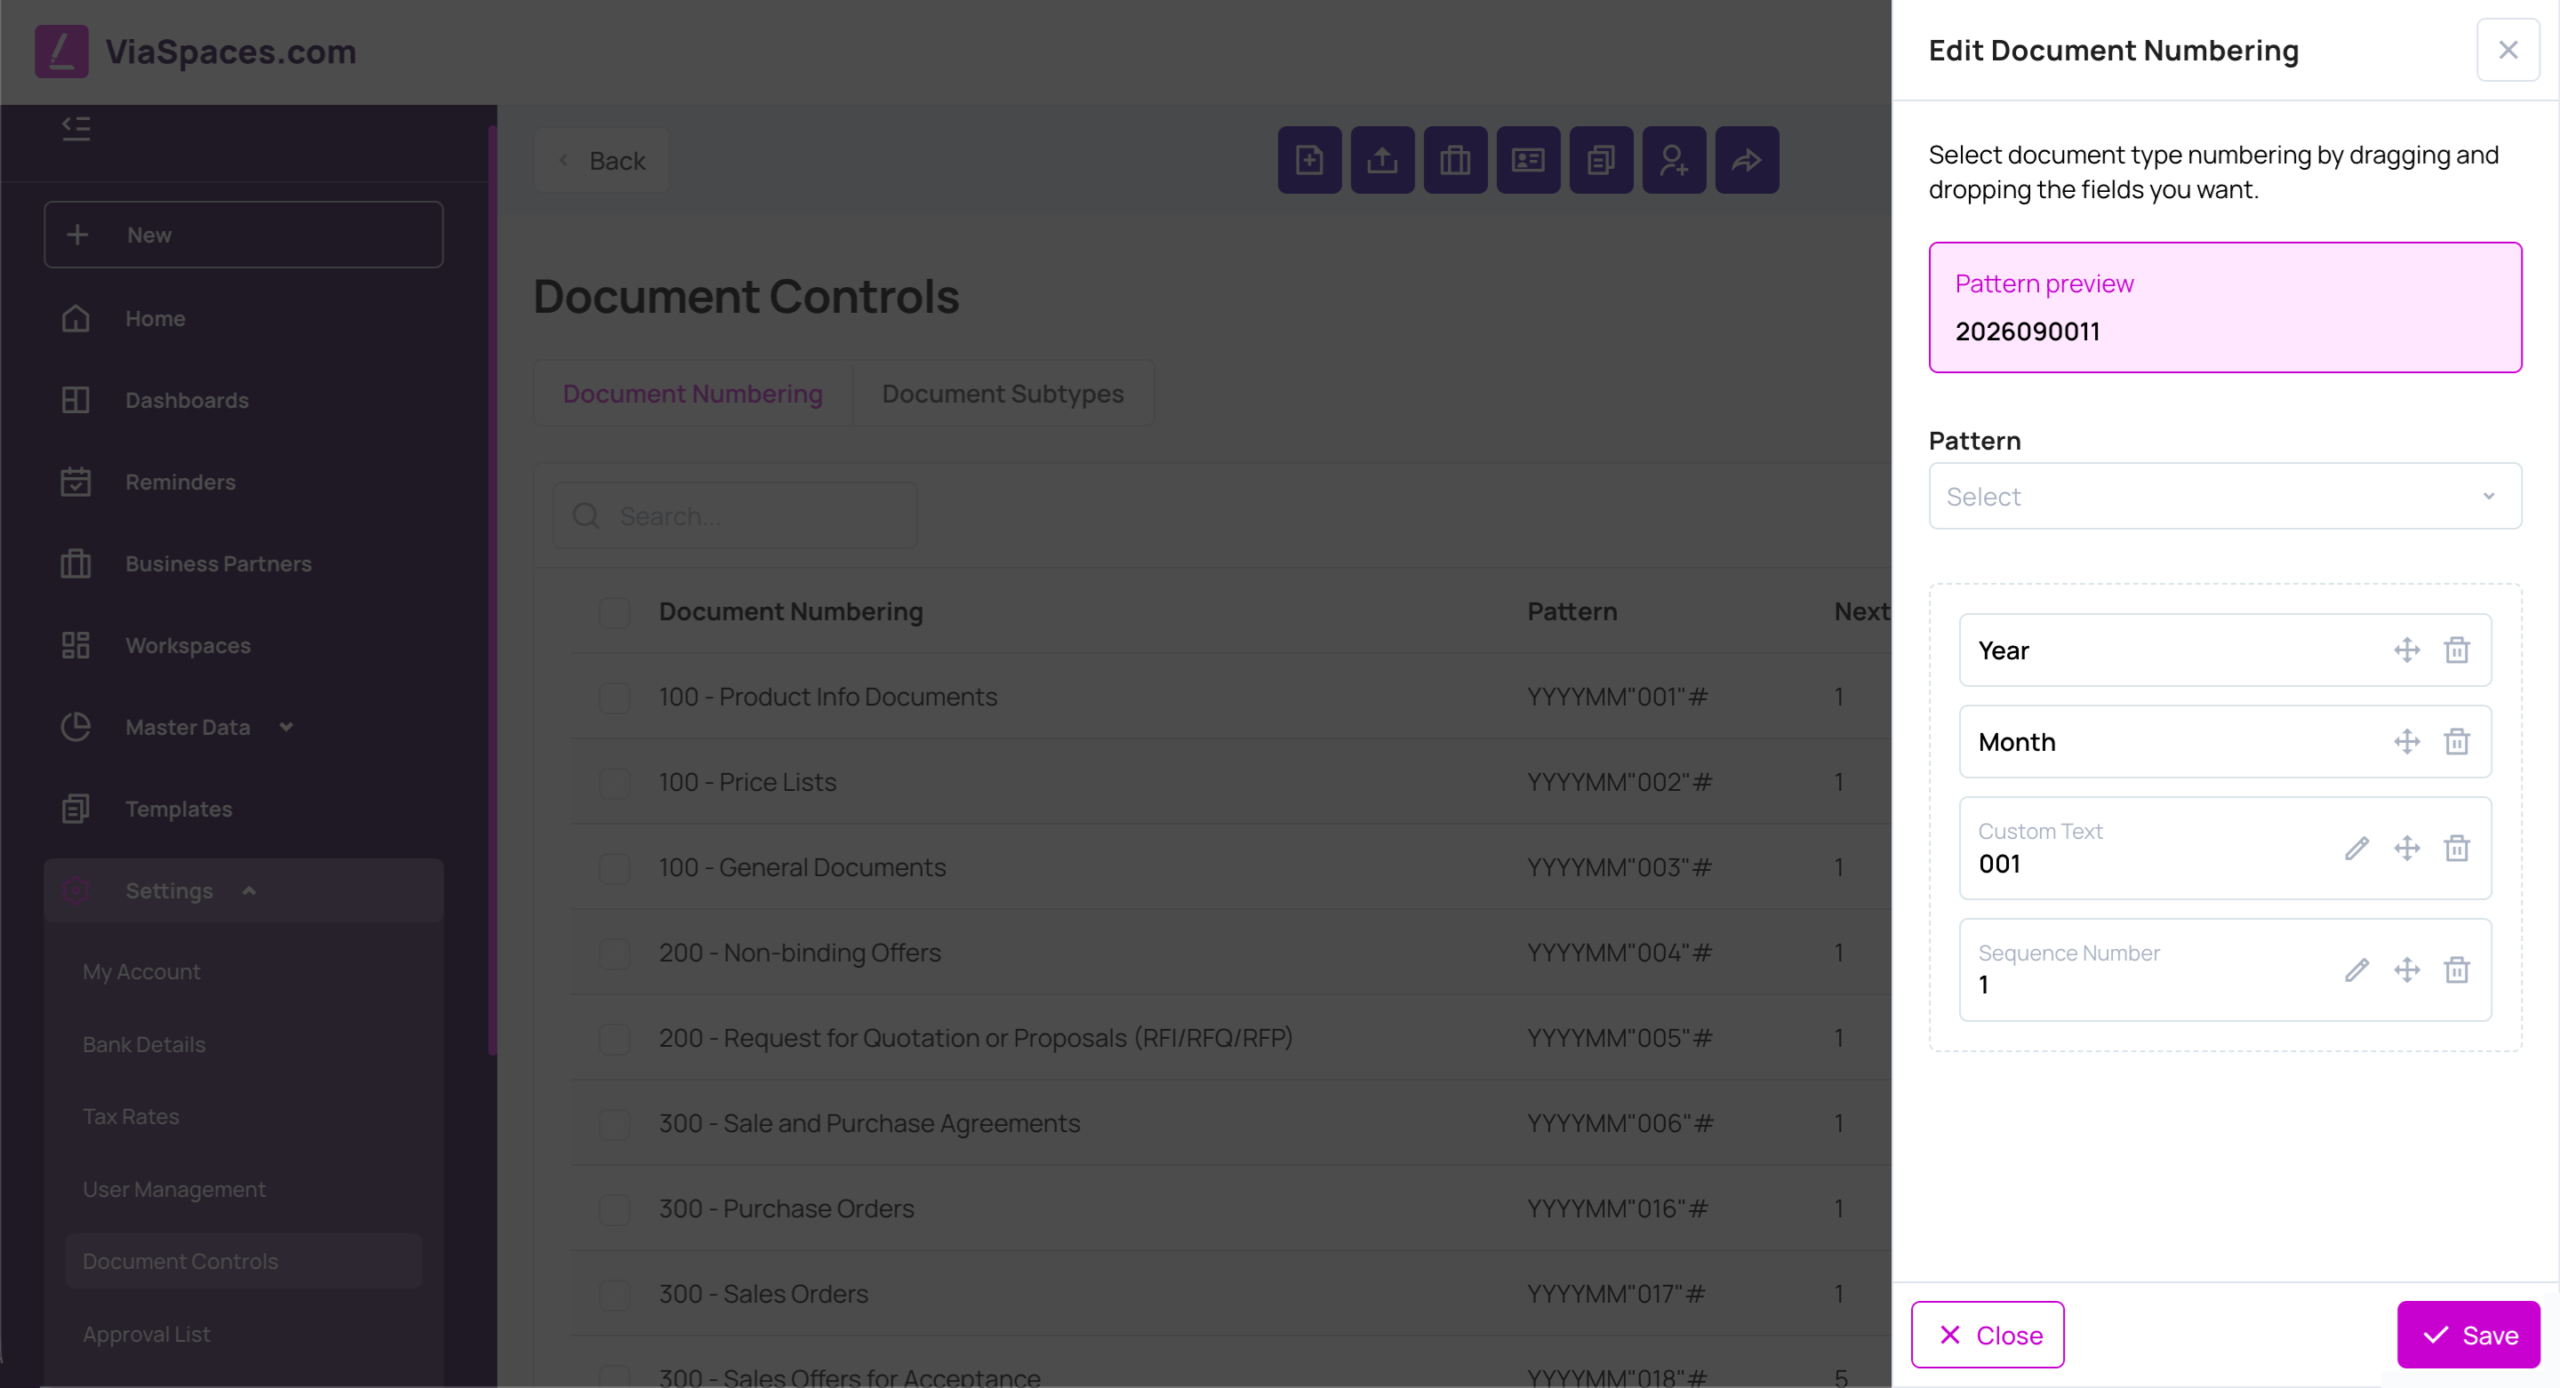
Upravte vzorec presúvaním polí pomocou funkcie drag & drop:
| Pole | Purpose |
|---|---|
| Rok | Vloží rok. |
| Mesiac | Vloží mesiac. |
| Vlastný text | Vloží pevný text. |
| Poradové číslo | Vloží automaticky sa zvyšujúce číslo. |
Náhľad vzorca zobrazuje výsledné číslo podľa toho, ako sú usporiadané jednotlivé polia.
Podtypy dokumentov #
Podtypy dokumentov definujú podtypy pre nahrané dokumenty (napríklad Iné, Faktúra). Podtyp pridáte pomocou možnosti Pridať nový.
Zoznam schvaľovateľov #
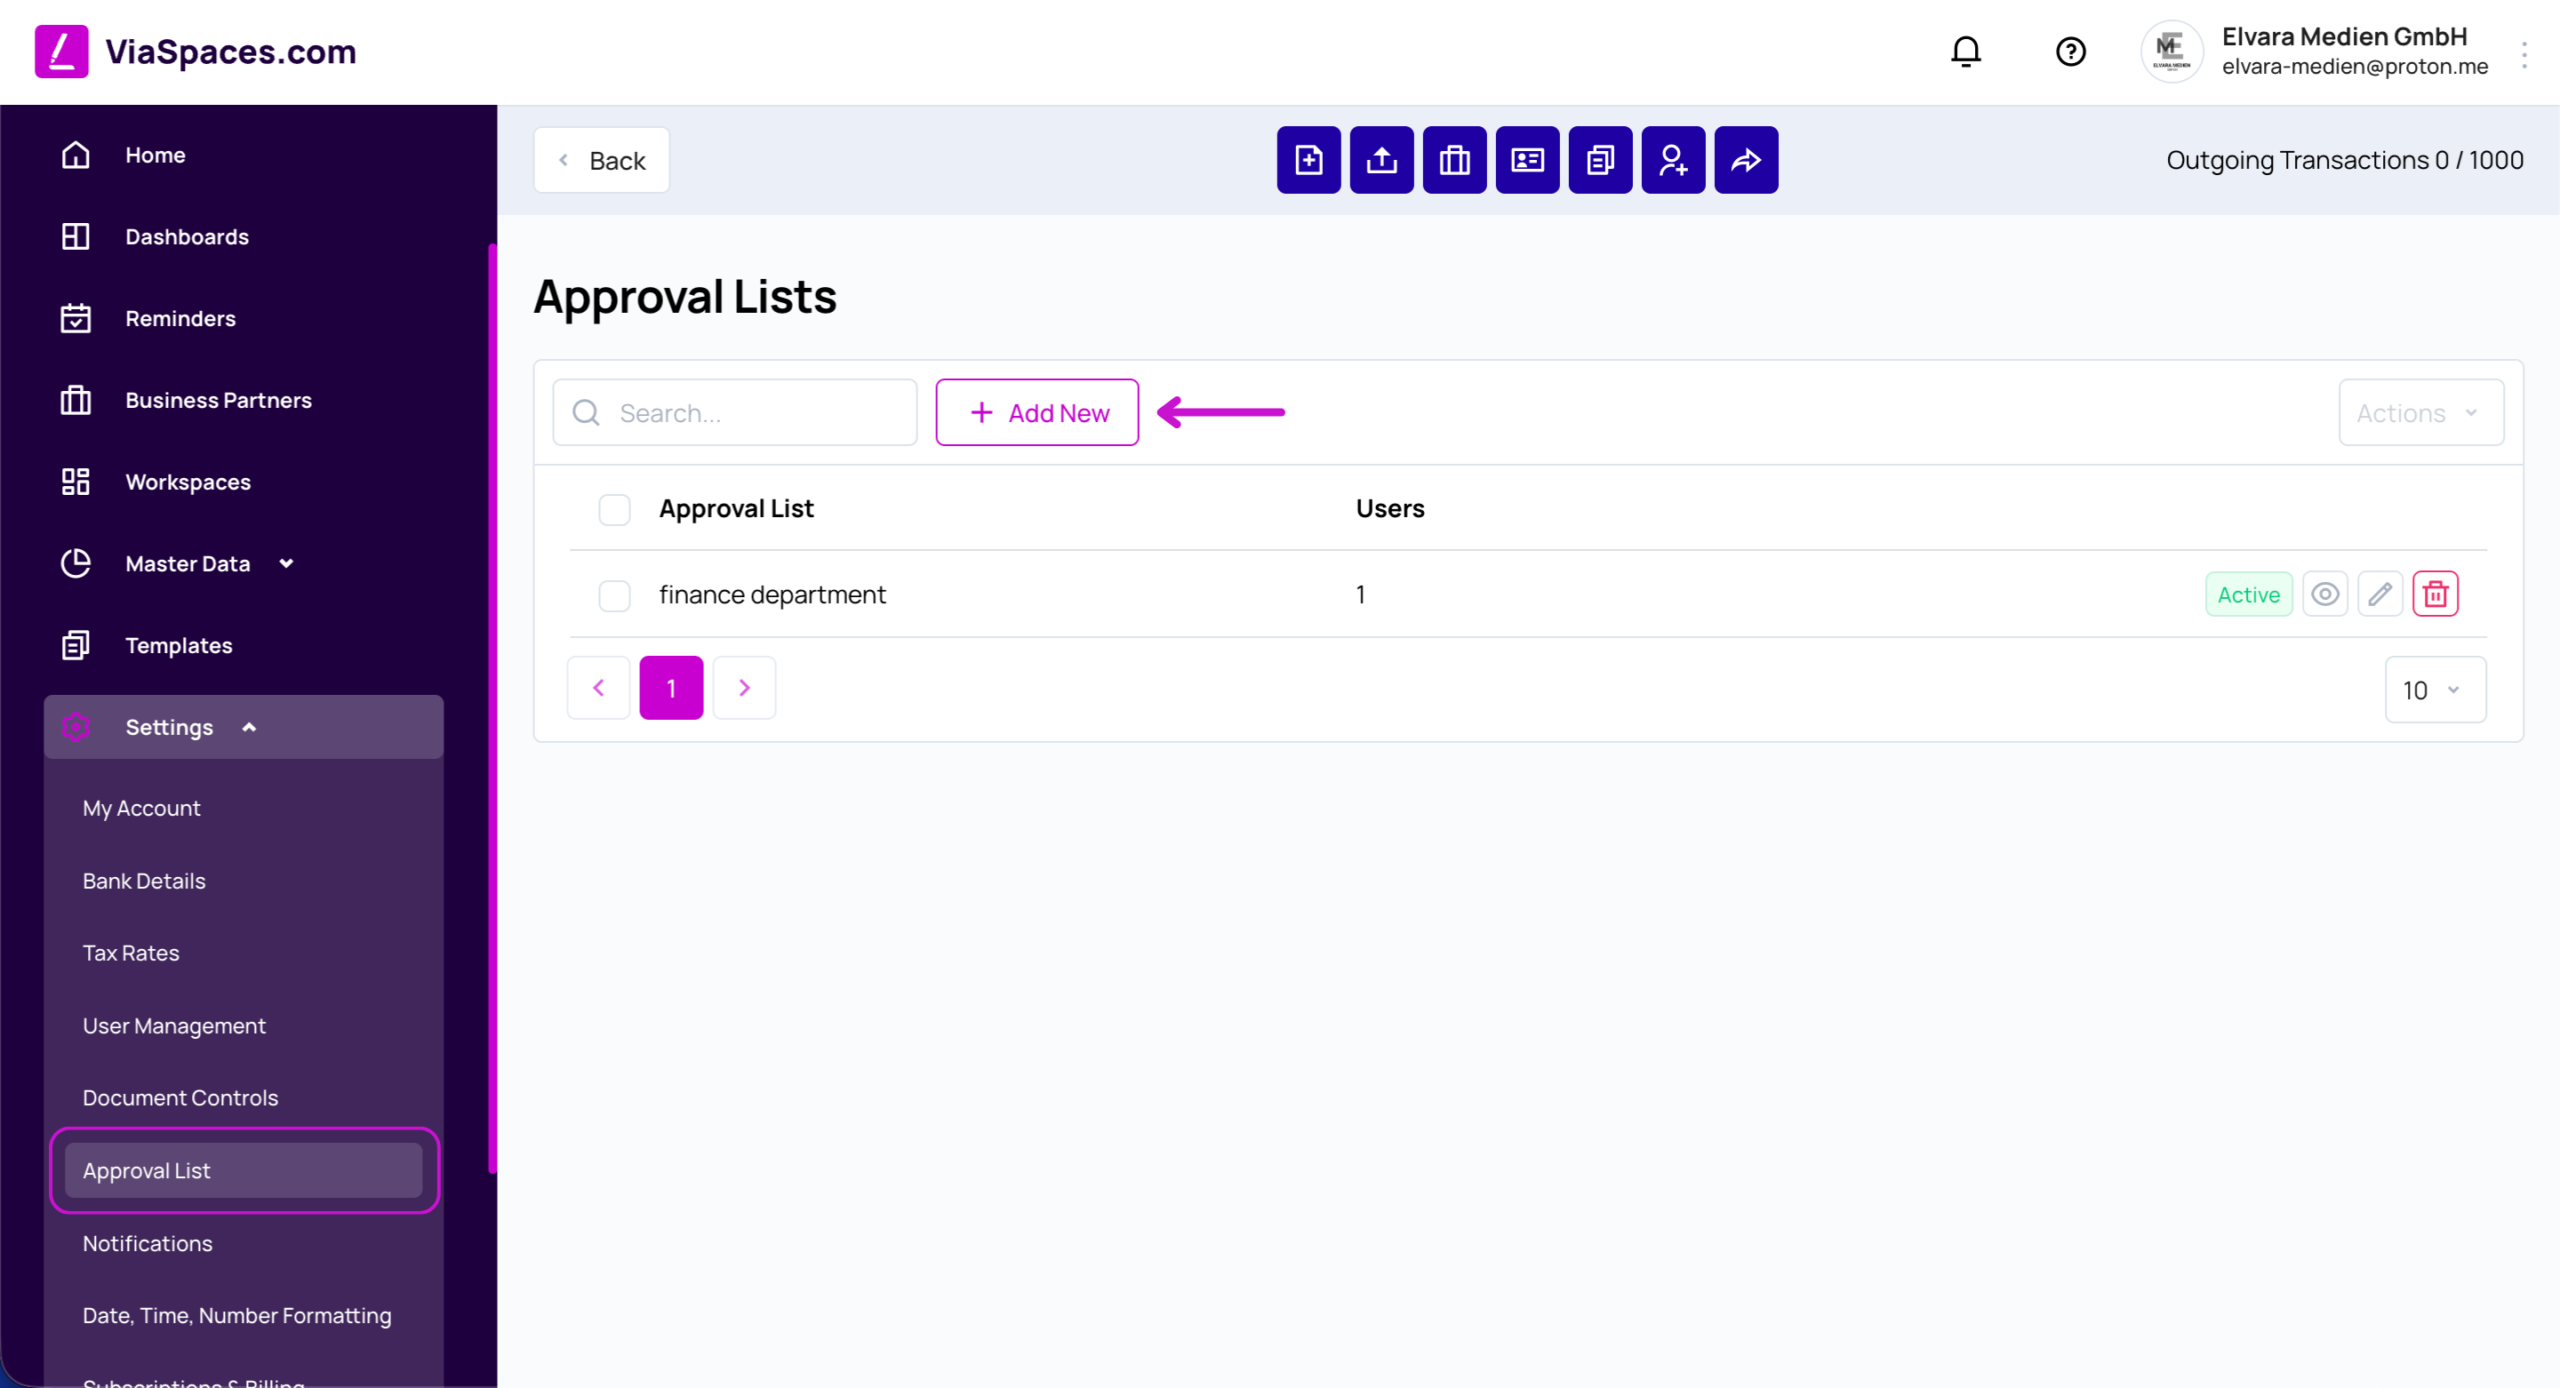
Zoznam schválení je opakovane použiteľná, pomenovaná skupina schvaľovateľov, ktorá sa aplikuje na dokumenty. Každý zoznam obsahuje Názov zoznamu schválení, počet používateľov a stav Aktívny alebo Neaktívny. Neaktívne zoznamy sa pri nastavovaní schvaľovateľov na dokumente neponúkajú.
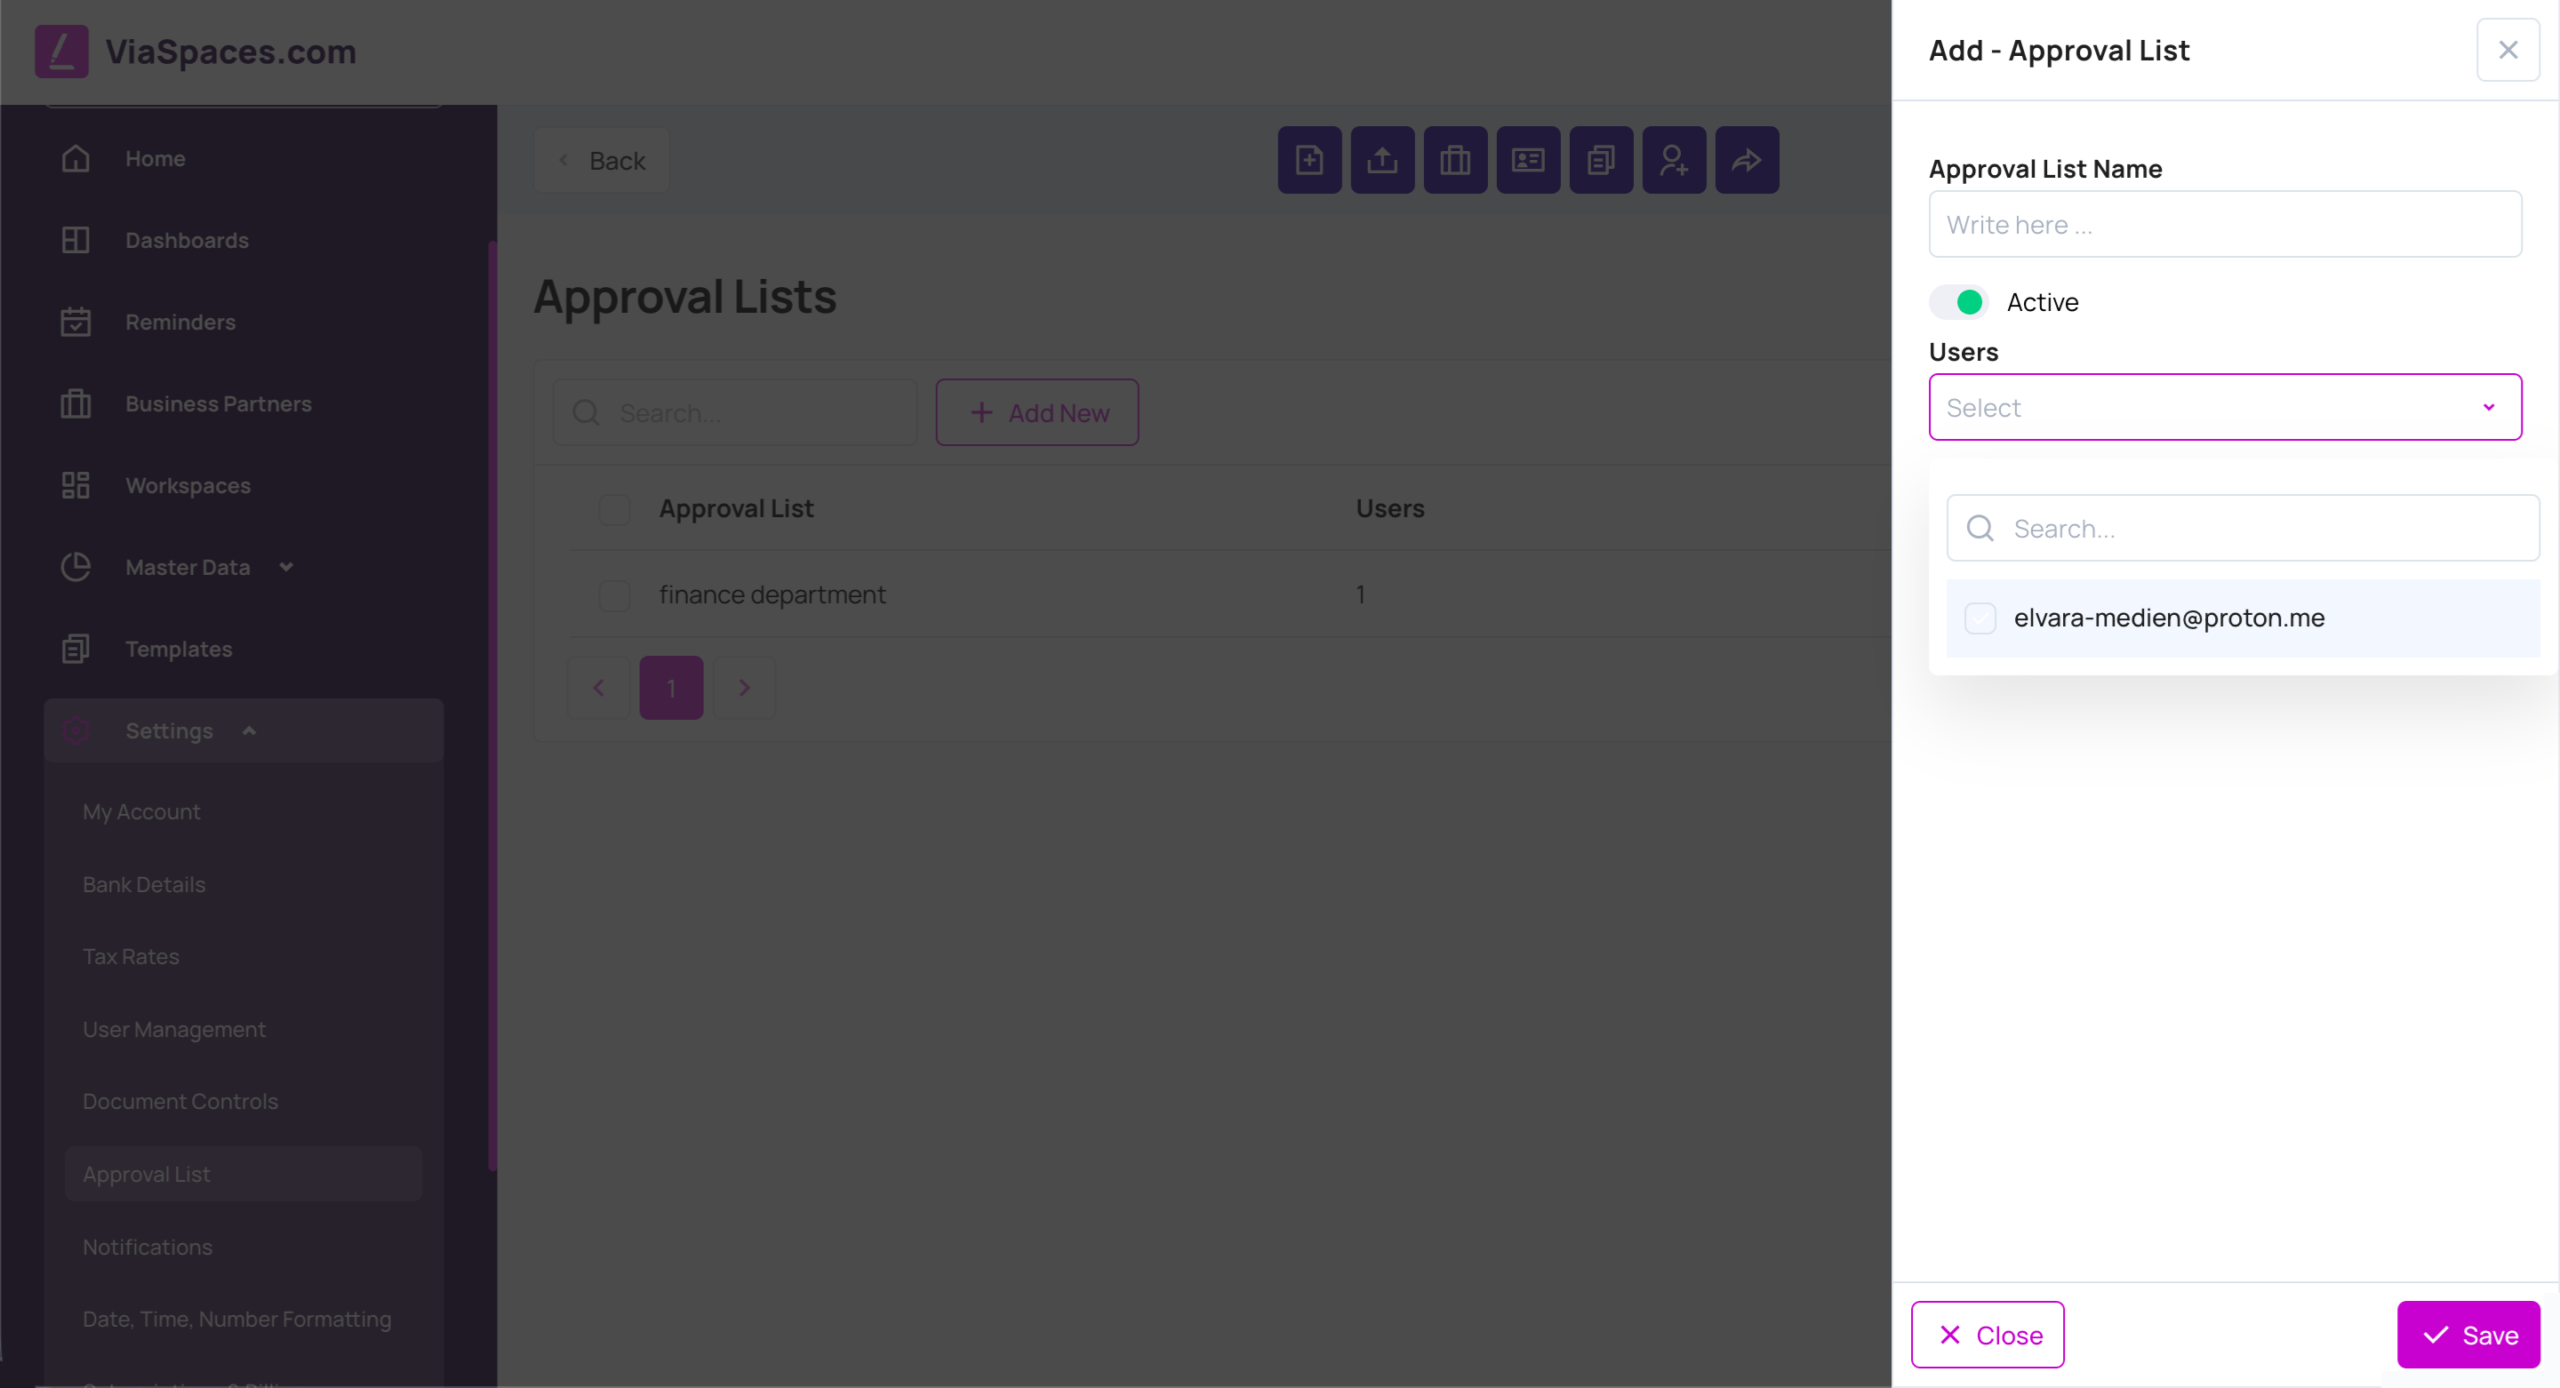
Vytvorenie alebo úprava zoznamu:
- Kliknite na Pridať nový alebo upravte existujúci zoznam.
- Zadajte Názov zoznamu schválení.
- Nastavte prepínač Aktívny.
- Vyberte používateľov pre zoznam.
- Uložiť.
Poznámka: Zoznam schvaľovateľov sa na dokument aplikuje pri odosielaní. Viac informácií nájdete na stránke Odosielanie a prijímanie dokumentov._
Notifikácie #
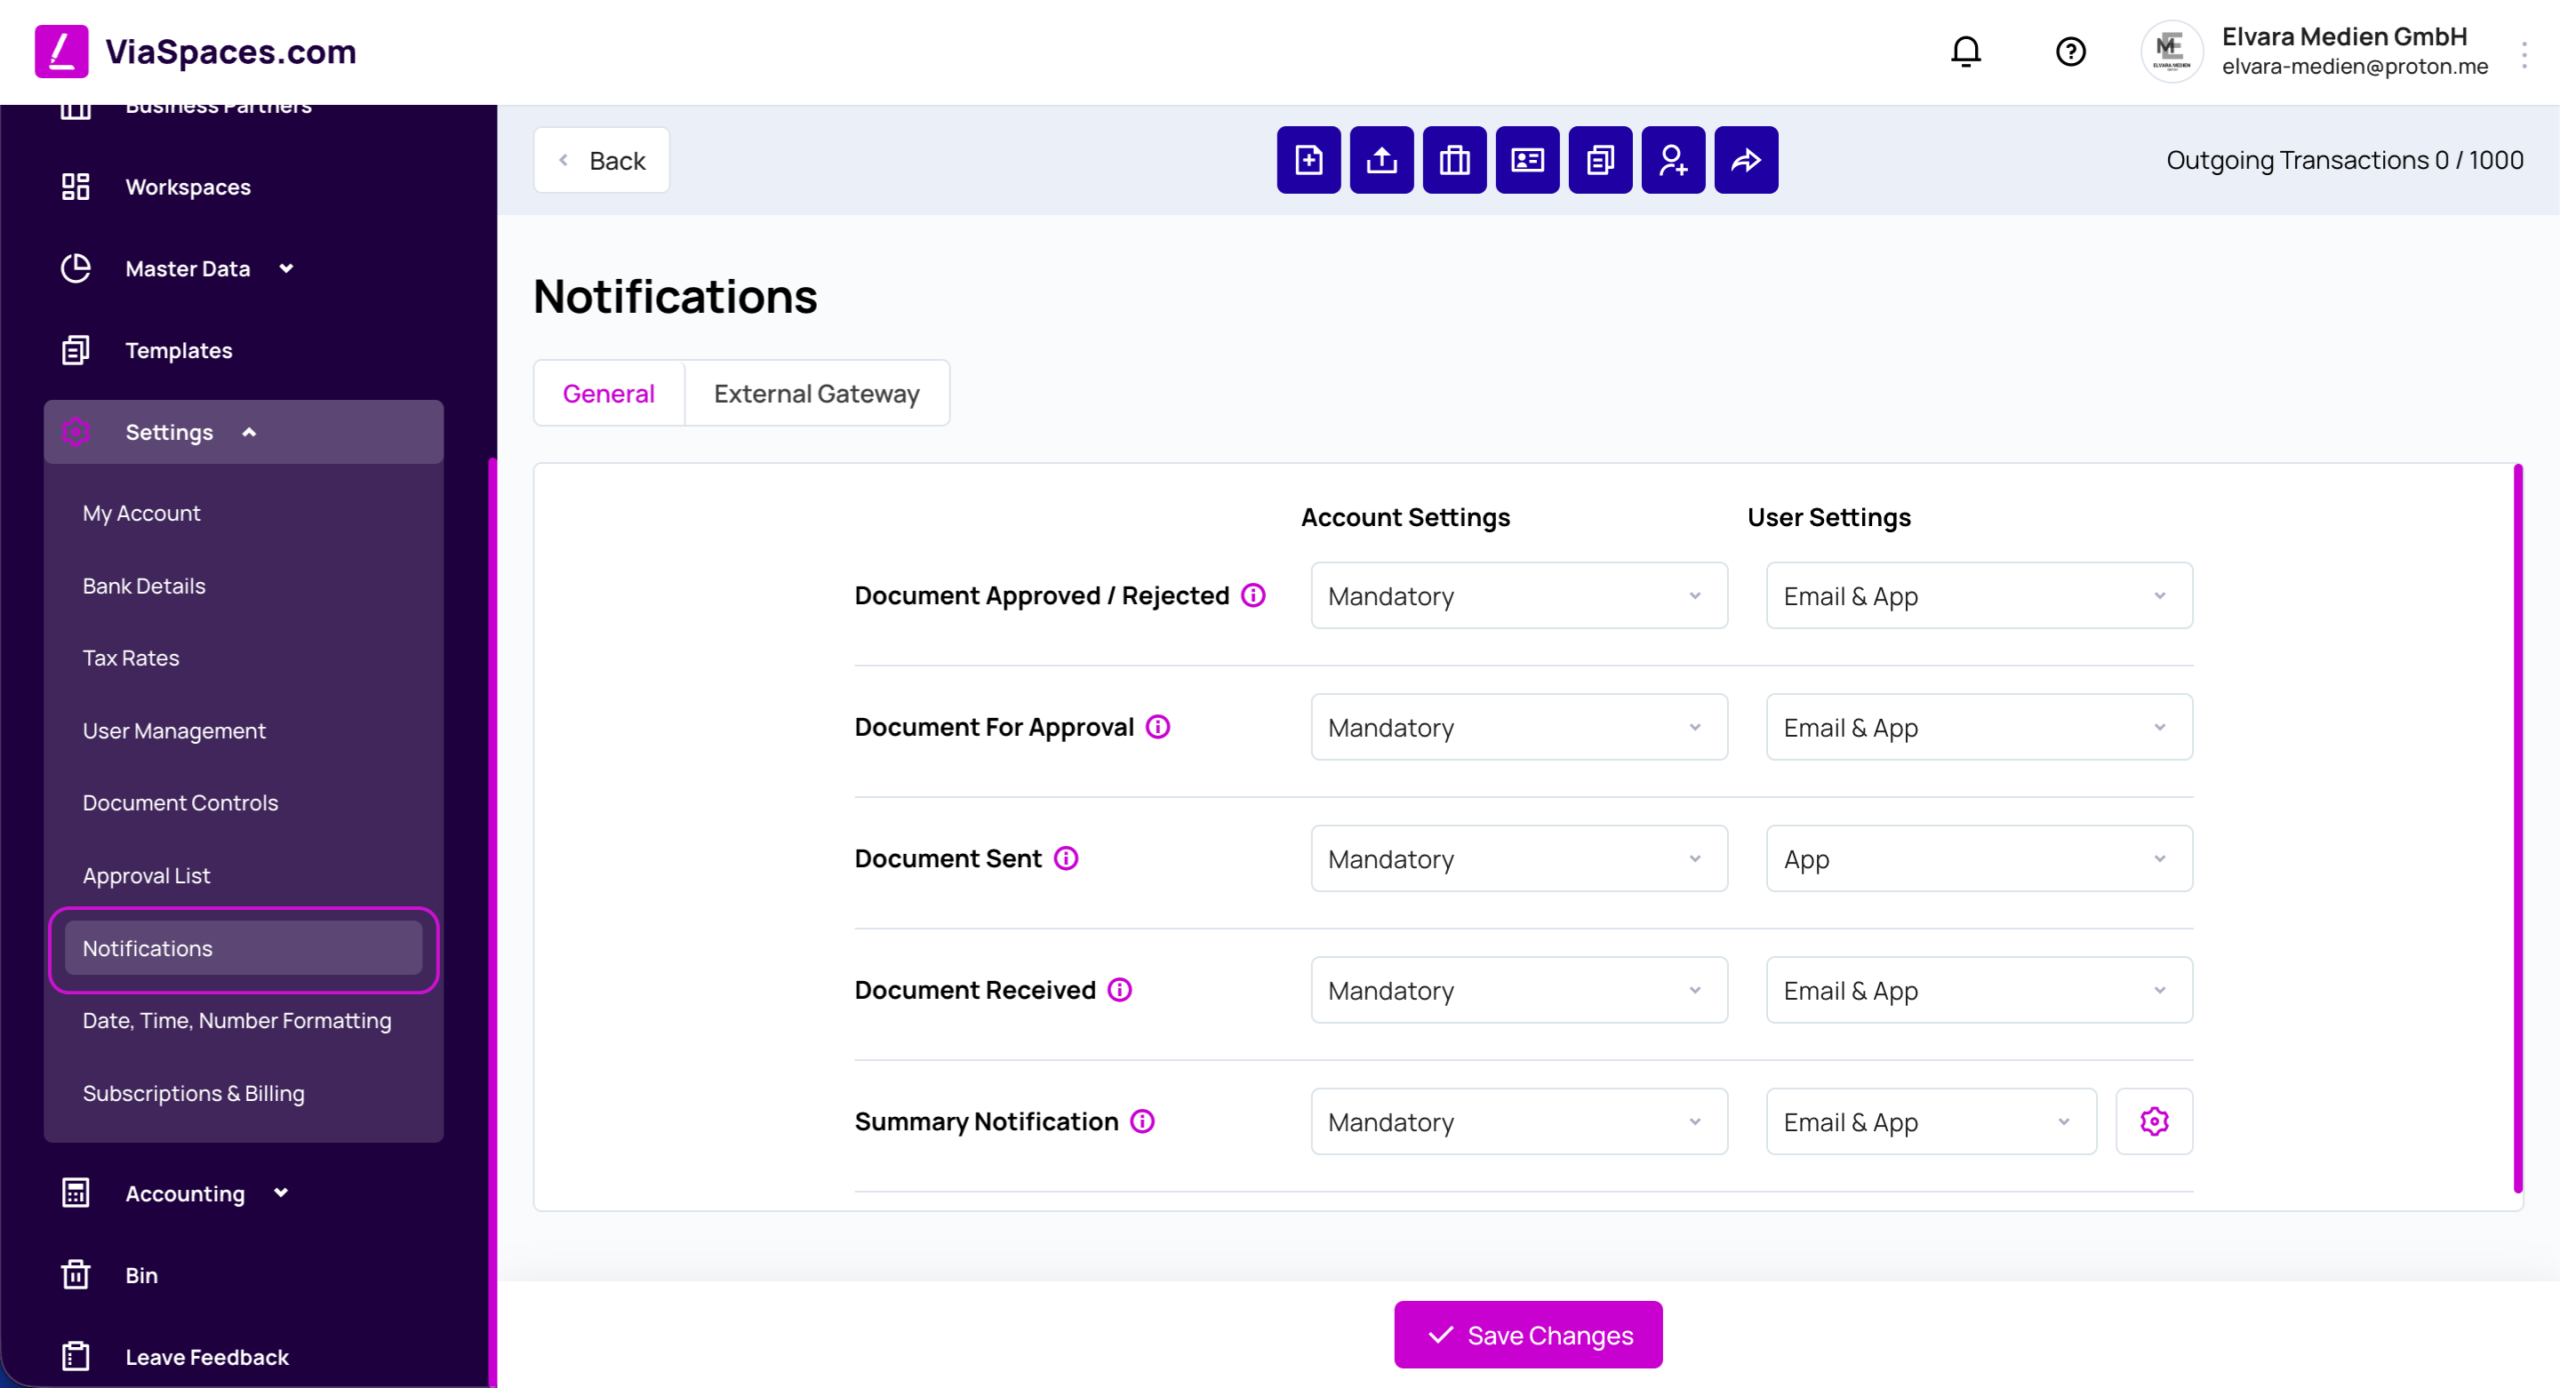
Notifikácie určujú, pri ktorých udalostiach dokumentu sa odošle upozornenie a akým spôsobom. Táto oblasť obsahuje dve karty: Všeobecné a Externá brána.
Každá udalosť má dve možnosti nastavenia:
| Ovládanie | Možnosti | Nastavuje |
|---|---|---|
| Nastavenia účtu | Povinné, Povolené, Zakázané | Administrátor |
| Nastavenia používateľa | E-mail a aplikácia, Aplikácia | Používateľ |
Nastavenia účtu a Nastavenia používateľa fungujú spoločne:
| Nastavenia účtu | Výsledok |
|---|---|
| Povinné | Notifikácia je vždy zapnutá. Používatelia ju nemôžu vypnúť. |
| Povolené | Notifikácia je zapnutá. Každý používateľ si vyberá kanál notifikácie v Nastaveniach používateľa. |
| Vypnuté | Notifikácia je vypnutá pre všetkých. |
Udalosti na karte Všeobecné: Dokument schválený / zamietnutý, Dokument na schválenie, Dokument odoslaný, Dokument prijatý a Súhrnné oznámenie. Súhrnné oznámenie má nastavenie frekvencie: Denne, Týždenne alebo Mesačne.
Uložte pomocou Uložiť zmeny.
Poznámka: Doručovanie sa riadi vlastnými nastaveniami každého používateľa v rámci limitov nastavených administrátorom.
Formátovanie dátumu, času a čísel #
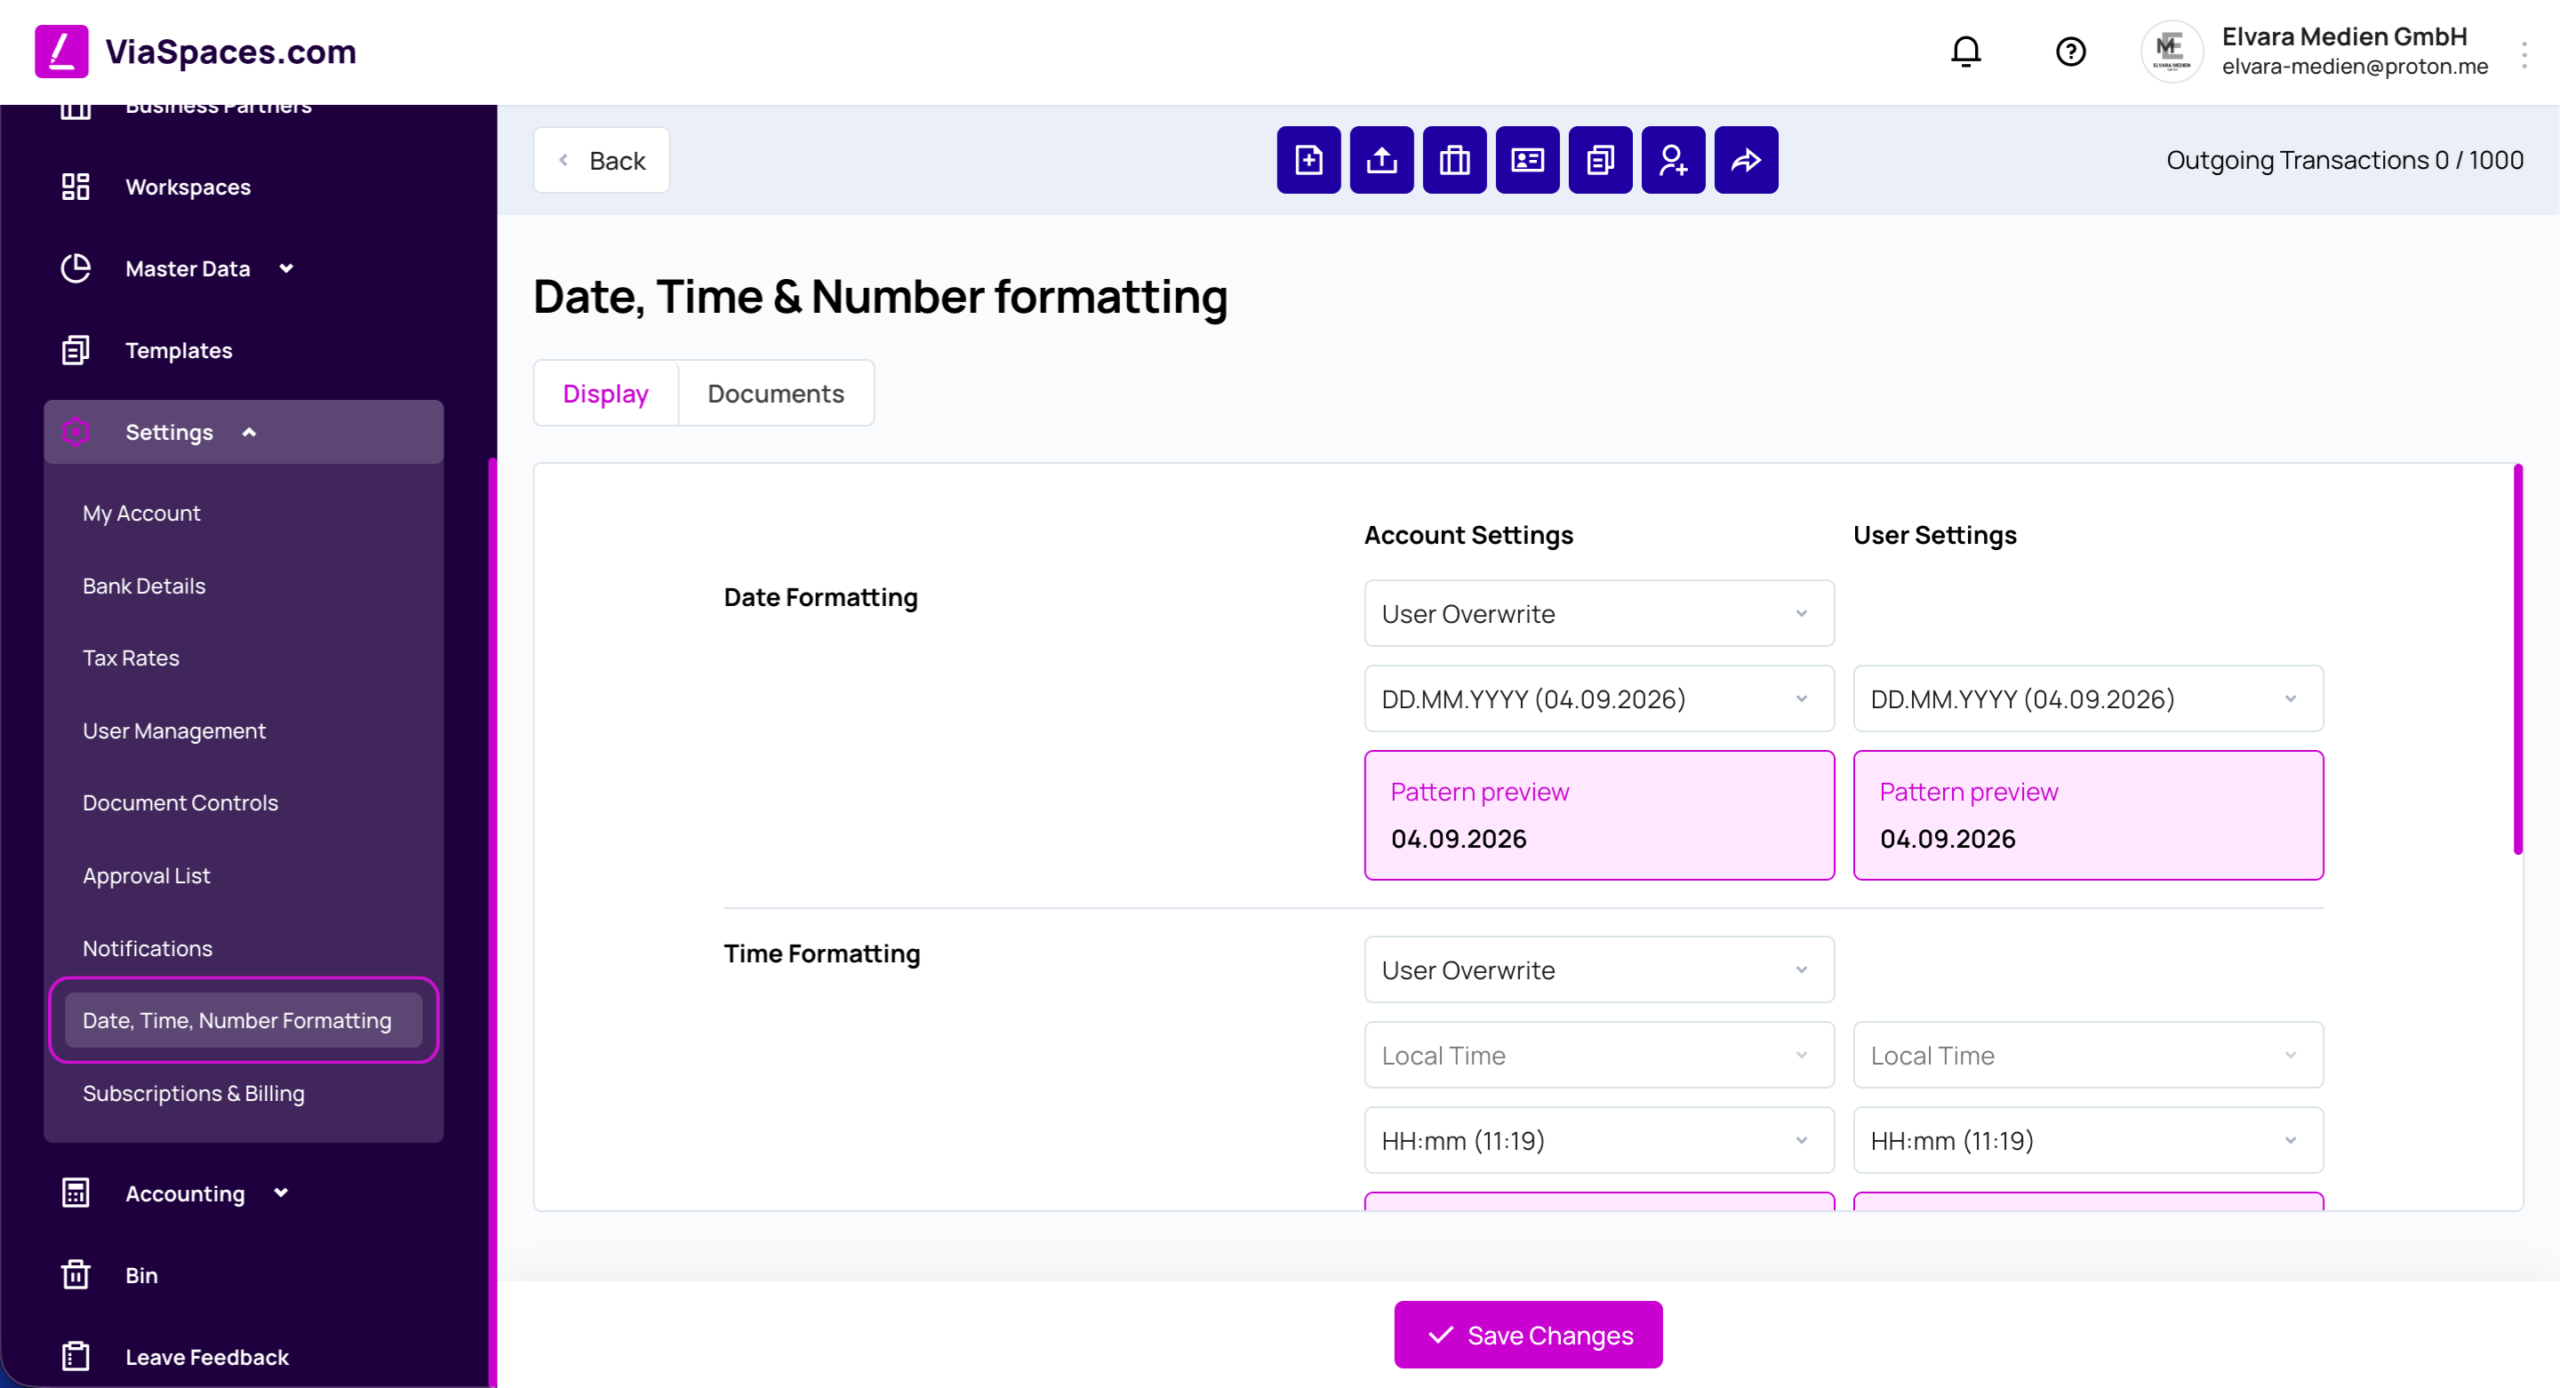
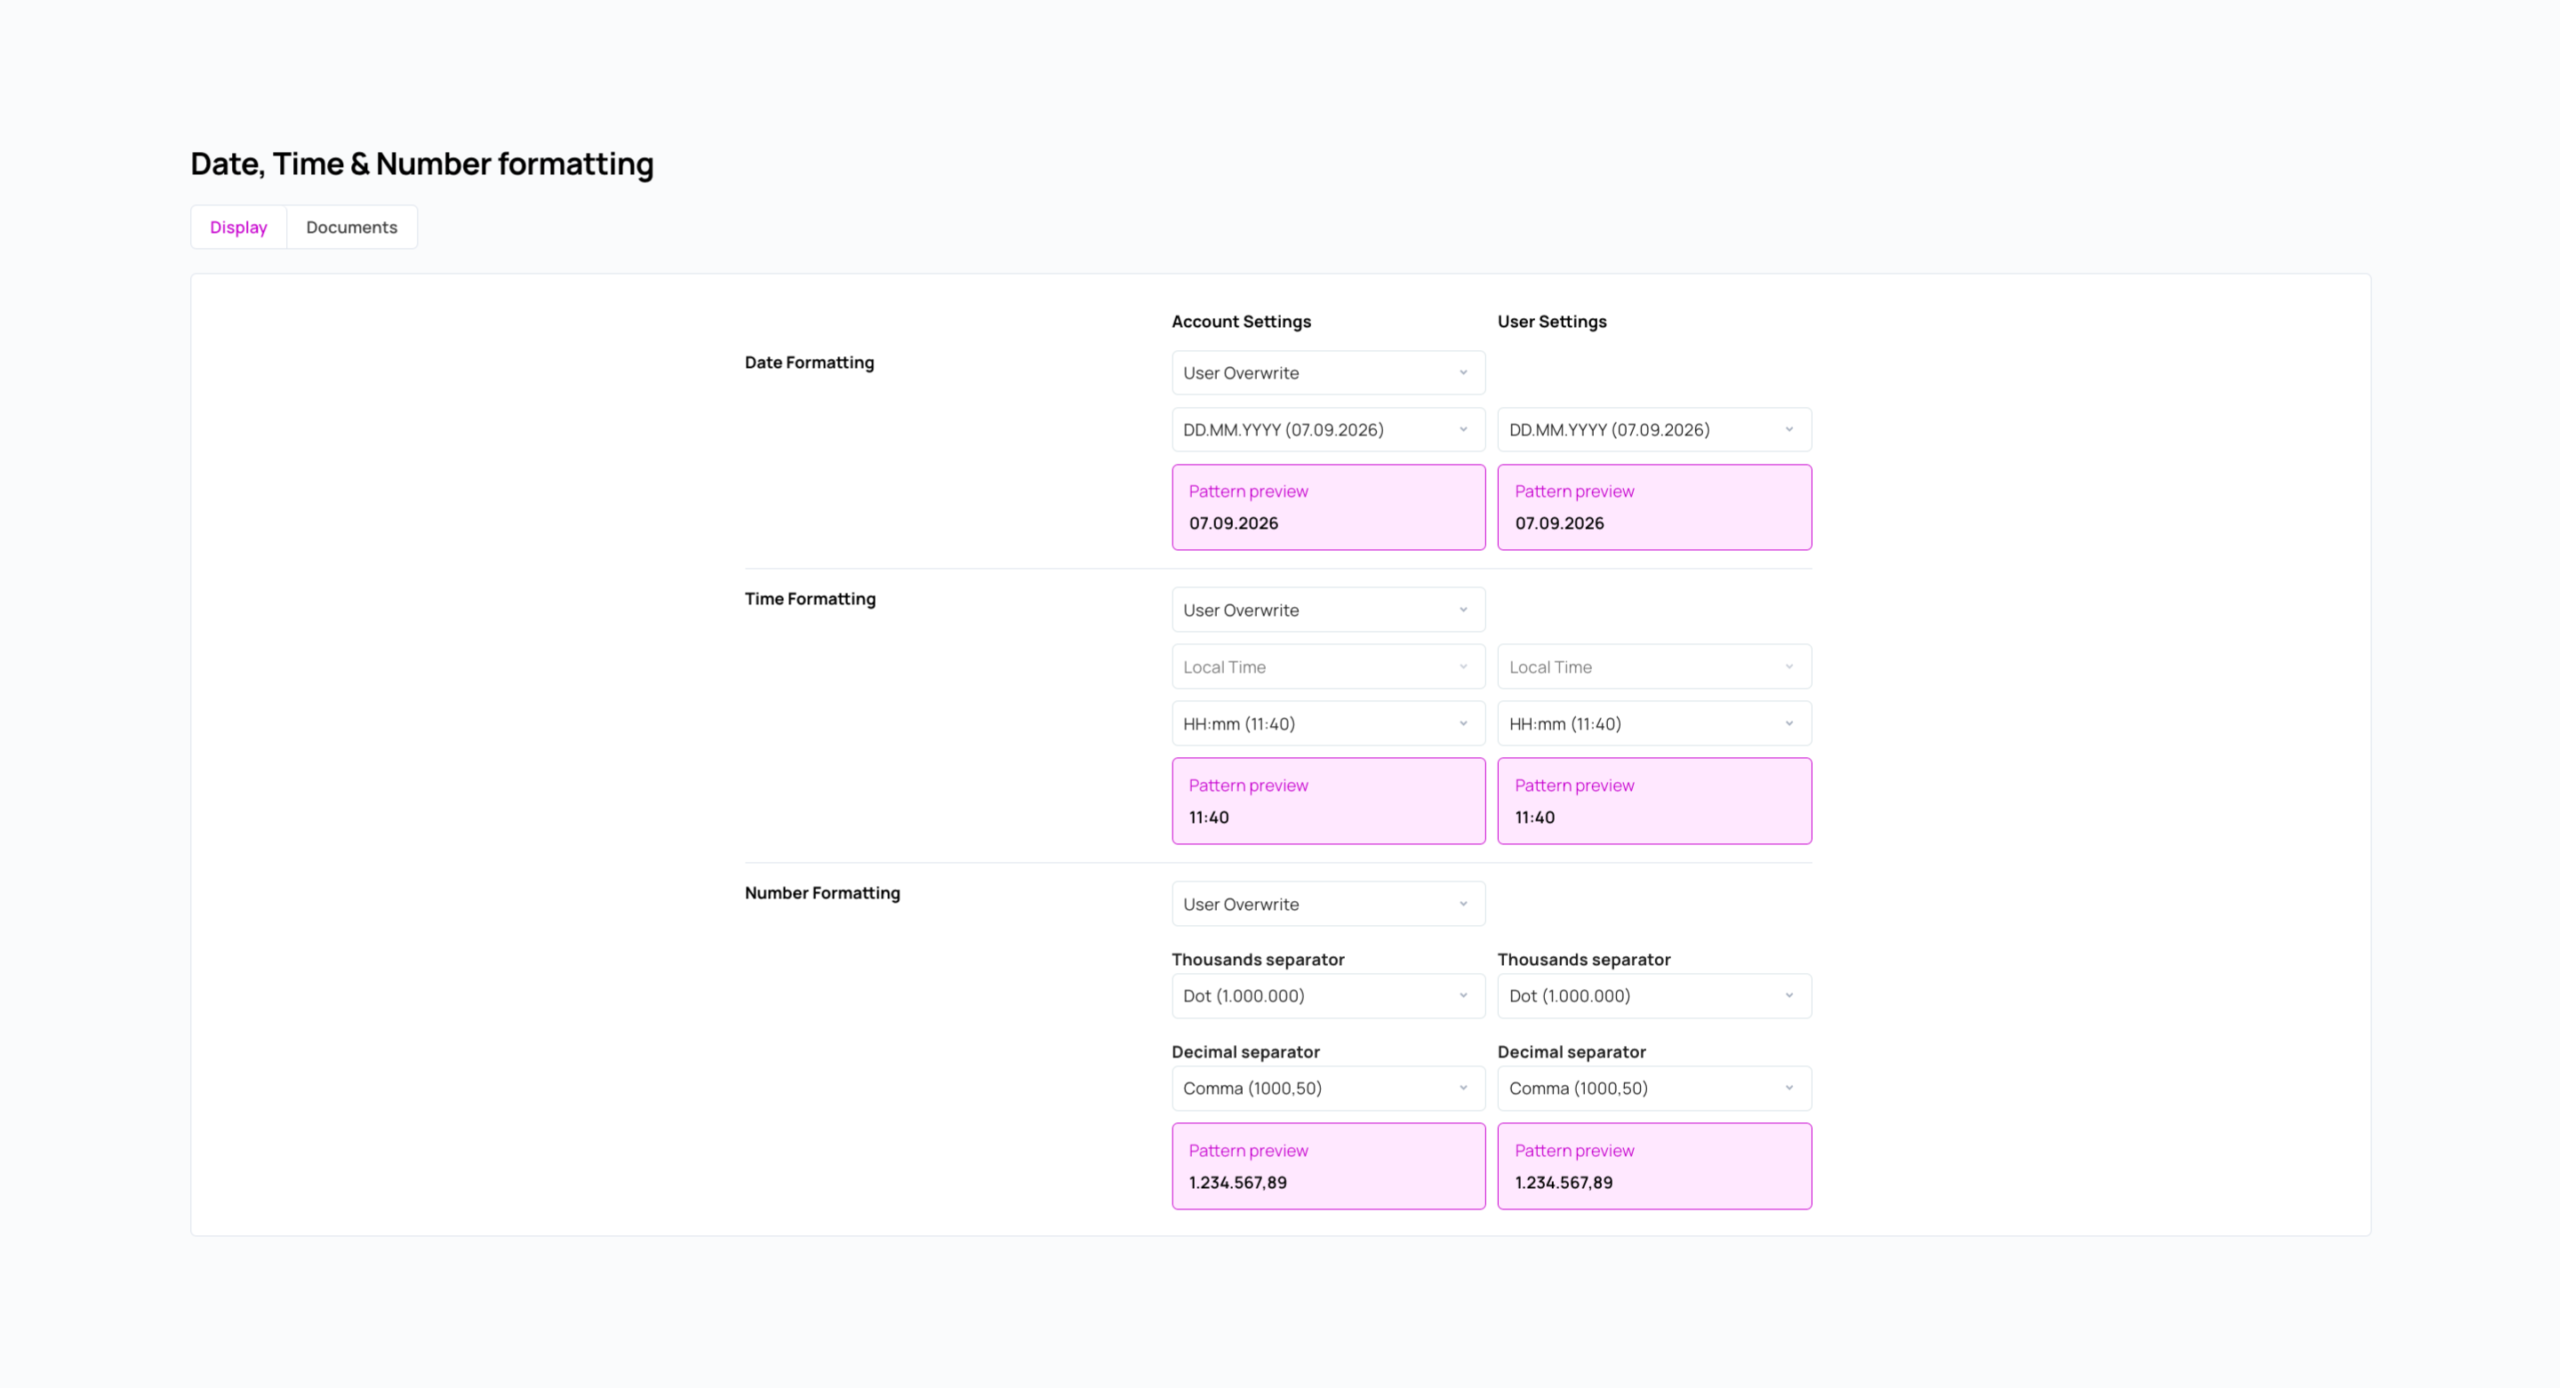
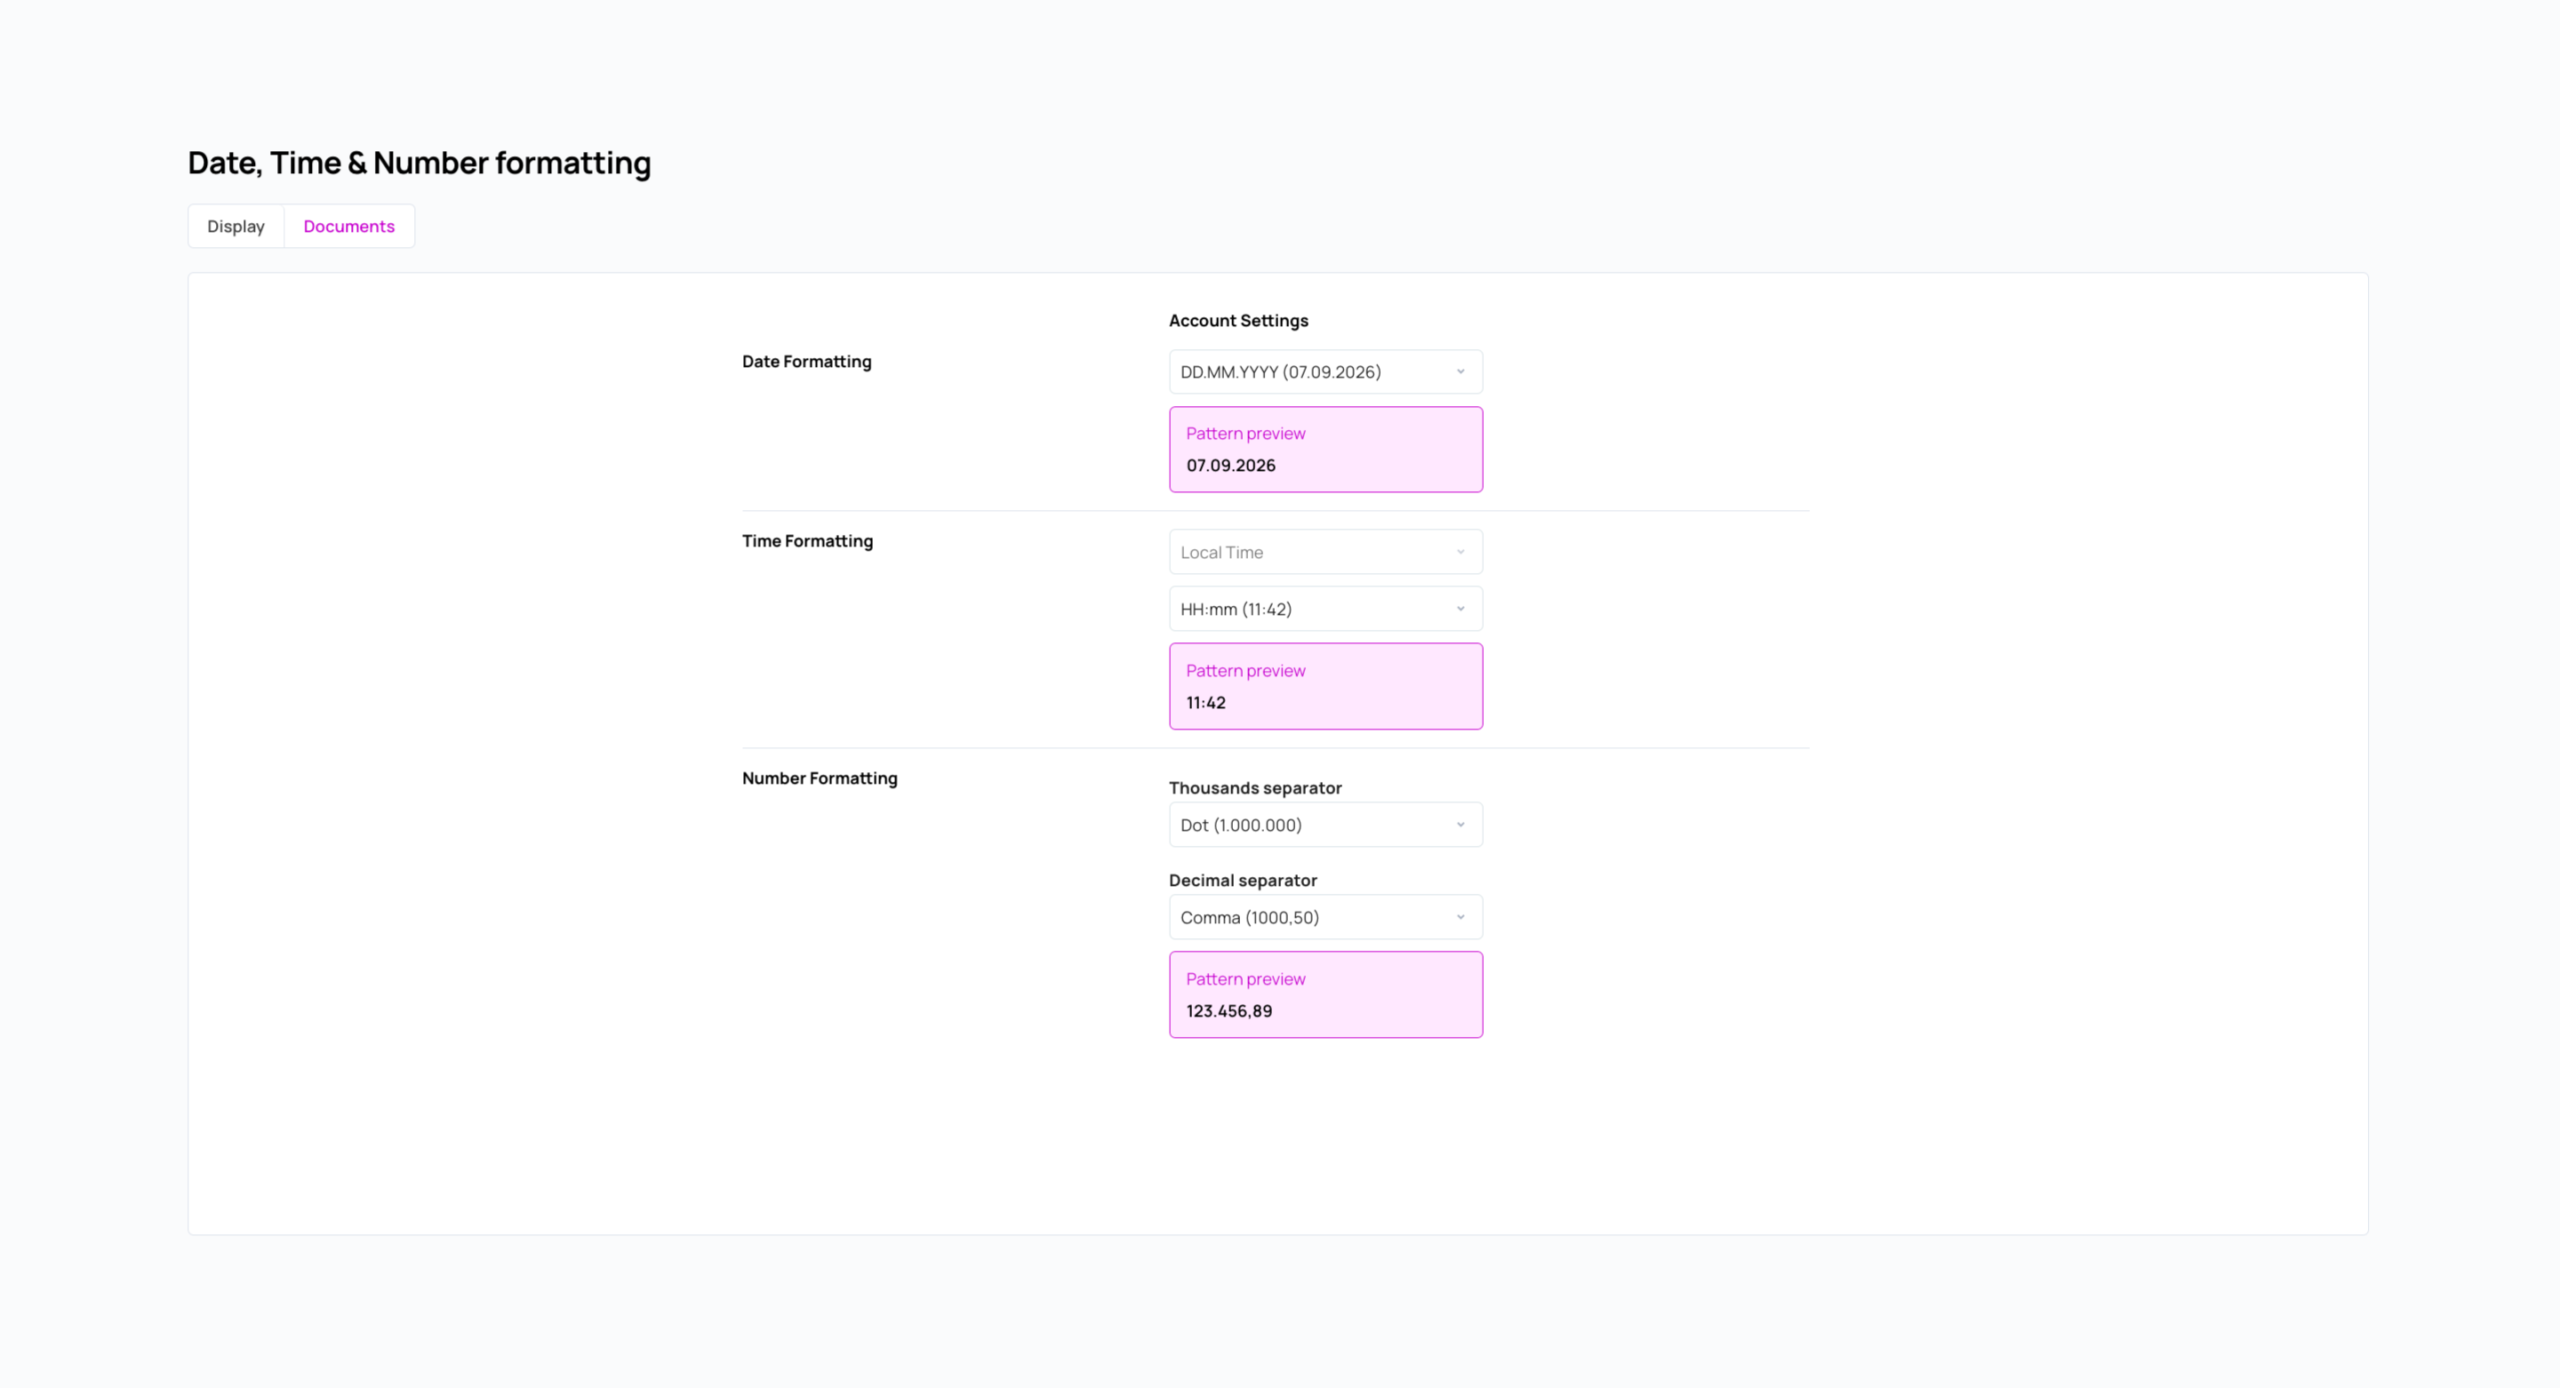
Táto časť určuje, ako sa zobrazujú dátumy, časy a čísla. Obsahuje dve karty: Zobrazenie (rozhranie aplikácie) a Dokumenty (generované dokumenty).
| Skupina | Možnosti |
|---|---|
| Formátovanie dátumu | Formát dátumu, napríklad D. M. YYYY. |
| Formát času | Miestny čas a formát času, napríklad H:mm. |
| Formátovanie čísel | Oddeľovač tisícov a desatinný oddeľovač. |
Každá skupina zobrazuje Náhľad formátu. Stĺpec Nastavenia účtu určuje predvolené nastavenie účtu. Ak je nastavený na Používateľské prepísanie, zobrazí sa stĺpec Nastavenia používateľa a každý používateľ si môže nastaviť vlastný formát.
Uložte pomocou Uložiť zmeny.
Predplatné a fakturácia #
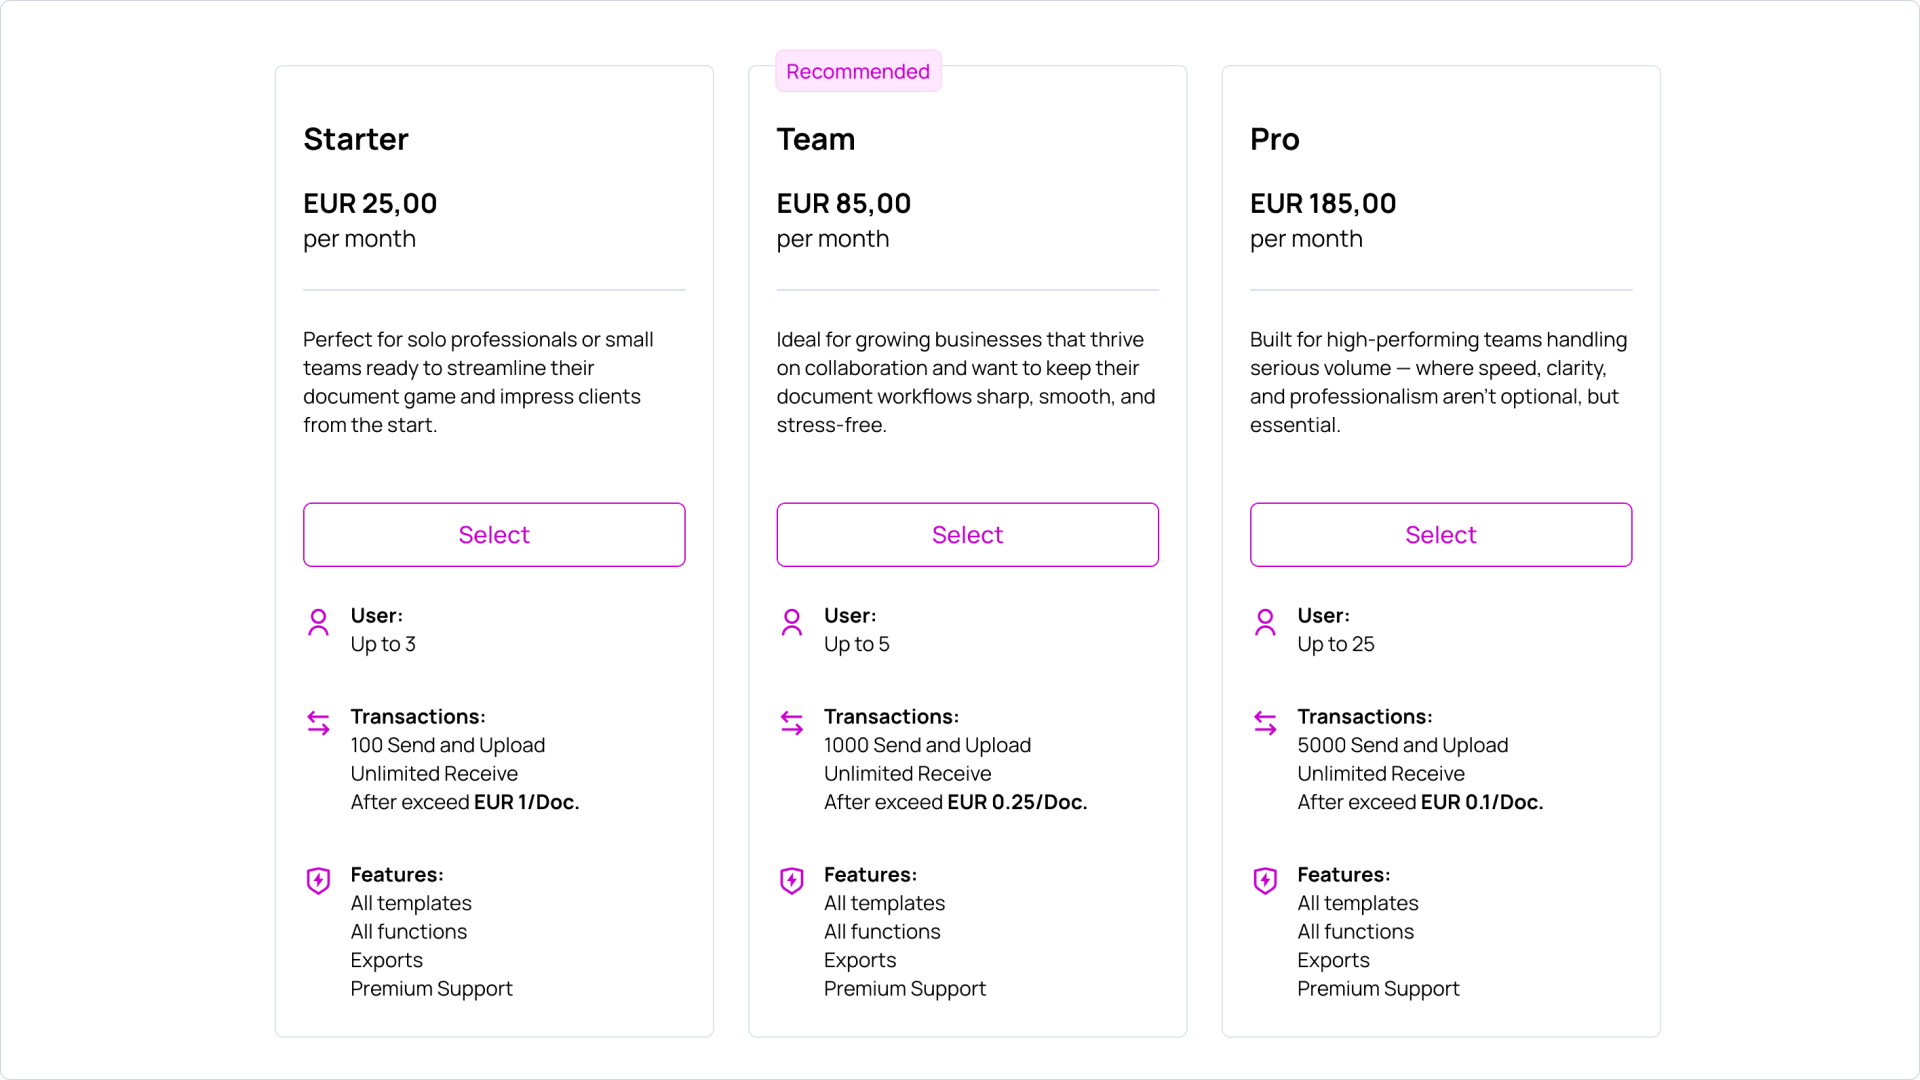
Predplatné a fakturácia slúži na správu programu účtu a jeho fakturačného obdobia. Každý účet má vlastné predplatné.
| Ovládanie | Funkcia |
|---|---|
| Firemné / Osobné | Vyberá kategóriu programu. |
| Mesačne / Ročne | Nastavuje fakturačné obdobie. |
| Vybrať | Aplikuje program. |
Program určuje limity účtu – počet používateľov a počet transakcií (Odoslanie a Nahratie). Prijímanie je vo všetkých programoch neobmedzené a transakcie nad stanovený limit sa účtujú za každú transakciu. Po dosiahnutí limitu používateľov sa pri pridávaní ďalšieho používateľa zobrazí možnosť Aktualizovať program.
Poznámka: Aktuálne plány, limity a ceny nájdete na stránke Cenník.