In this help doc: how to configure an account — the company profile, banking, tax, users, document rules, approvals, notifications, formatting, and billing.
Settings apply to one account. Values set here appear on documents and govern account-wide behavior. Open Settings from the sidebar; it expands into nine areas grouped as basic (My Account), banking (Bank Details), and advanced (all others).
My Account #
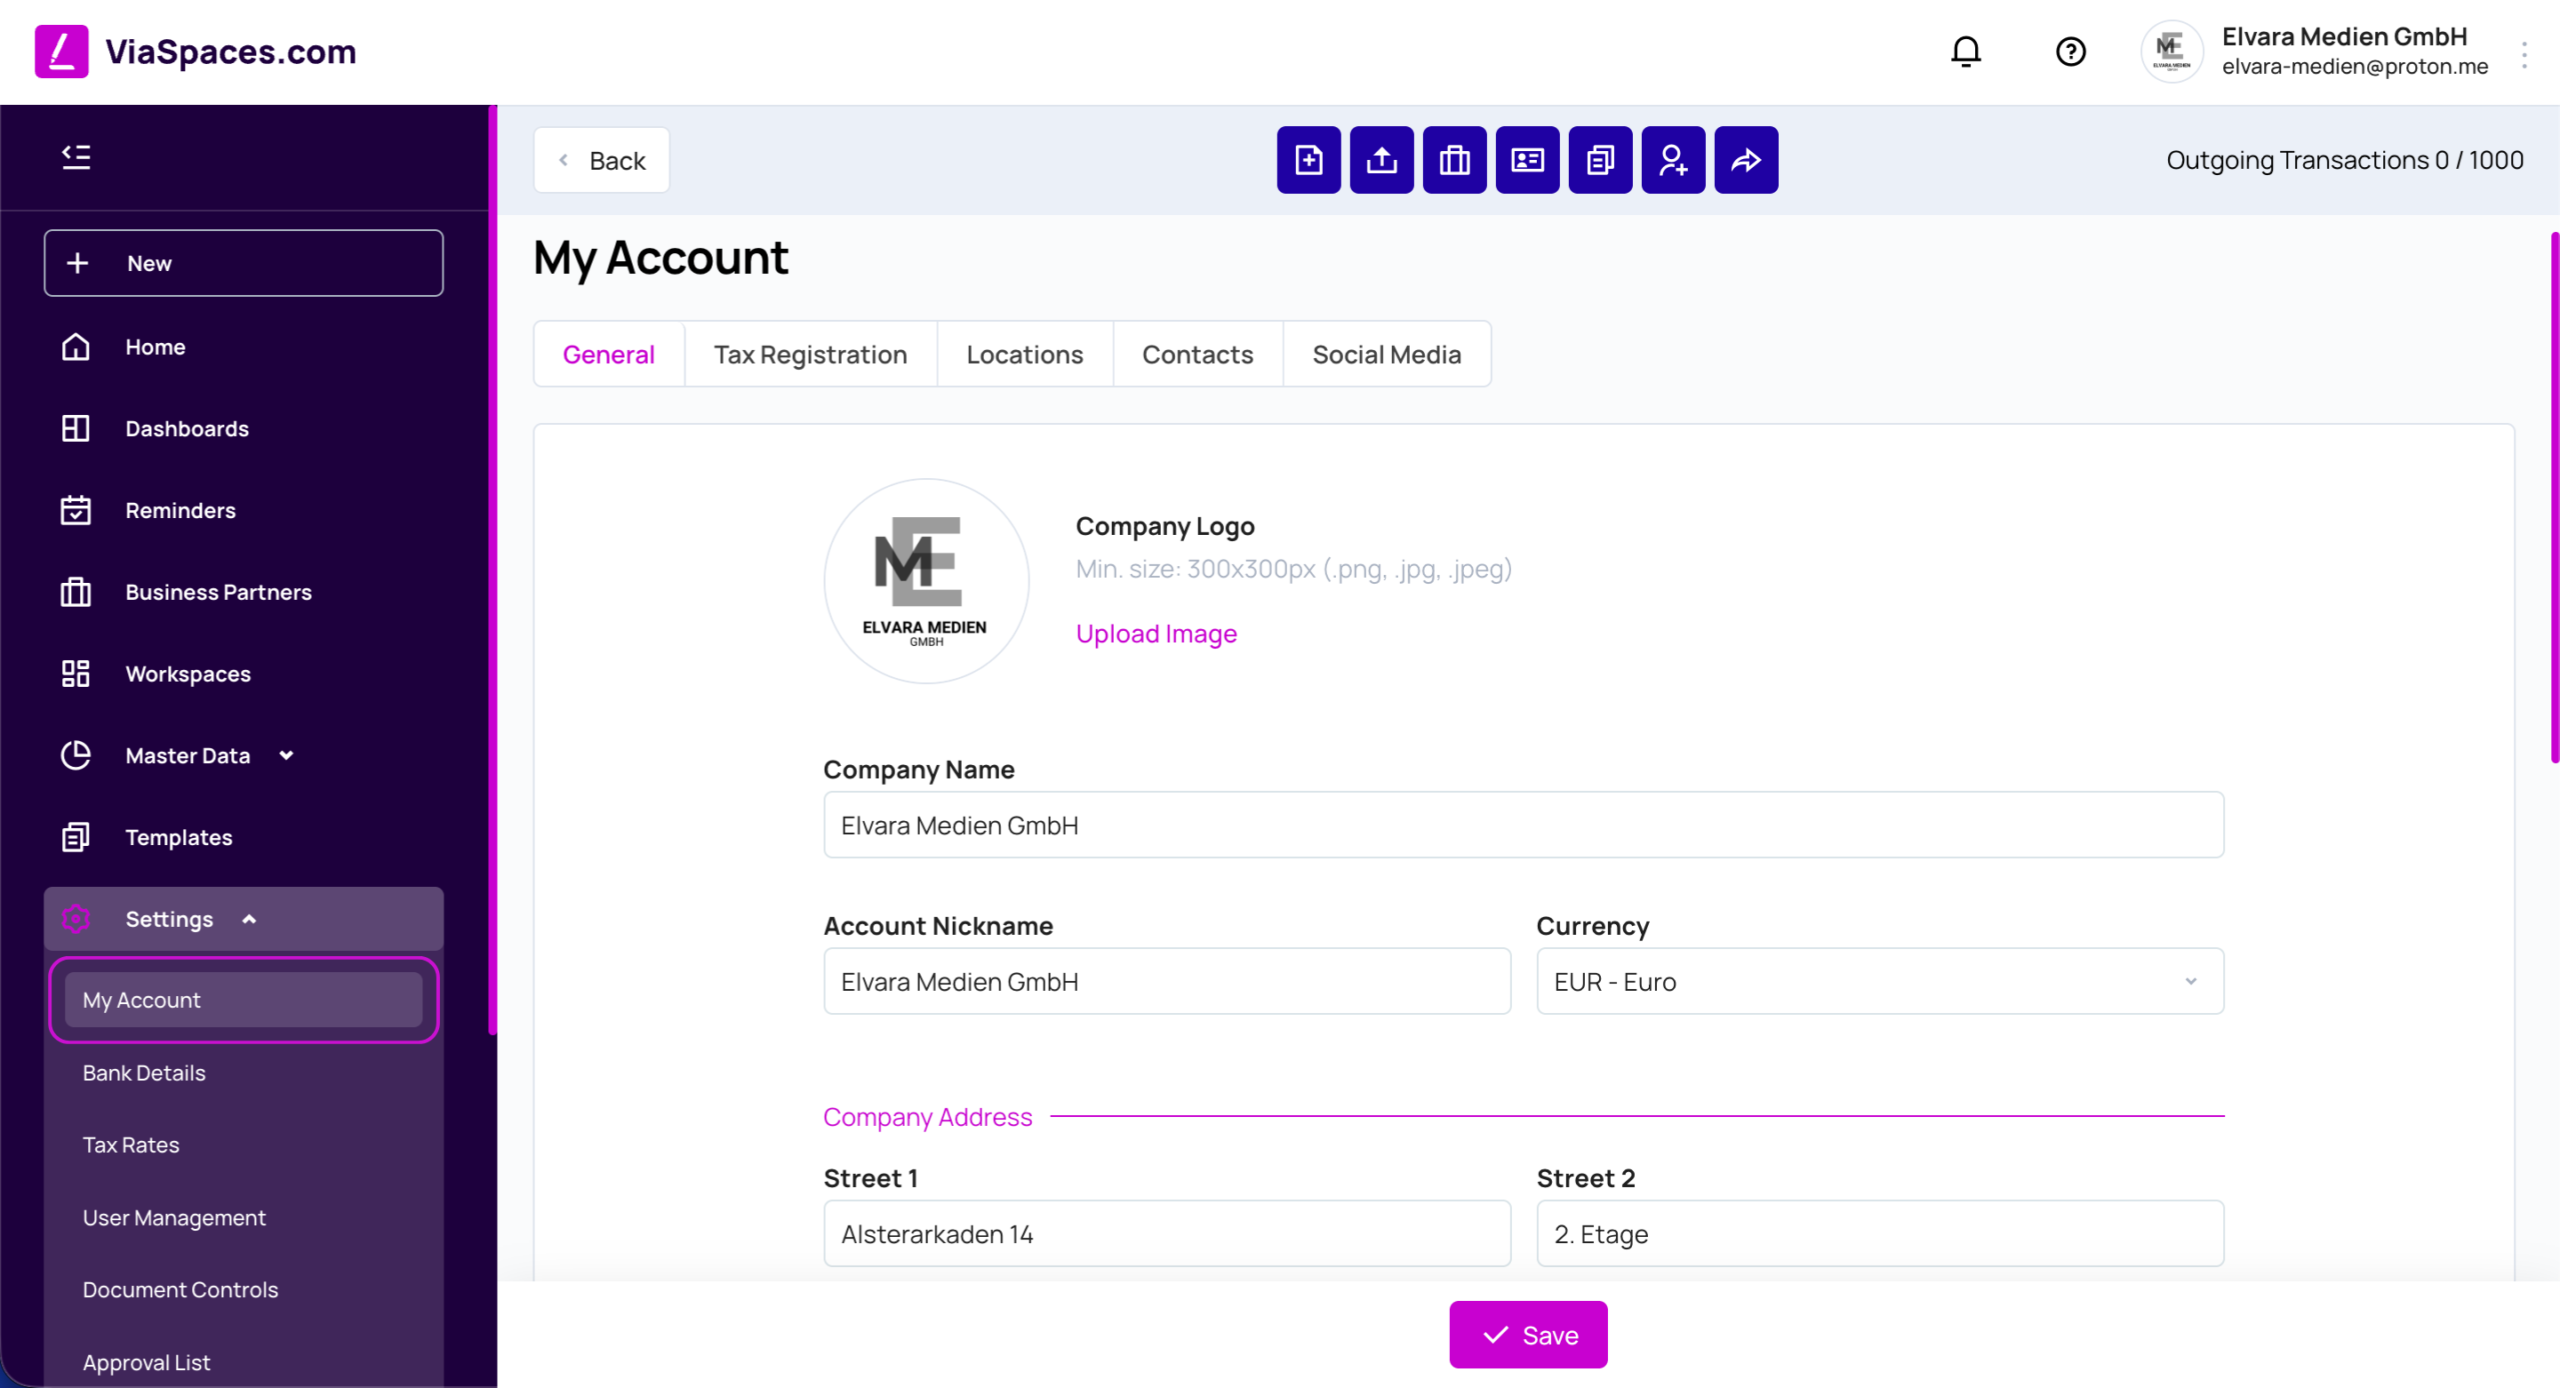
My Account is the company profile — the basic identity that appears on documents. It is organized into tabs: General, Tax Registration, Locations, Contacts, and Social Media.
The General tab holds:
| Field | Value |
|---|---|
| Company logo | Image on documents. Minimum 300 × 300 px; .png, .jpg, .jpeg. |
| Company Name | Registered company name. |
| Account Nickname | Label shown in the account list. |
| Default Currency | Currency used across the account and for Dashboard totals. |
| Address | Company address. |
| Company Registration No. | Business registration number. |
| Tax Registration / ID | Tax identification number. |
| Tax Jurisdiction Code | Country code for tax (for example, DE). |
| Show Welcome Screen | Shows or hides the welcome screen. |

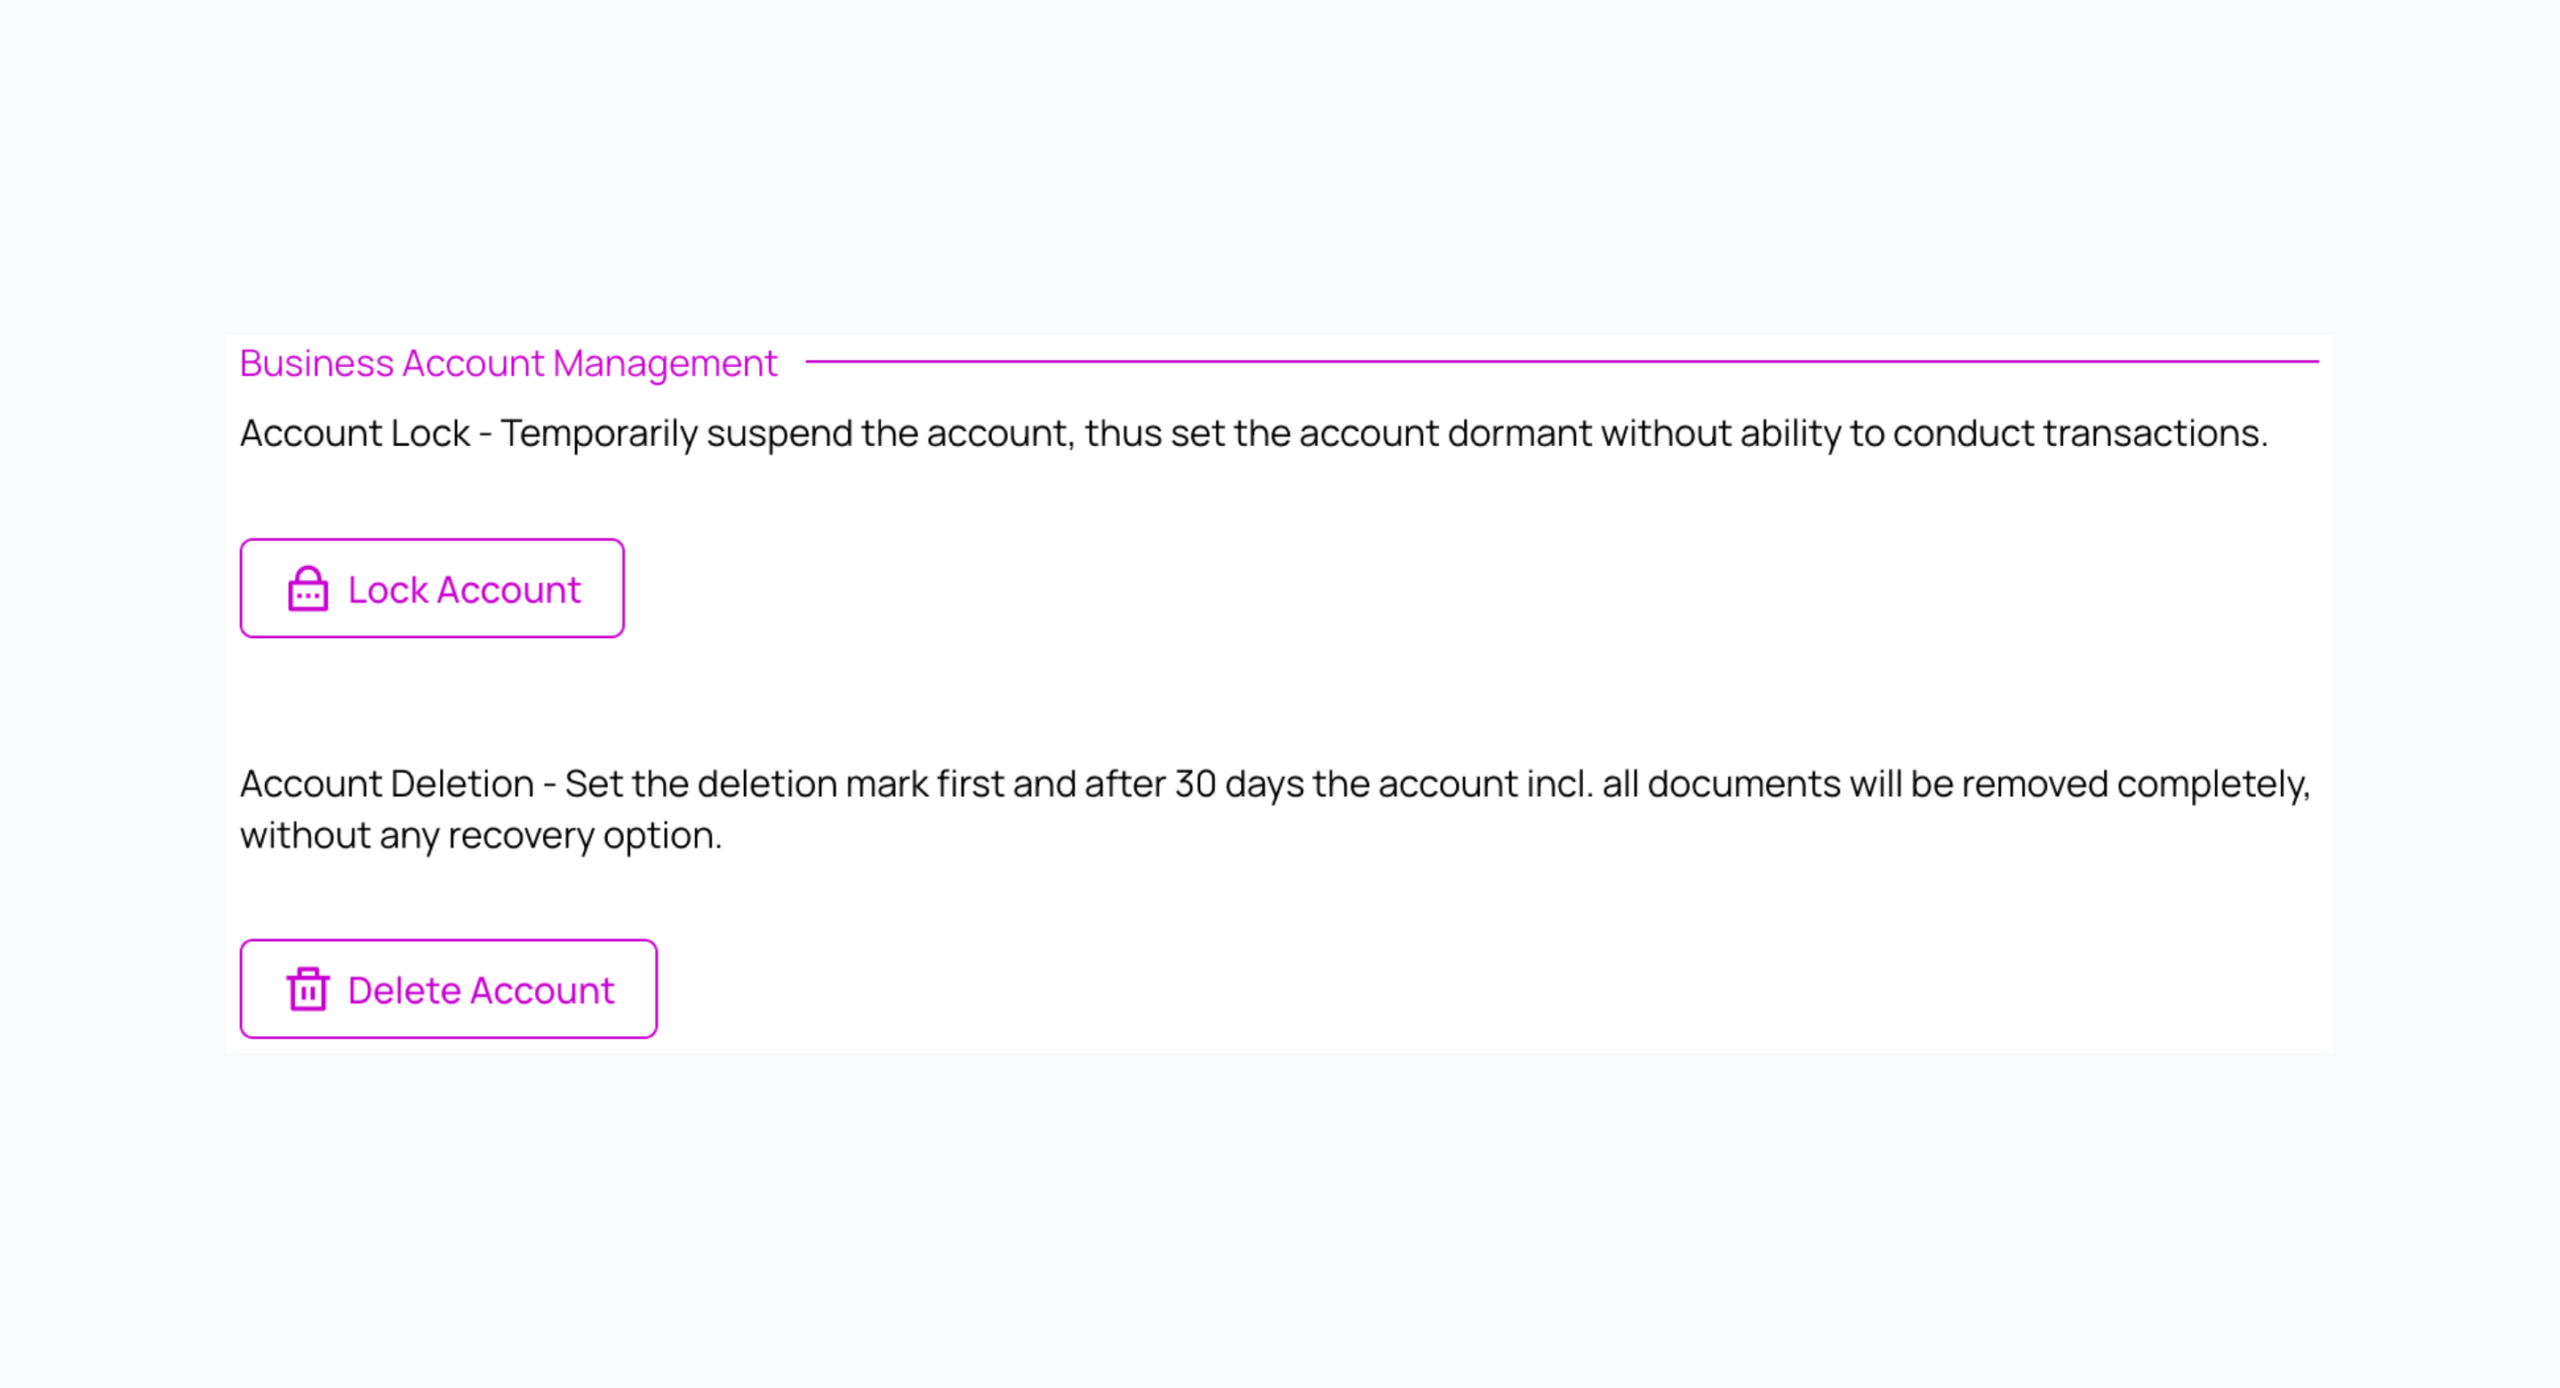
Note: Lock and delete actions are at the bottom of the General tab, under Business Account Management. See Account lock and deletion below.
Account lock and deletion #
Business Account Management holds two account-level actions.
| Action | Effect |
|---|---|
| Lock Account | Temporarily suspends the account and sets it dormant, with no ability to conduct transactions. An Administrator unlocks it. |
| Delete Account | Sets a deletion mark. After 30 days the account and all documents are removed with no recovery option. |
The remaining tabs:
| Tab | Content |
|---|---|
| Tax Registration | Tax registrations by country and type. |
| Locations | Additional addresses: Location Name, Street, City, ZIP Code, Country. |
| Contacts | Contact people with Full Name, Title, E-mail, Phone Number, and a Primary flag. |
| Social Media | Website and social profile links. |
Bank Details #
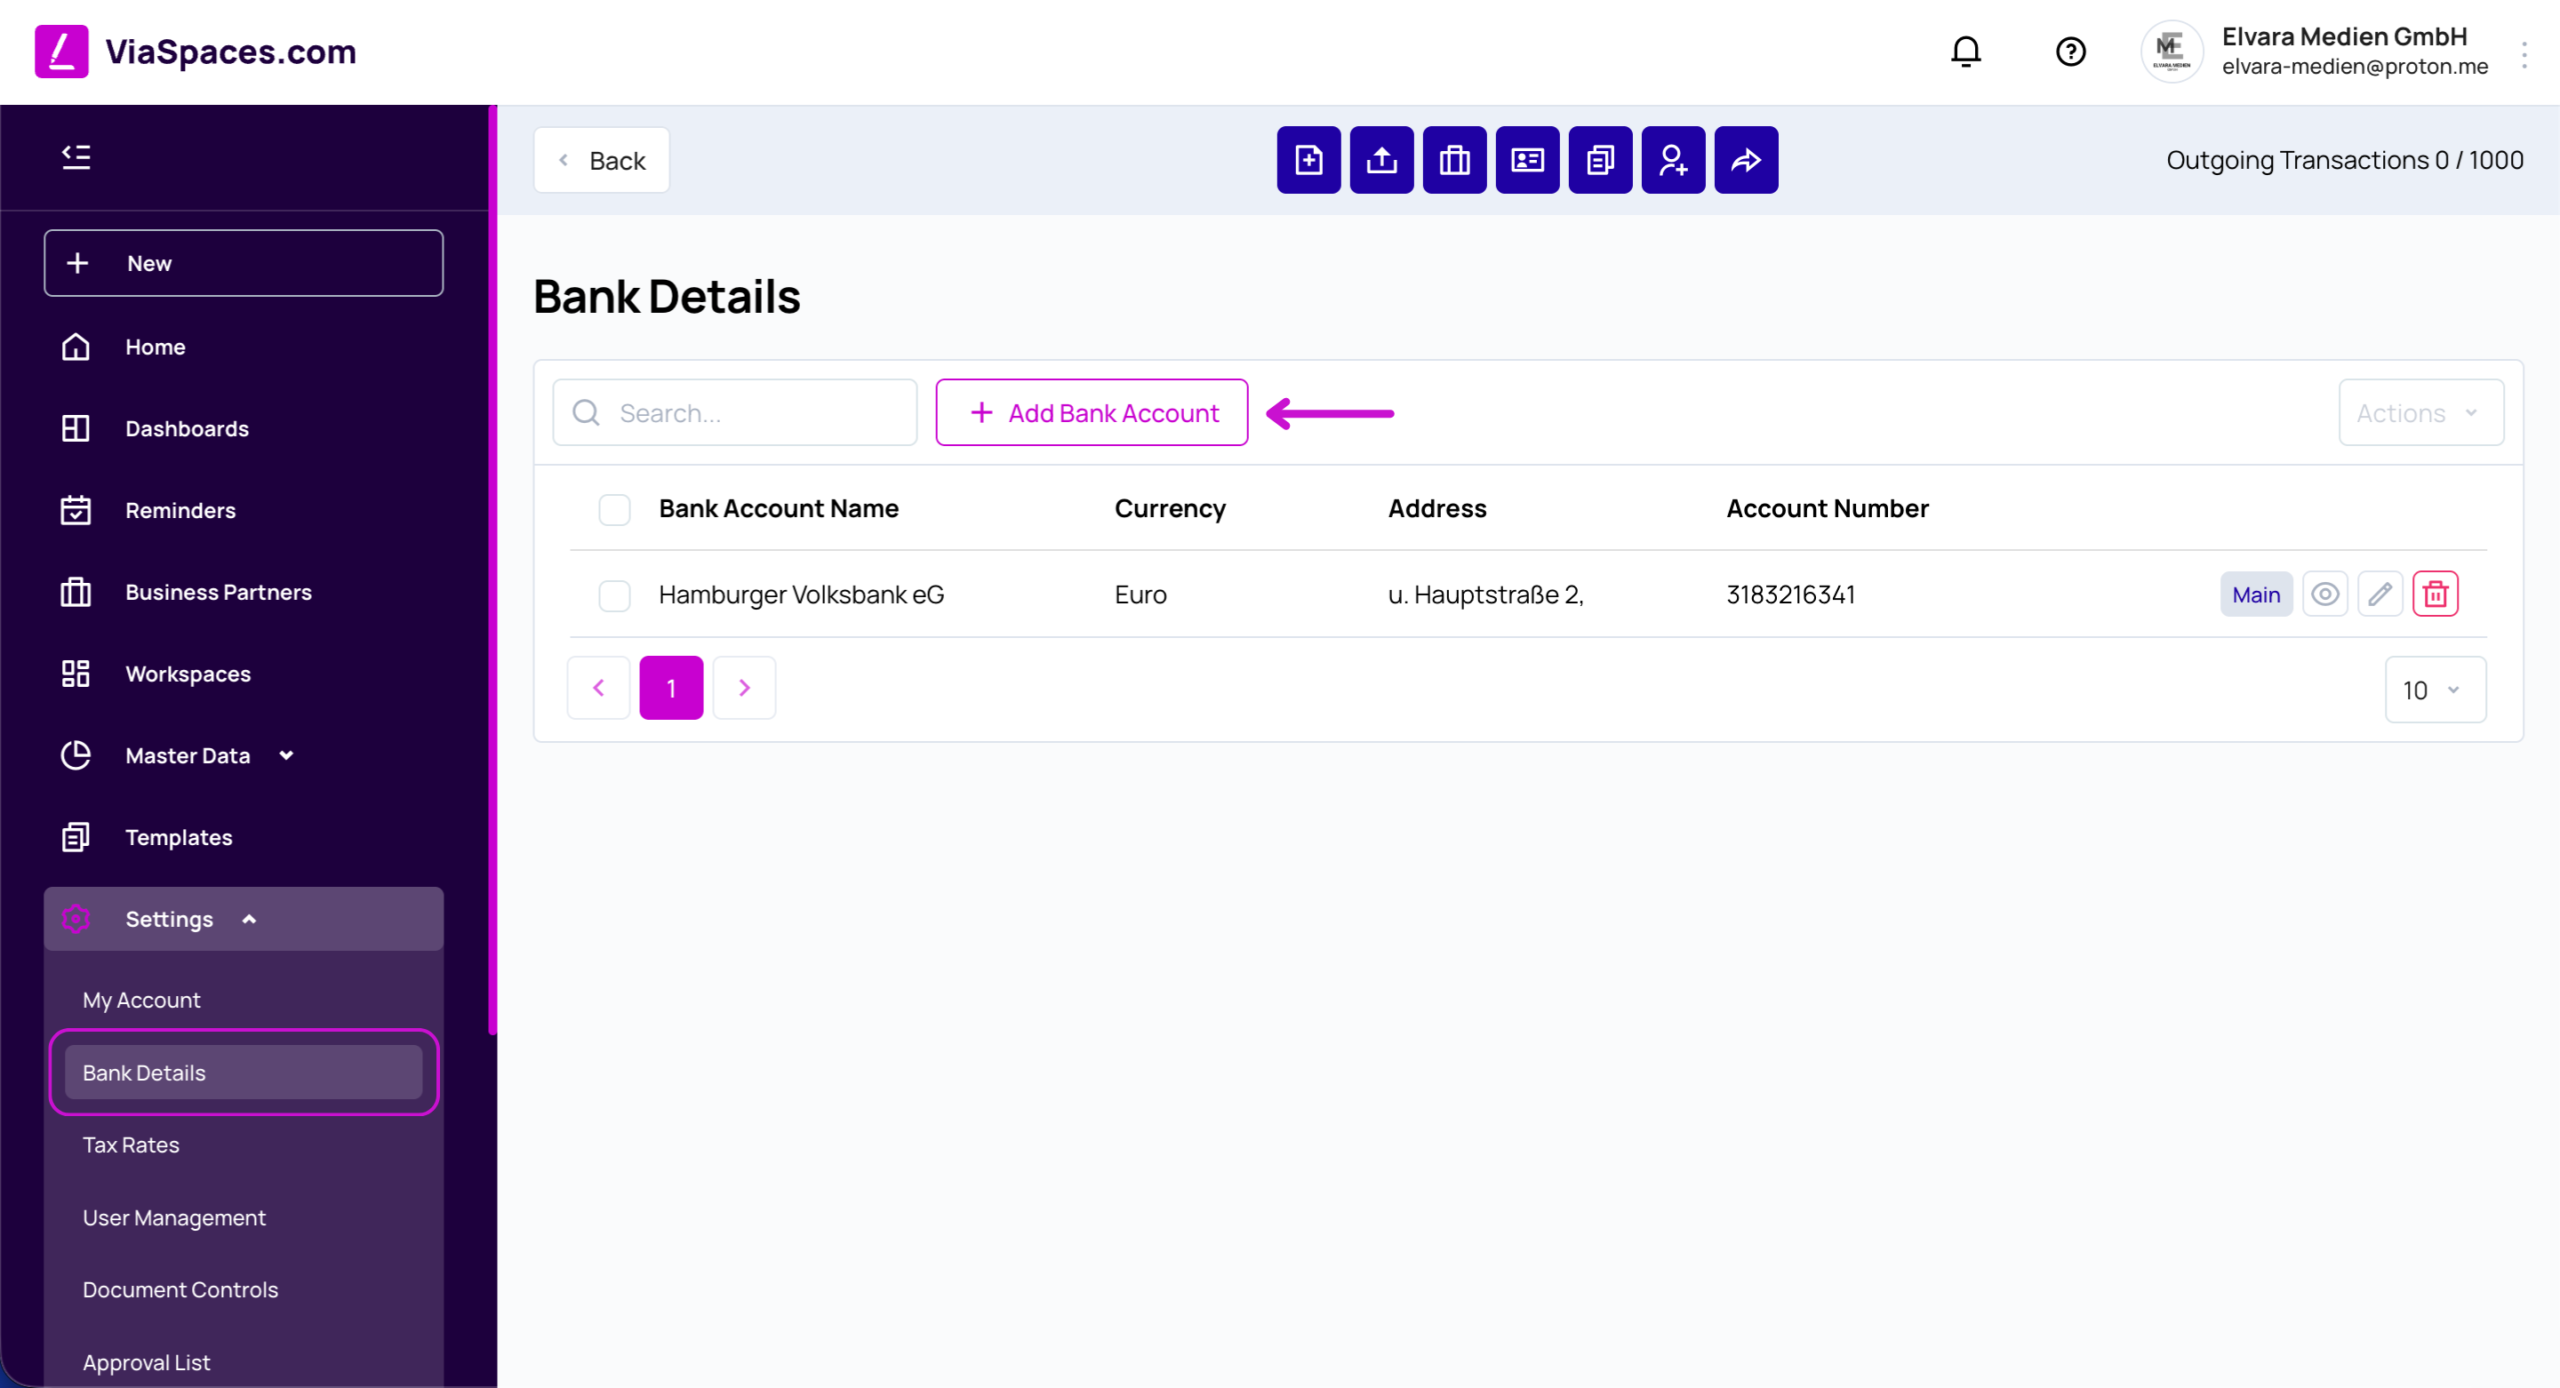
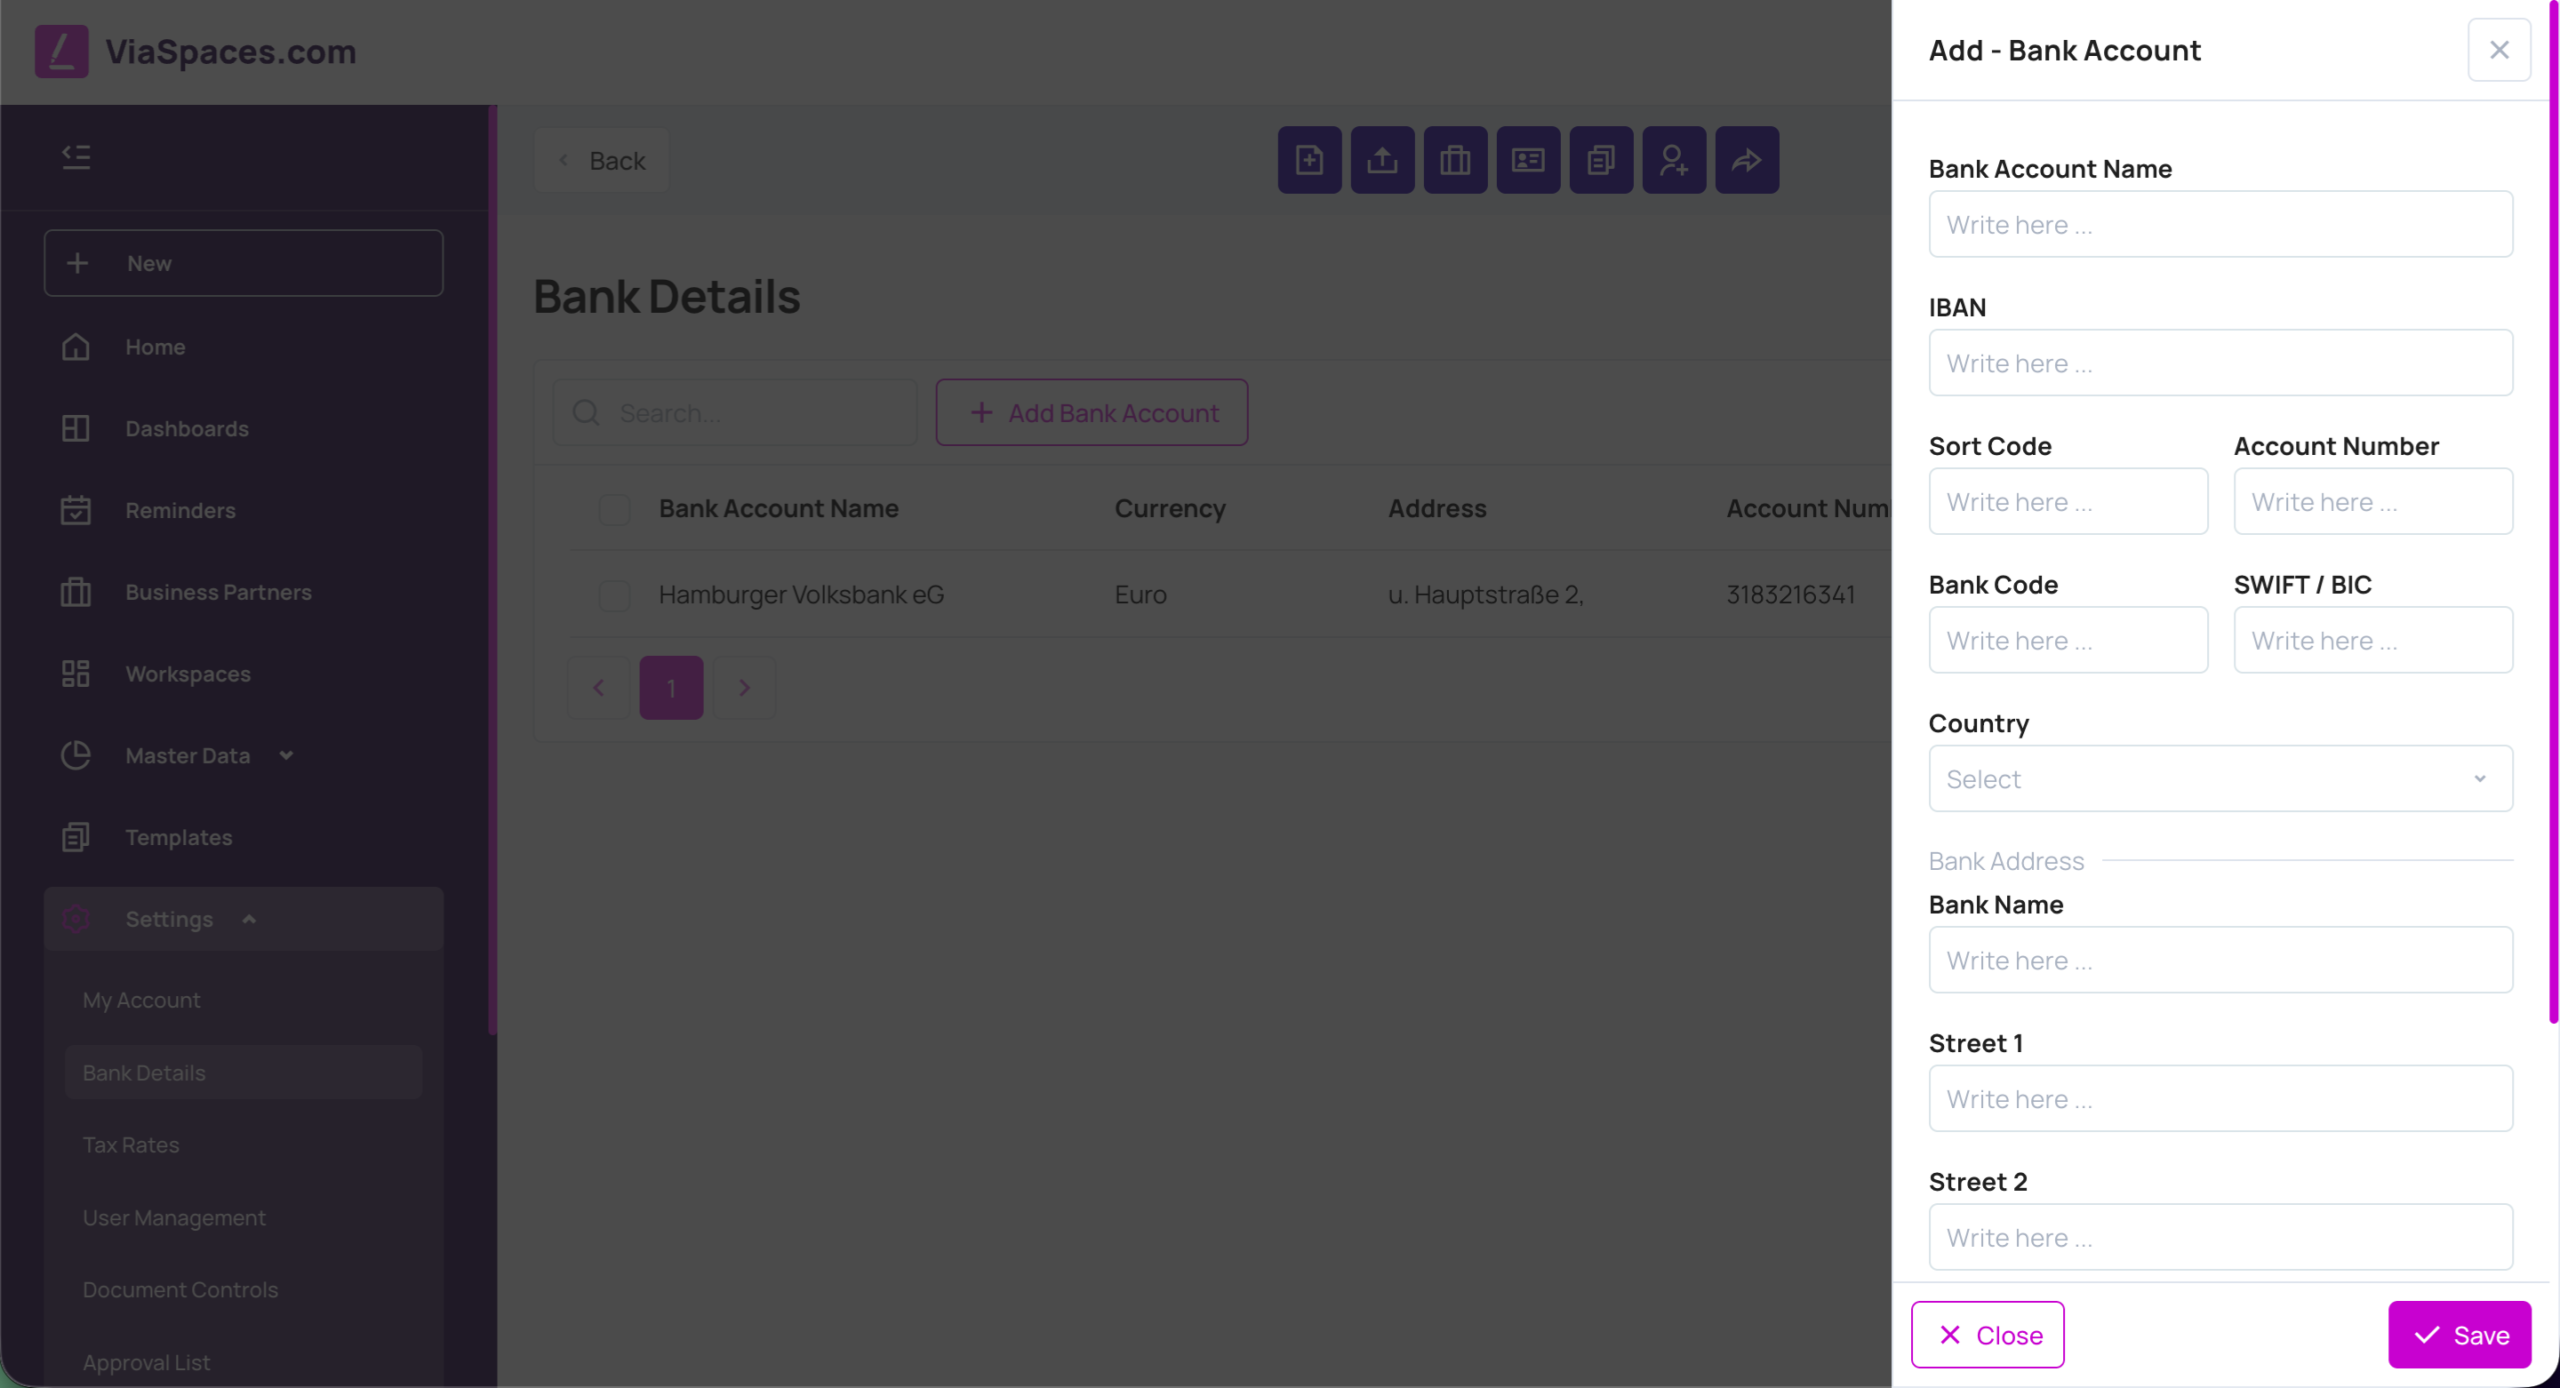
Bank Details holds the bank accounts shown on documents. Each entry records:
| Field | Value |
|---|---|
| Bank Account Name | Name of the account. |
| Currency | Currency of the account. |
| Account Number | Account number. |
| Address | Bank address. |
| Main | Marks the default account used on documents. |
Add an account with Add New.
Tax Rates #
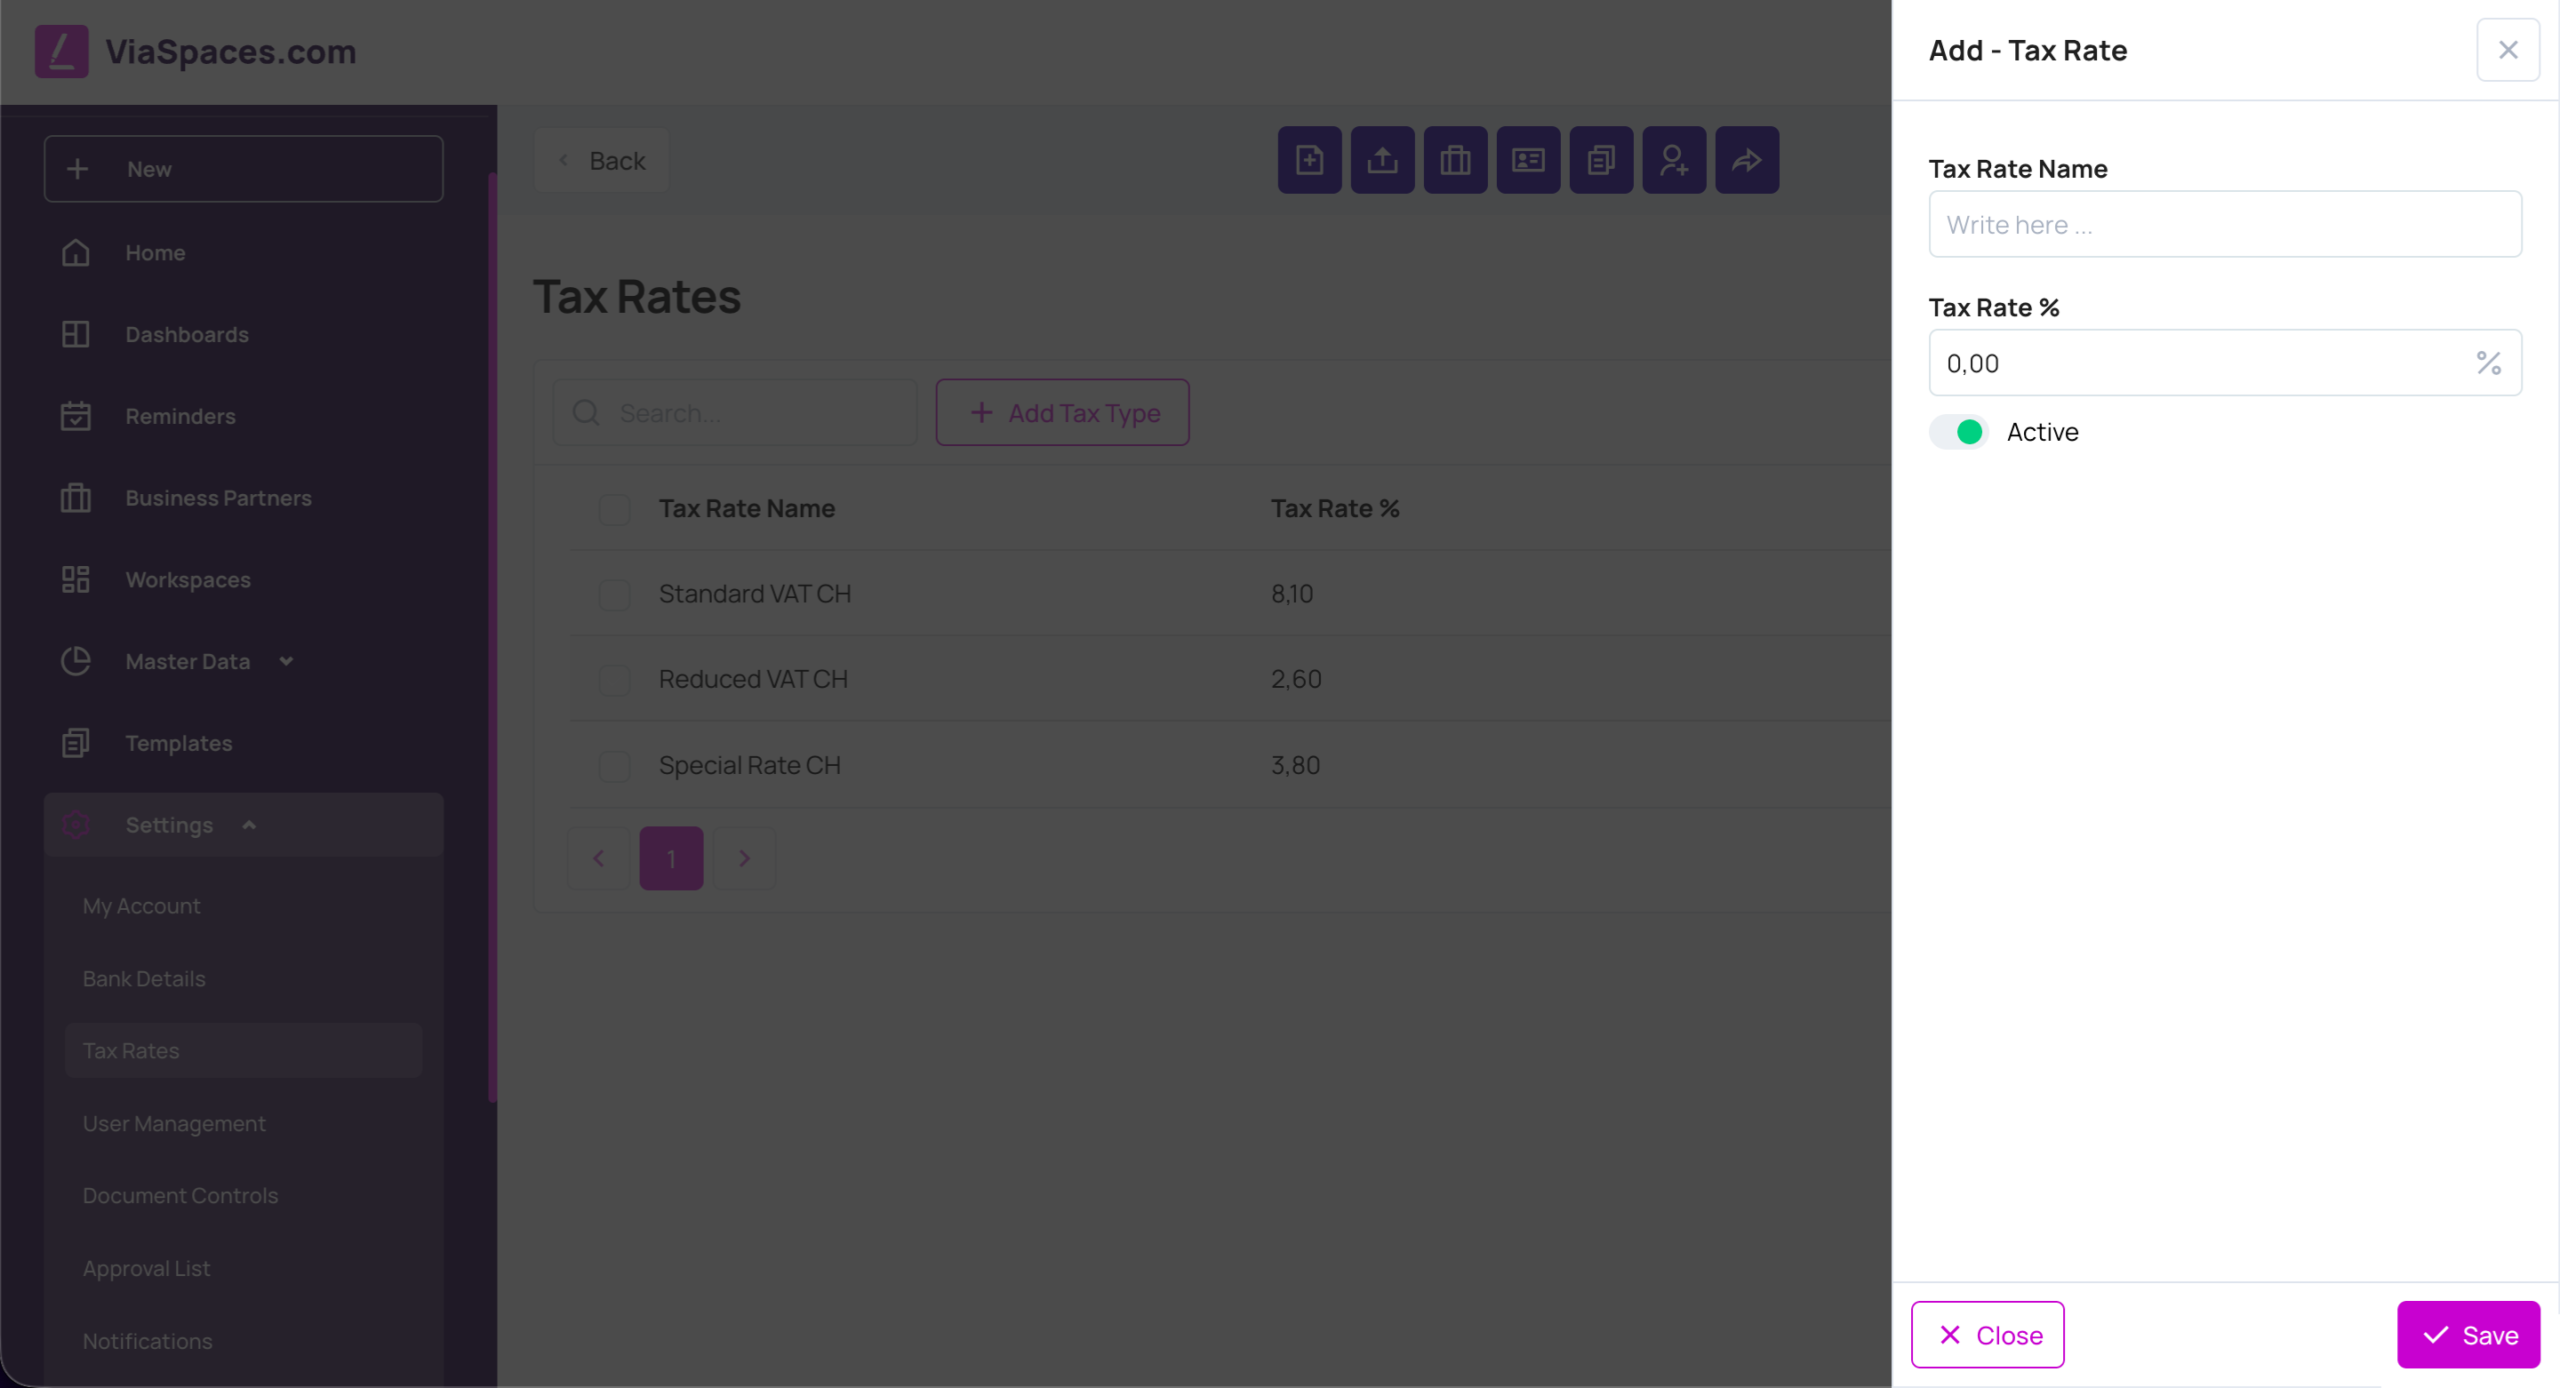
Tax Rates defines the tax percentages used in document calculations. Each rate has a Tax Rate Name, a Tax Rate percentage, and a status of Active or Disabled. A disabled rate is retained but not offered on new documents. Add a rate with Add New.
User Management #
User Management controls who can enter the account and what they can do. It has three tabs: Users, Groups, and Roles.
Users #
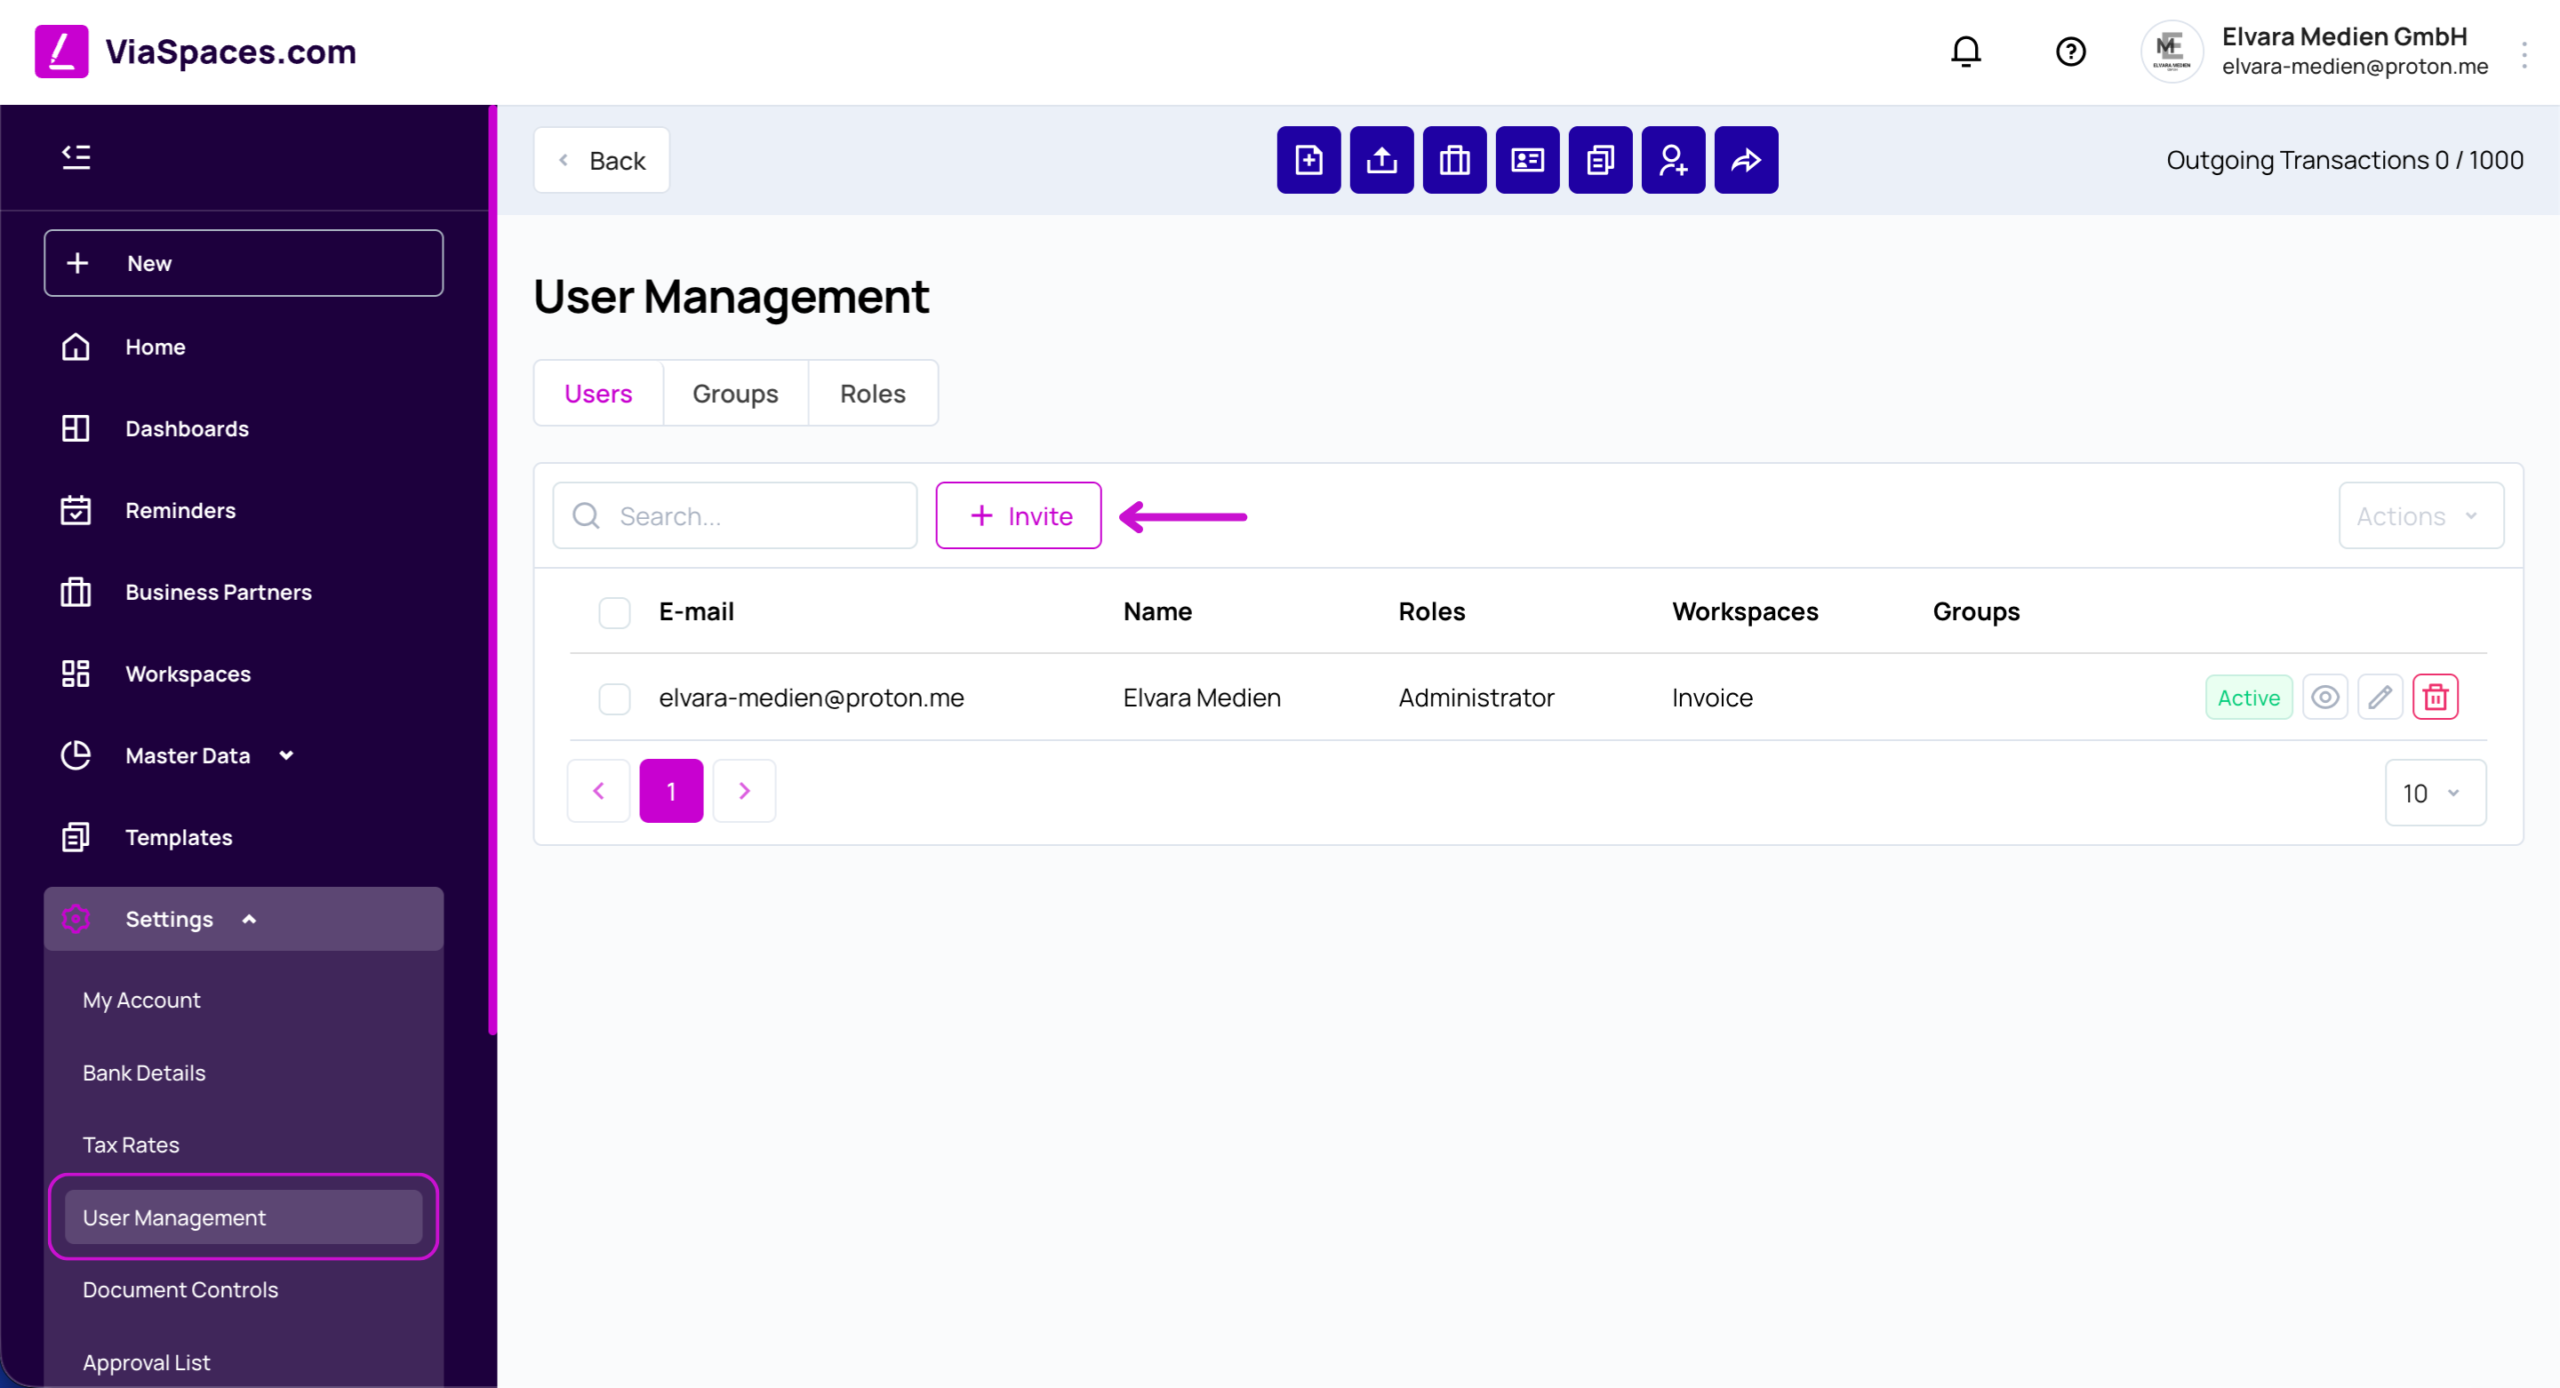
The Users tab lists users with E-mail, Name, Roles, Workspaces, Groups, and status (Active or Inactive). Each row can be viewed, edited, or deleted.
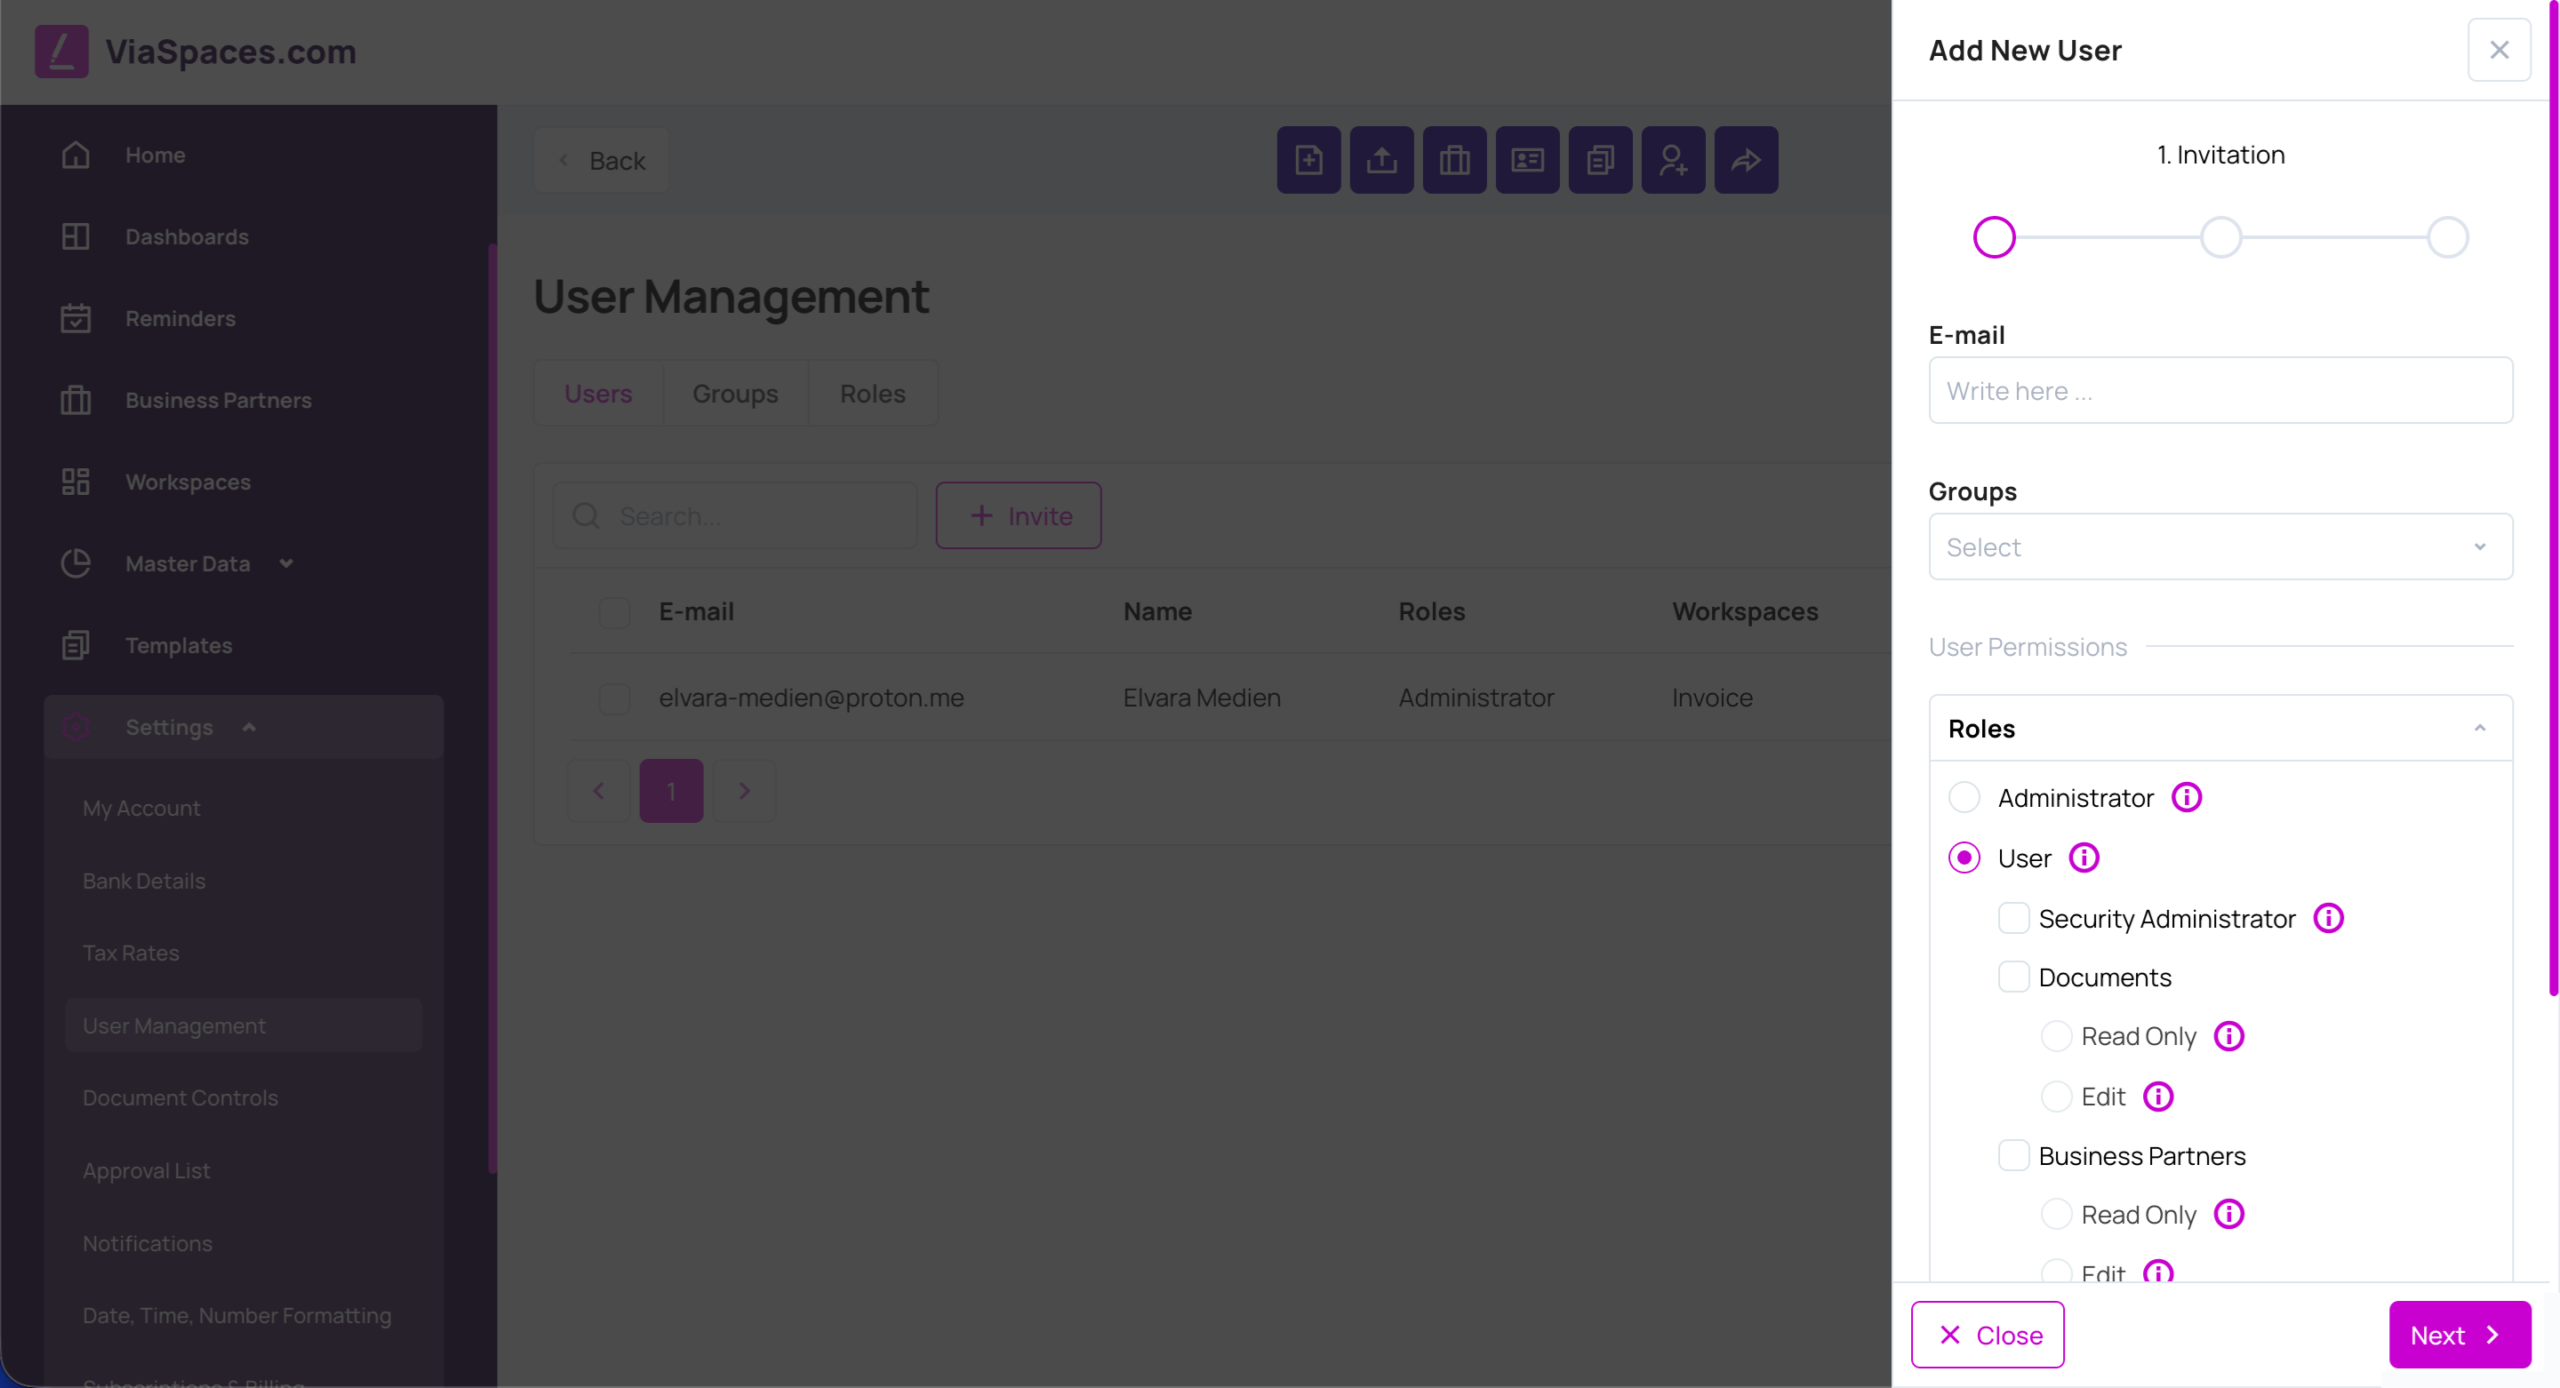
Add a user with Invite, a three-step flow:
- Invitation — enter the E-mail, select Groups, and set User Permissions (Roles).
- Complete the remaining steps.
- Send the invitation. The user appears with an invited status until accepted.
Groups #
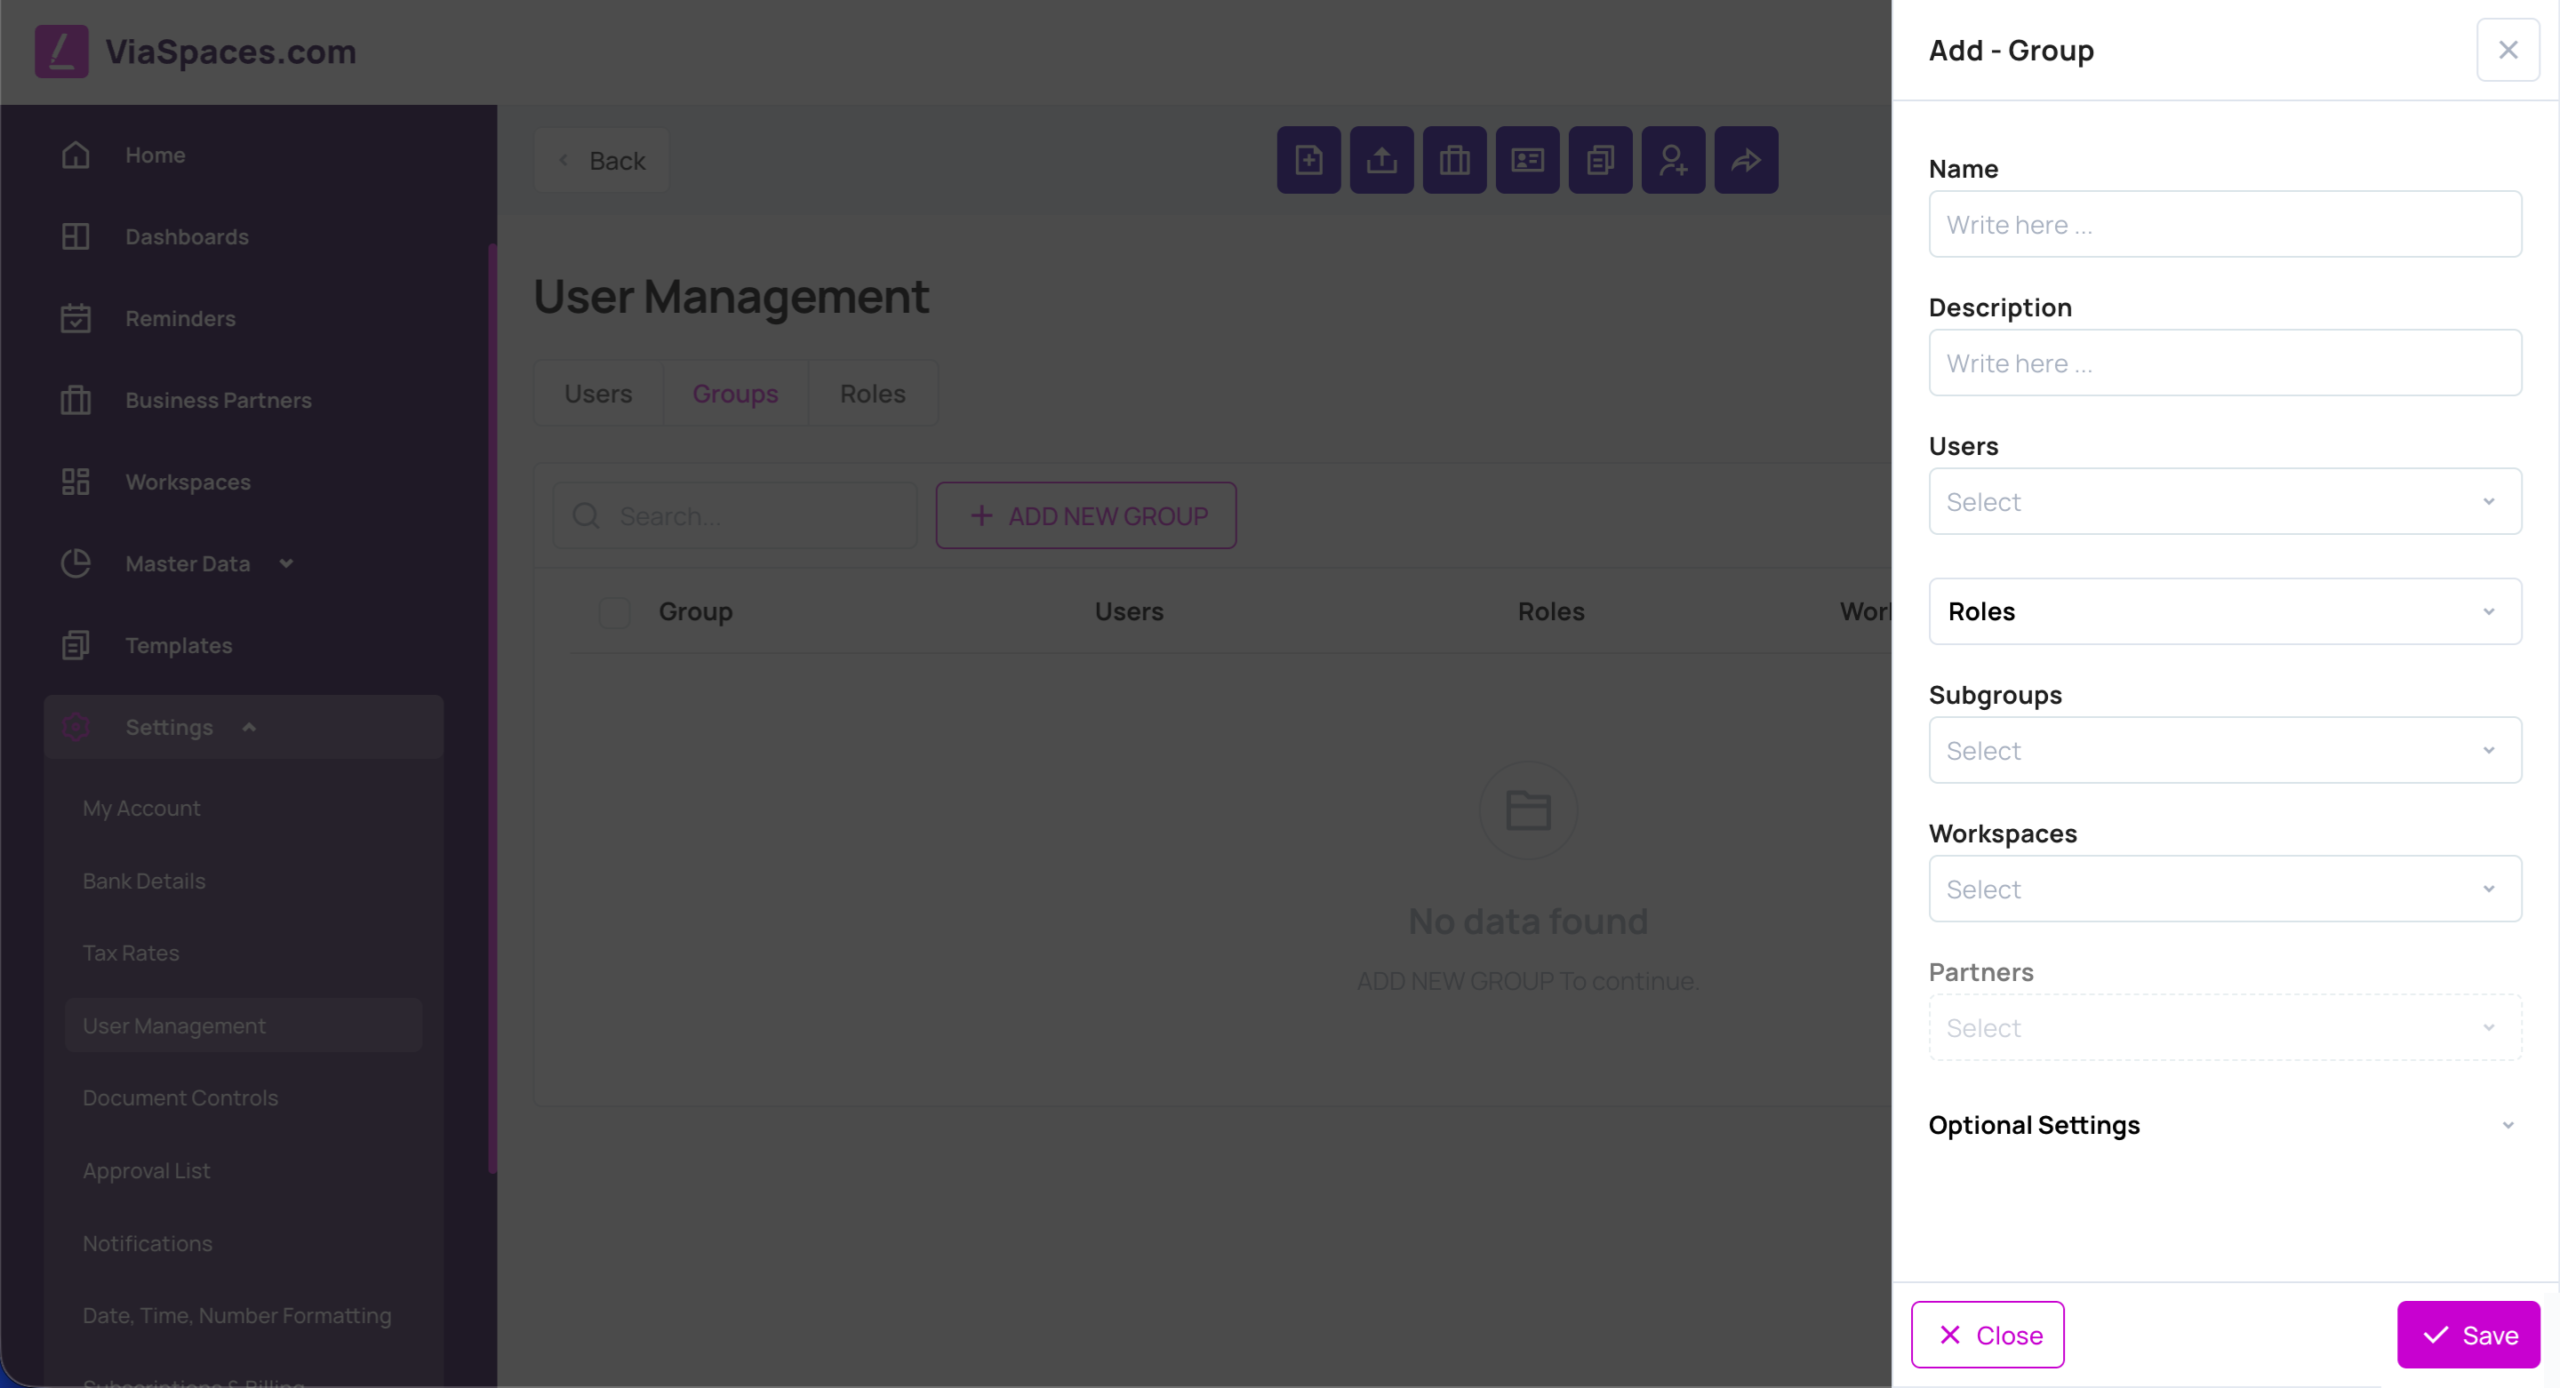
The Groups tab lists user groups with Group name, Users count, Roles, and Workspaces. Add a group with Add New Group.
| Field | Value |
|---|---|
| Name | Group name. |
| Description | Group description. |
| Users | Members of the group. |
| Roles | Roles granted to the group. |
| Subgroups | Groups nested inside this group. |
| Workspaces | Workspaces assigned to the group. |
| Partners | Partners assigned to the group. |
| Optional Settings | Custom permission filters — Permission’s Filter Name, Permission Object, and a Predicate for field-level access. |
Roles #
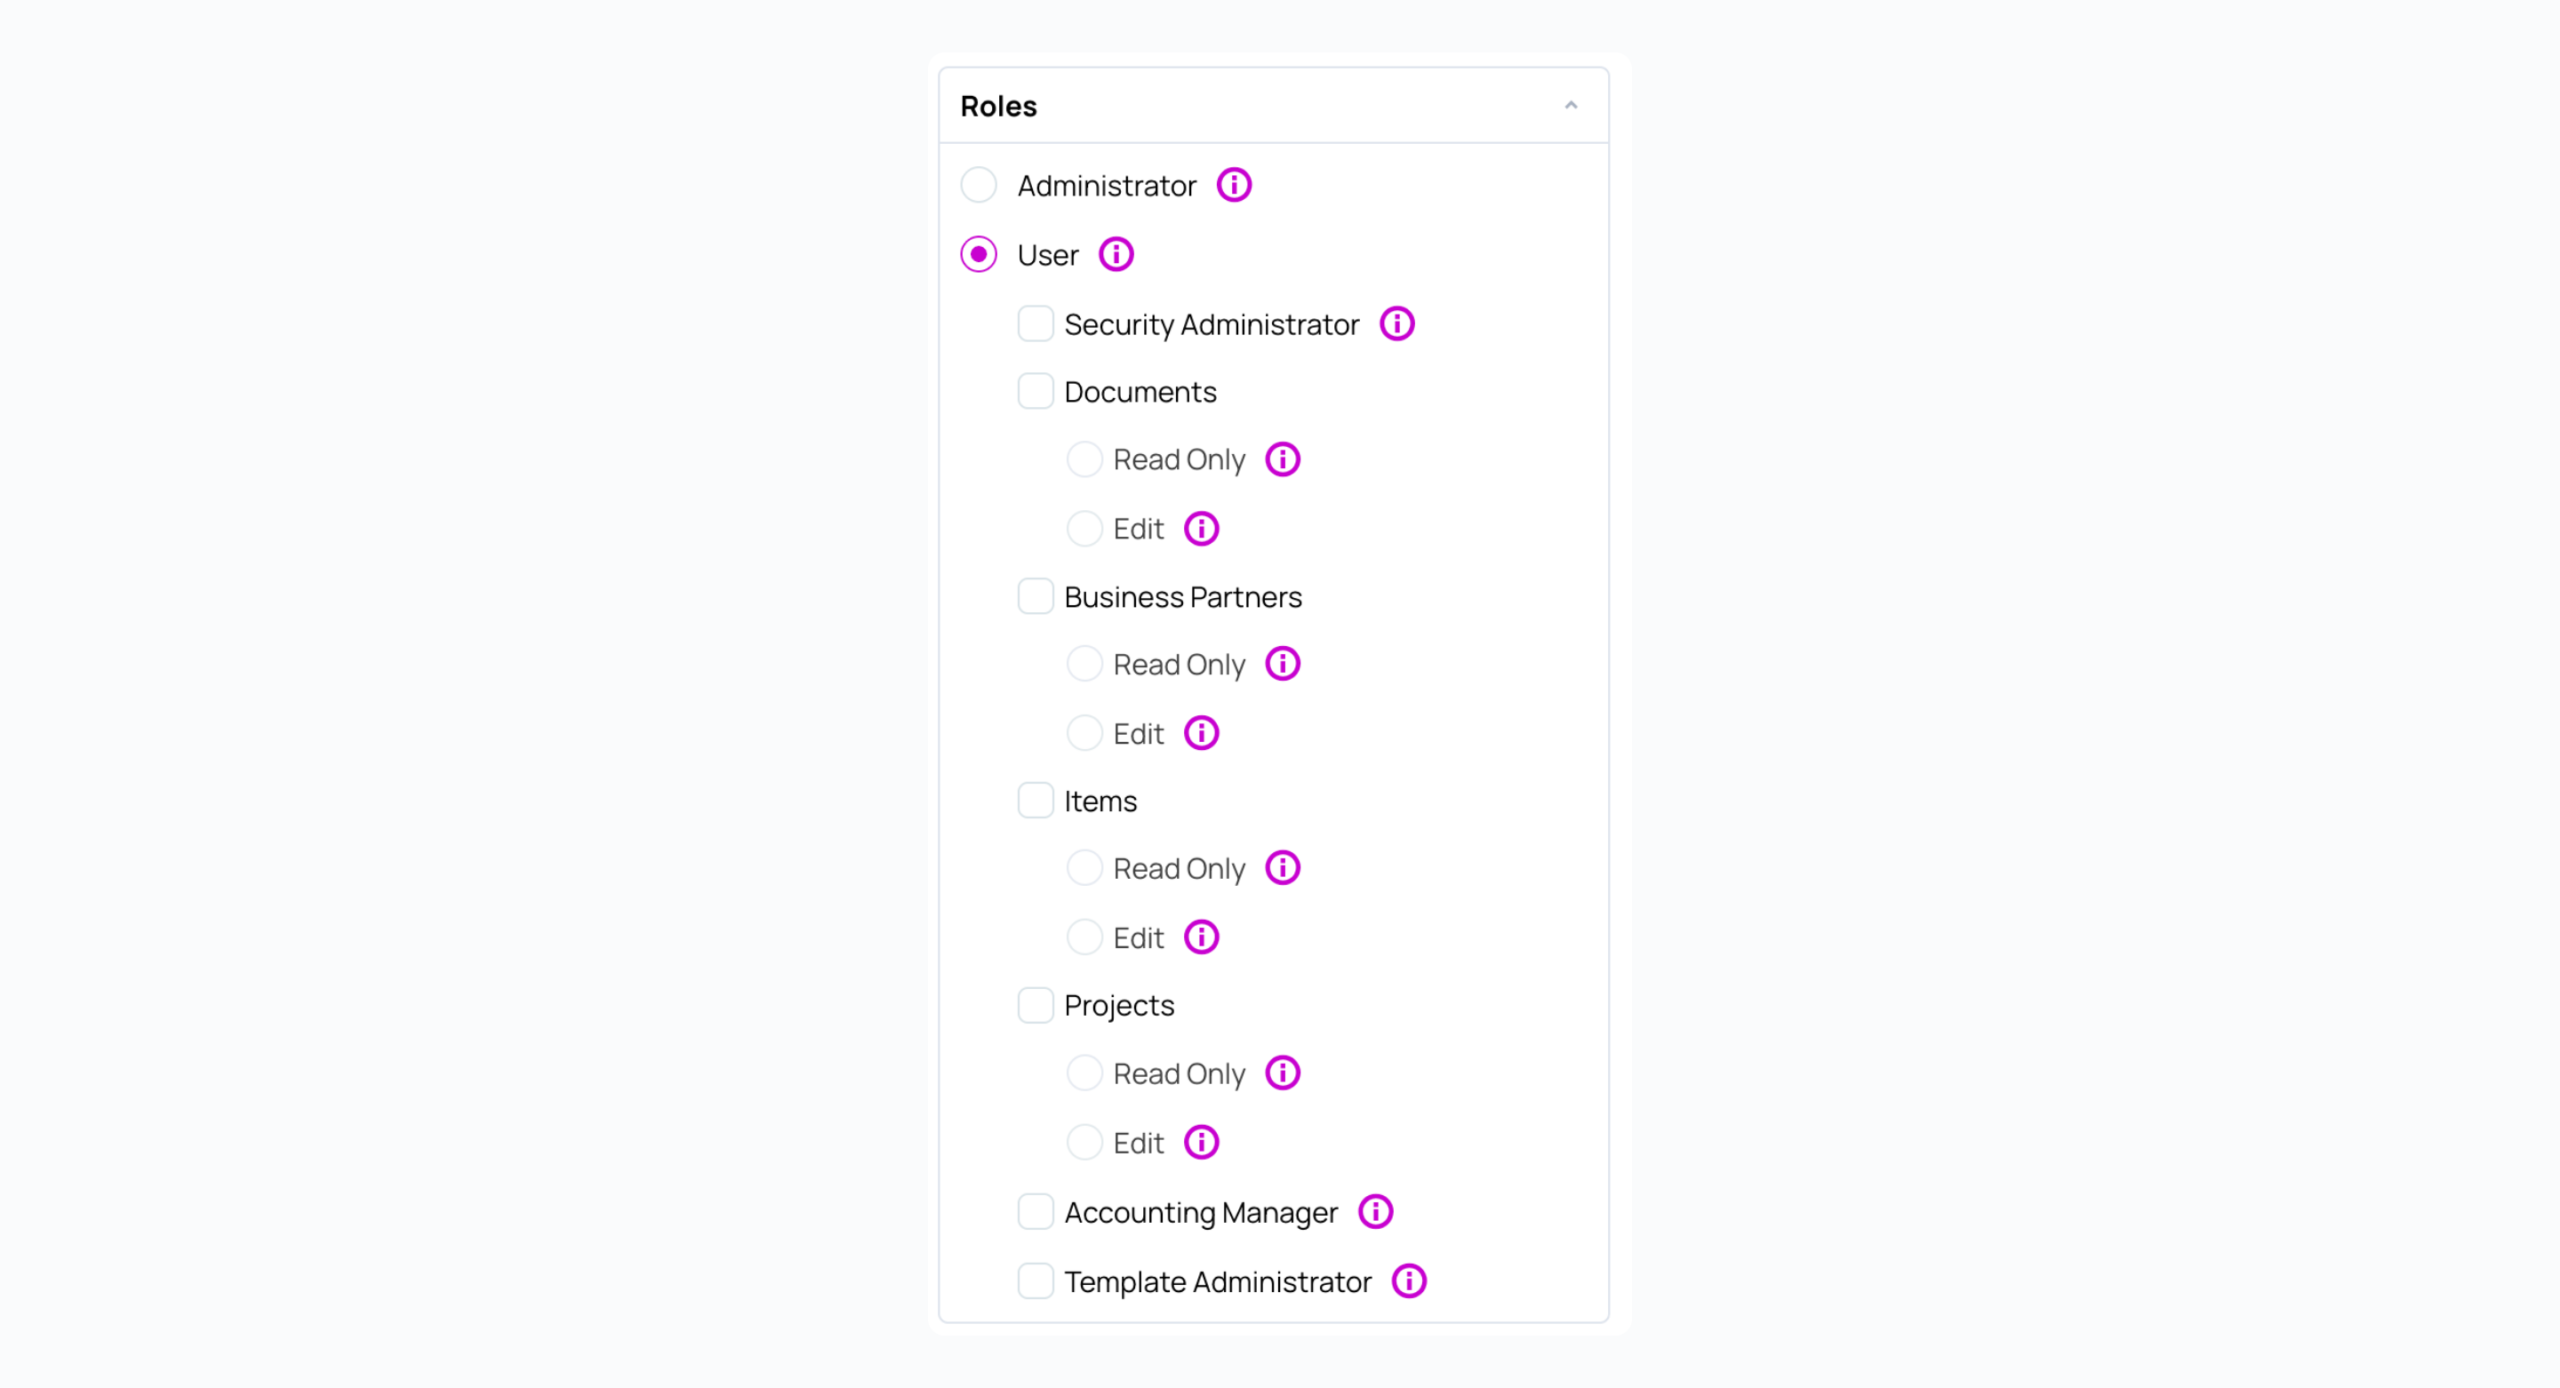
The Roles tab lists the account’s roles with the number of users and groups holding each. Roles are assigned to users and groups here.
Note: For the meaning of each role, see the Users and Access Rights page.
Document Controls #
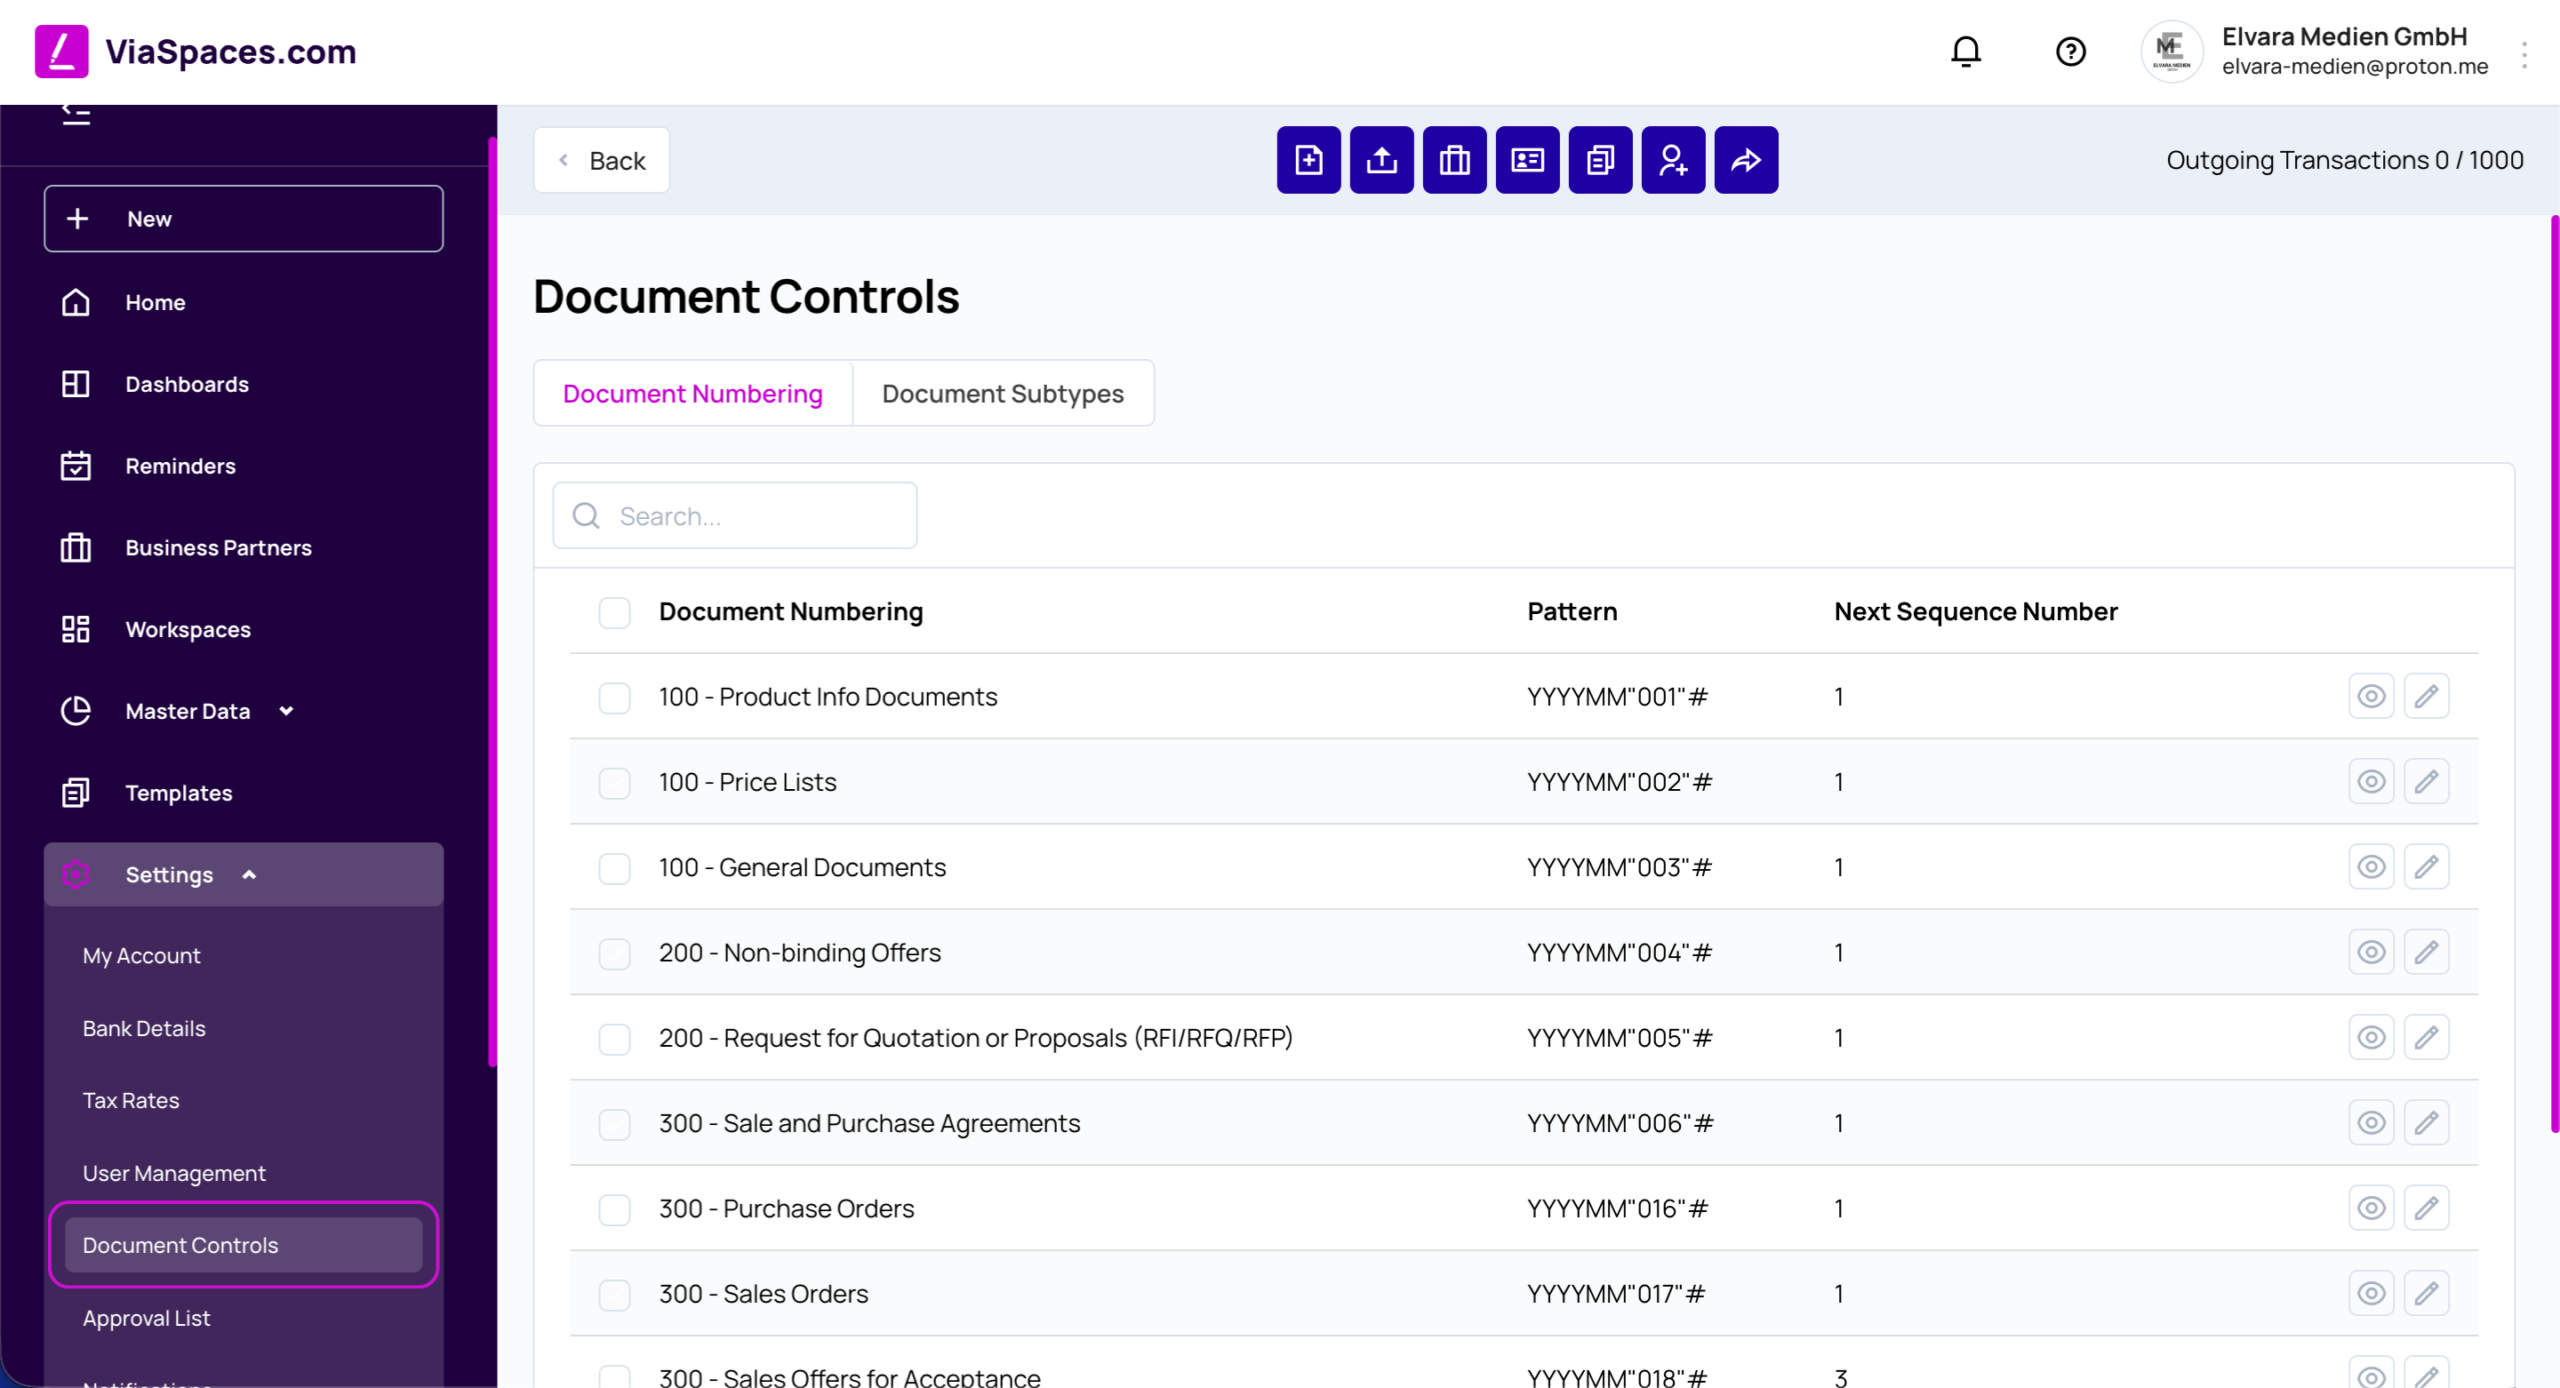
Document Controls defines document rules across the account. It has two tabs: Document Numbering and Document Subtypes.
Document Numbering #
Document Numbering sets the number format for each document category. Categories are predefined by purpose (for example, 100 – Product Info Documents, 300 – Purchase Orders, 500 – Billing and Invoicing). Each row shows the Pattern and the Next Sequence Number.
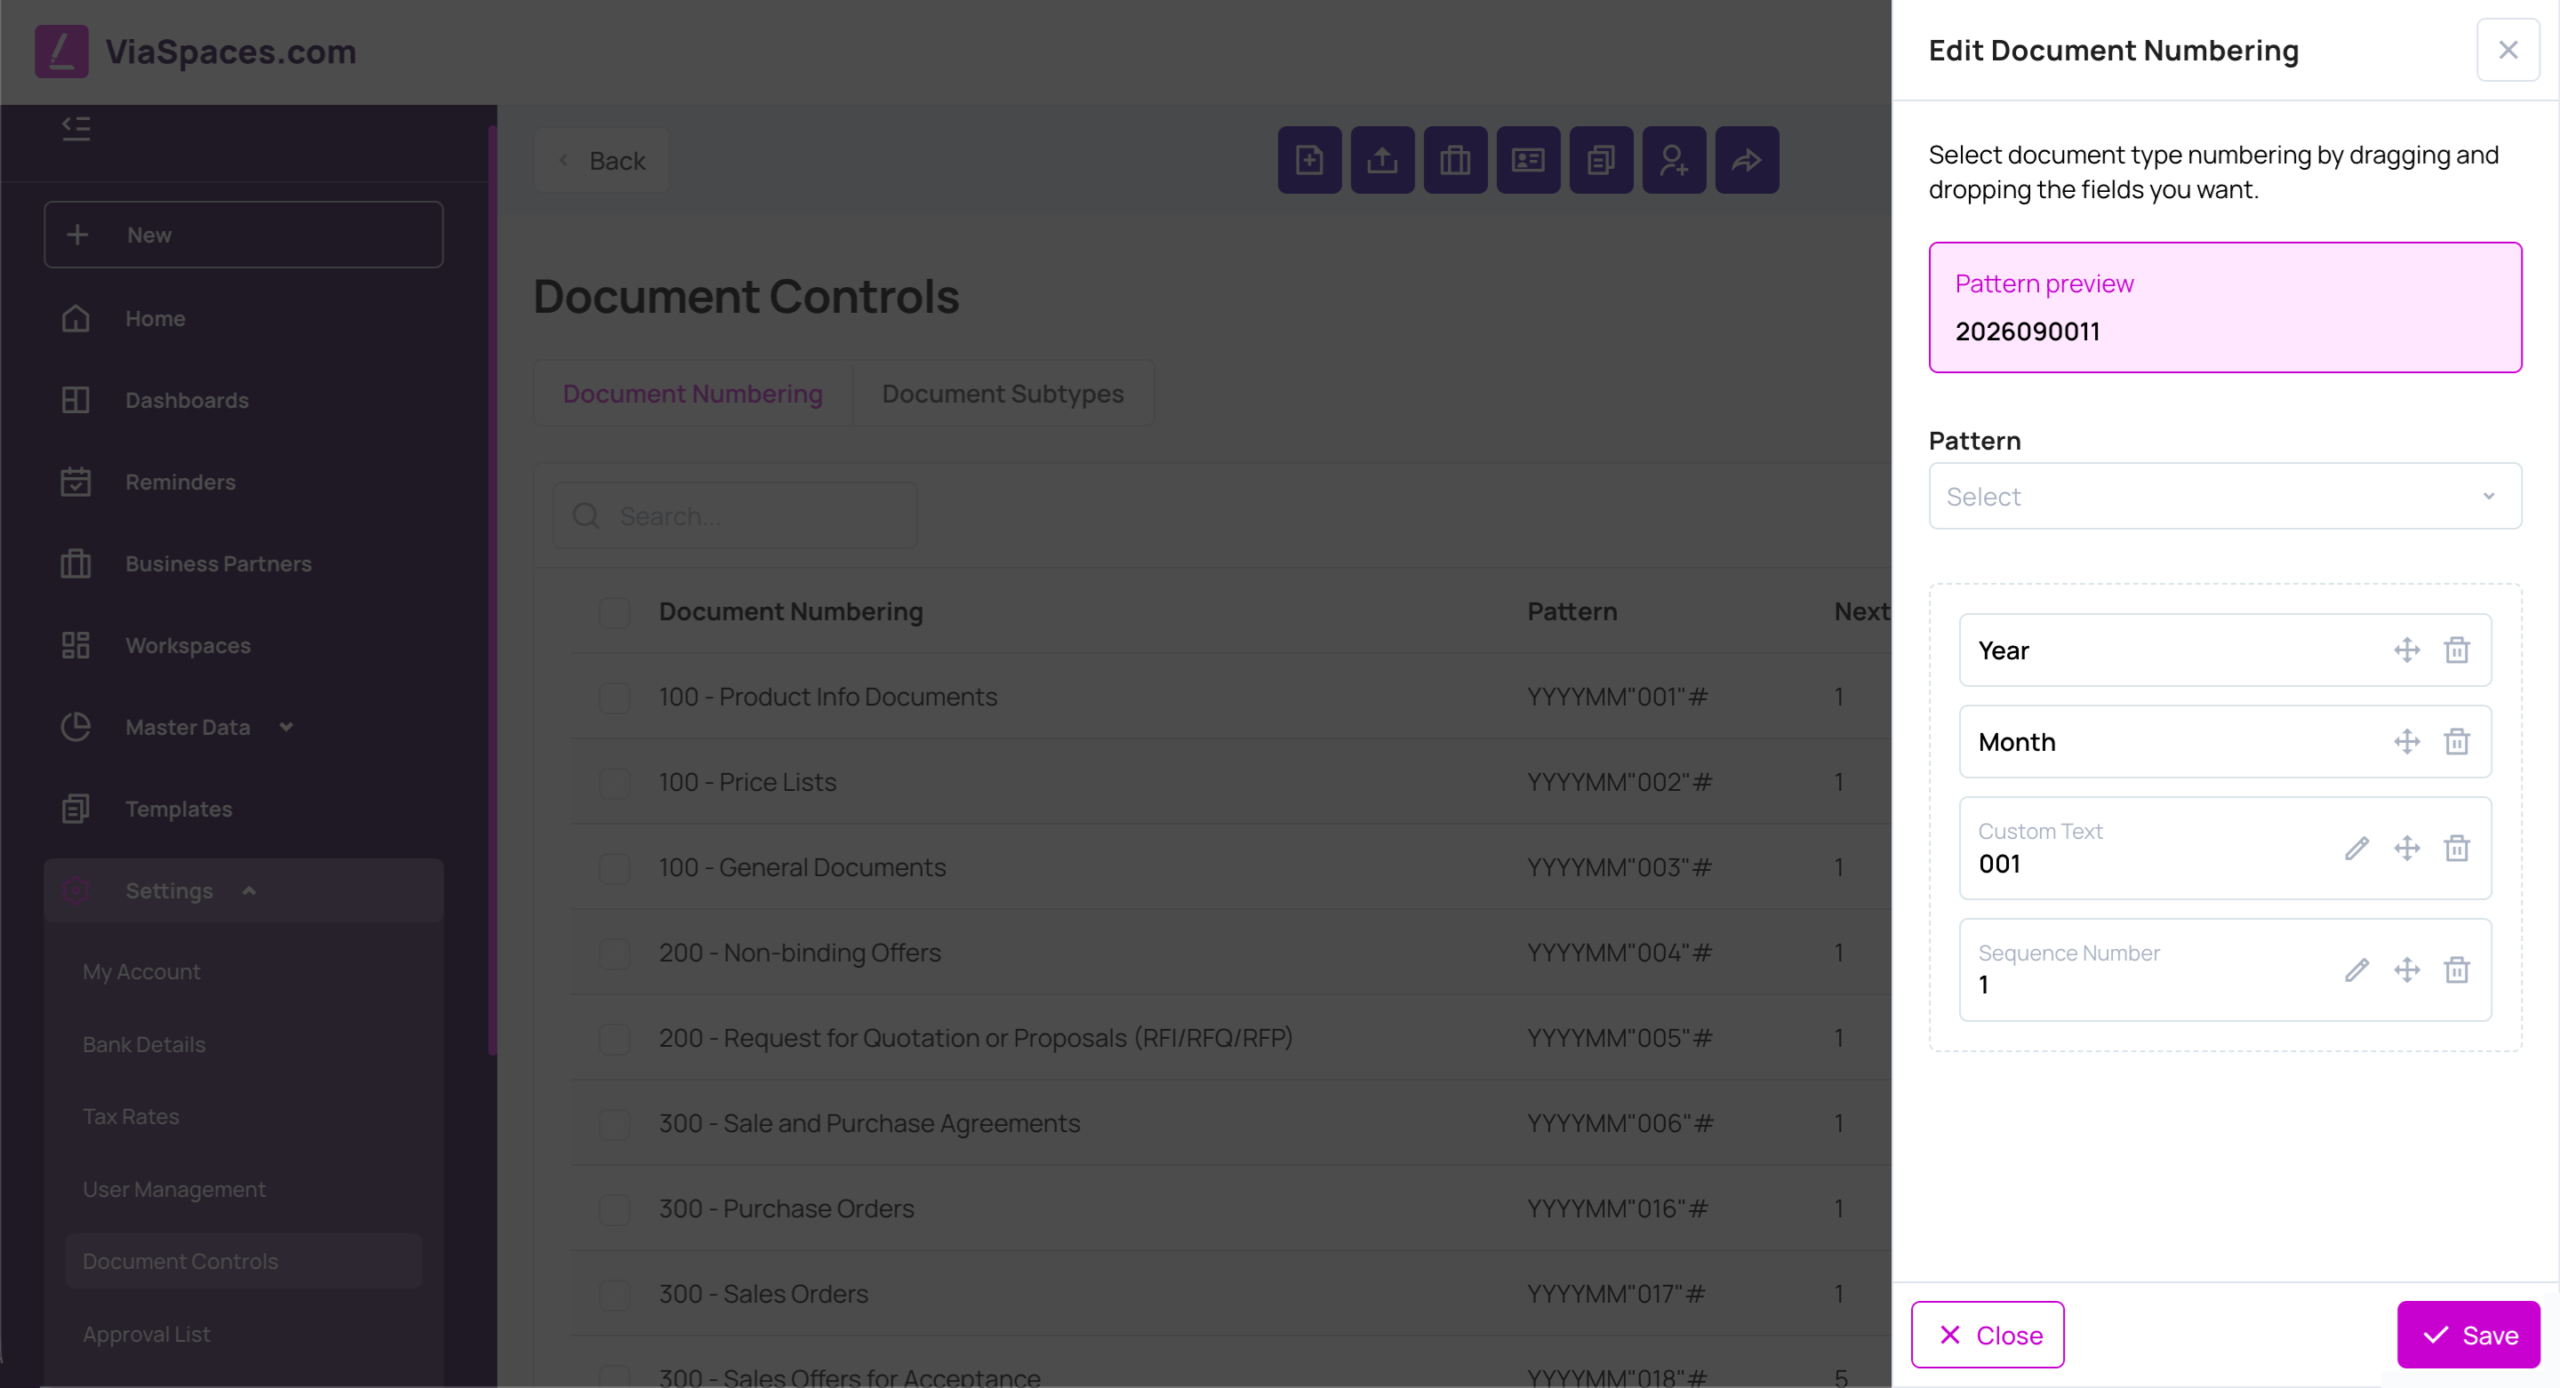
Edit a pattern by dragging and dropping fields:
| Field | Purpose |
|---|---|
| Year | Inserts the year. |
| Month | Inserts the month. |
| Custom Text | Inserts fixed text. |
| Sequence Number | Inserts the incrementing number. |
A Pattern preview shows the resulting number as fields are arranged.
Document Subtypes #
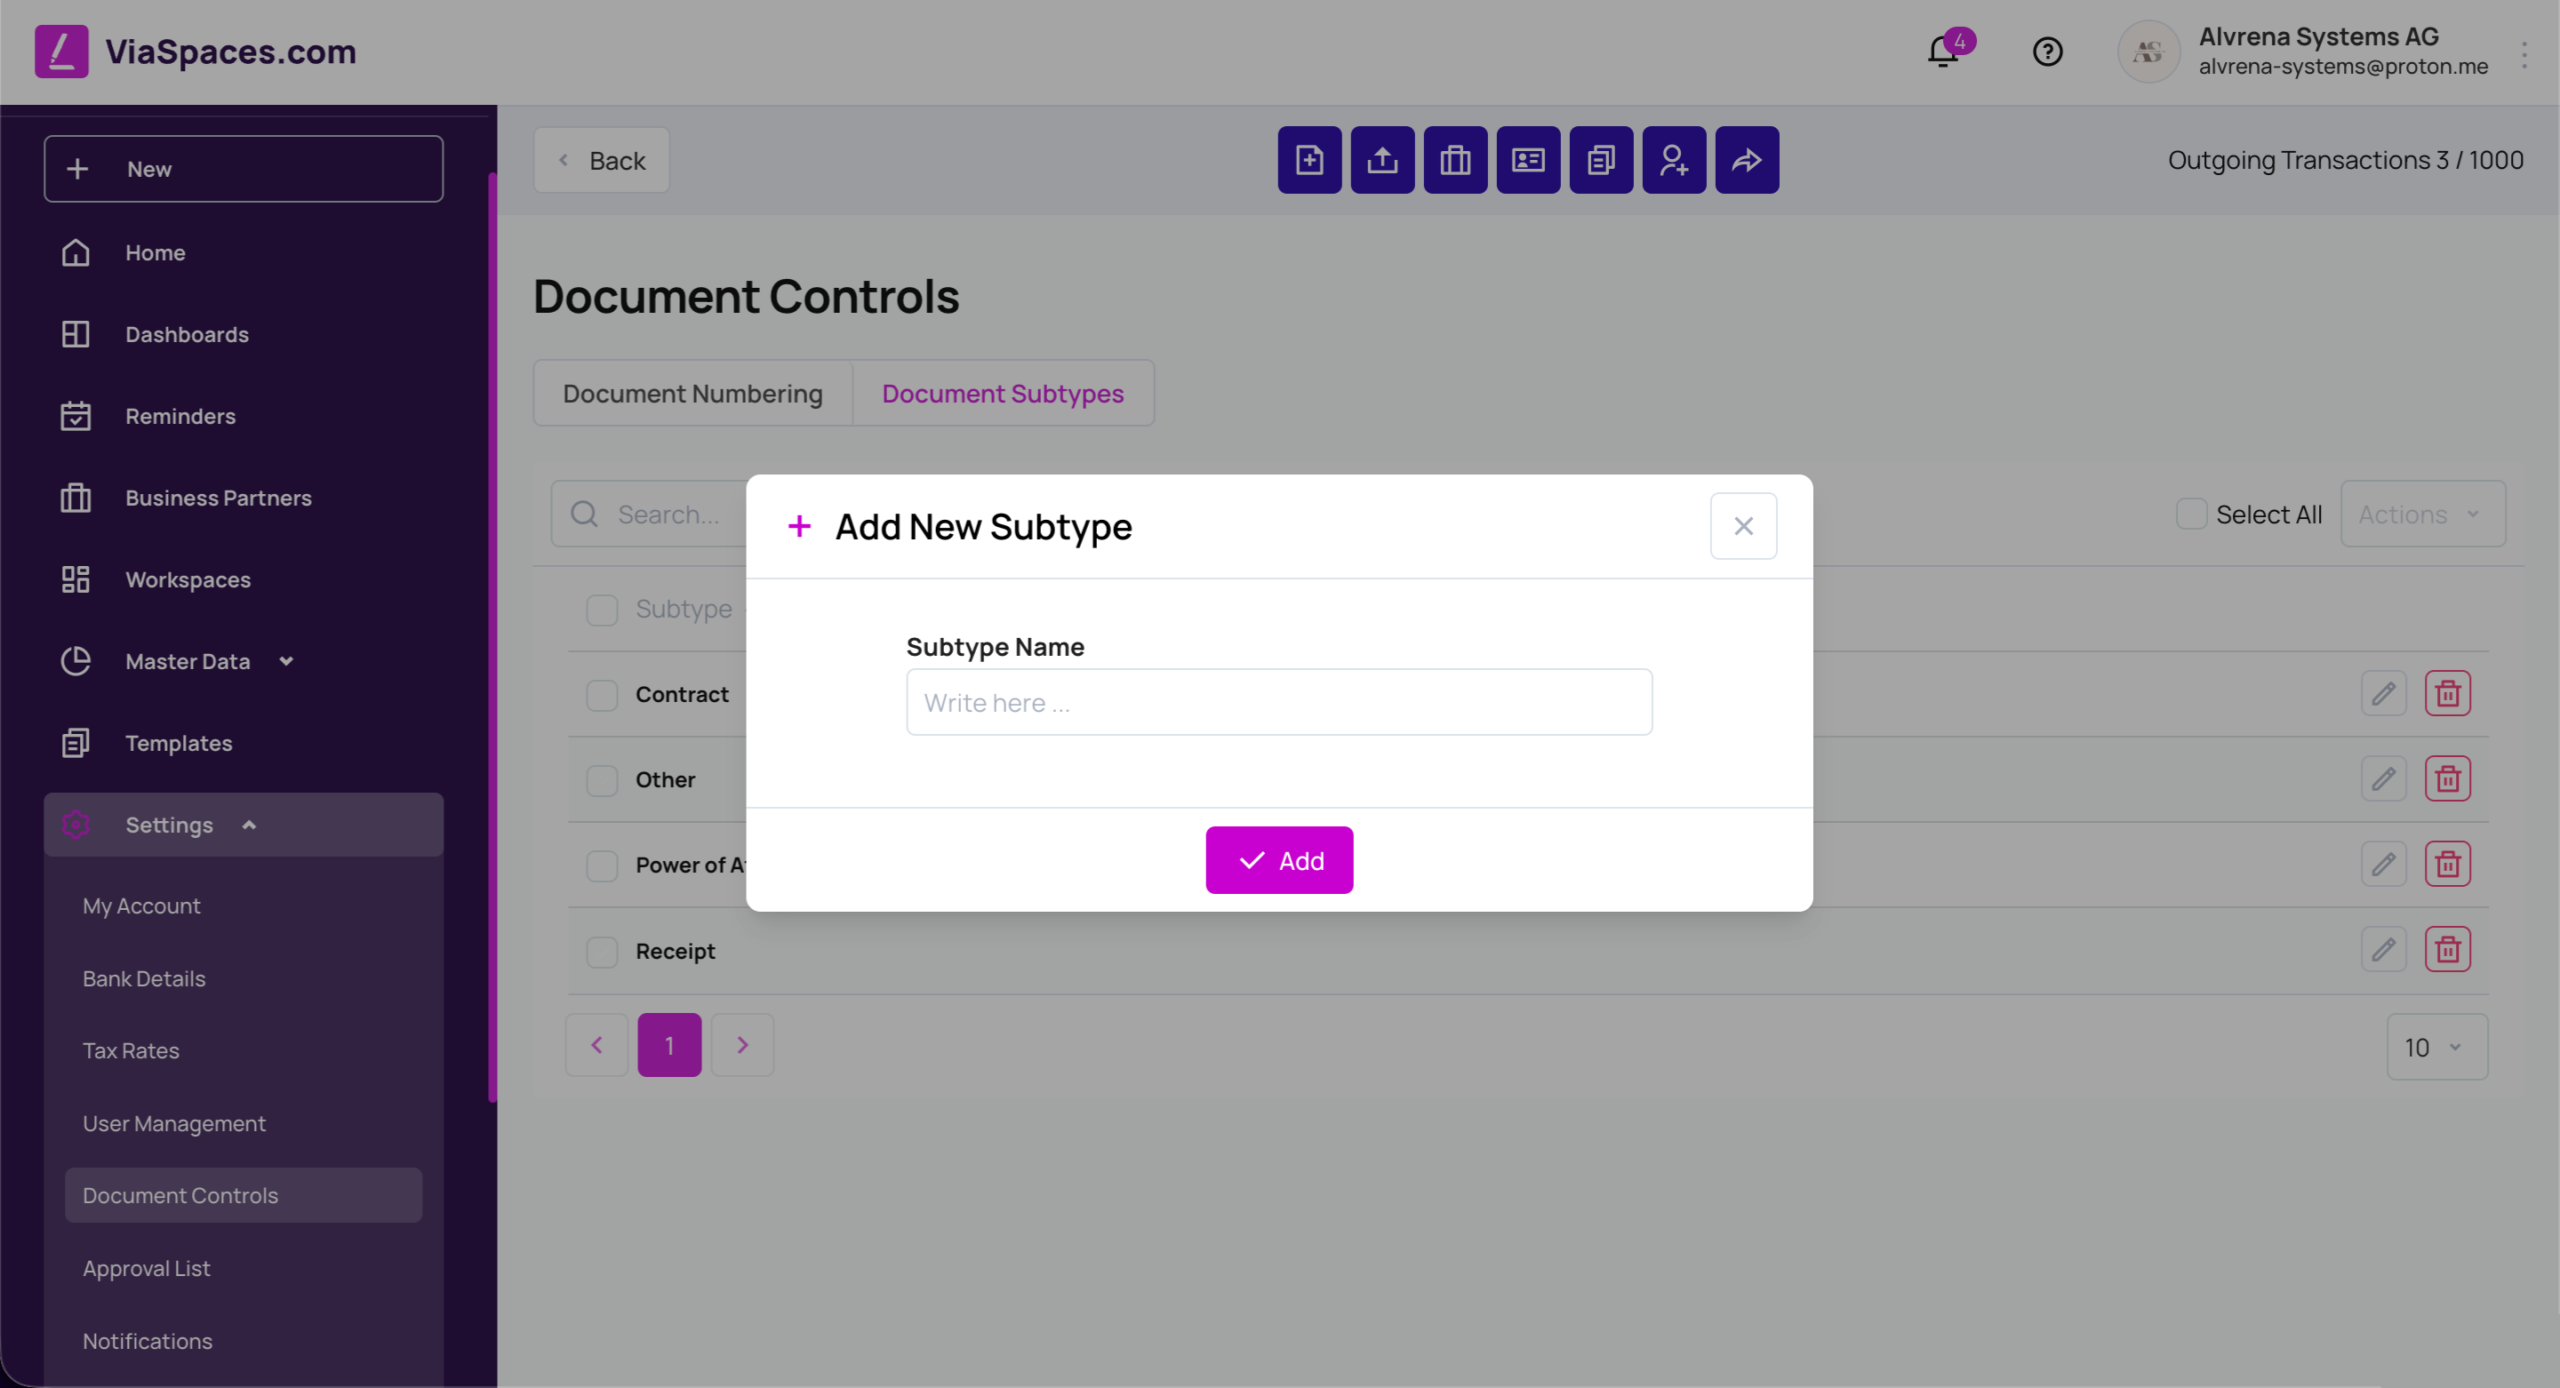
Document Subtypes defines subtypes for uploaded documents (for example, Other, Invoice). Add a subtype with Add new.
Approval List #
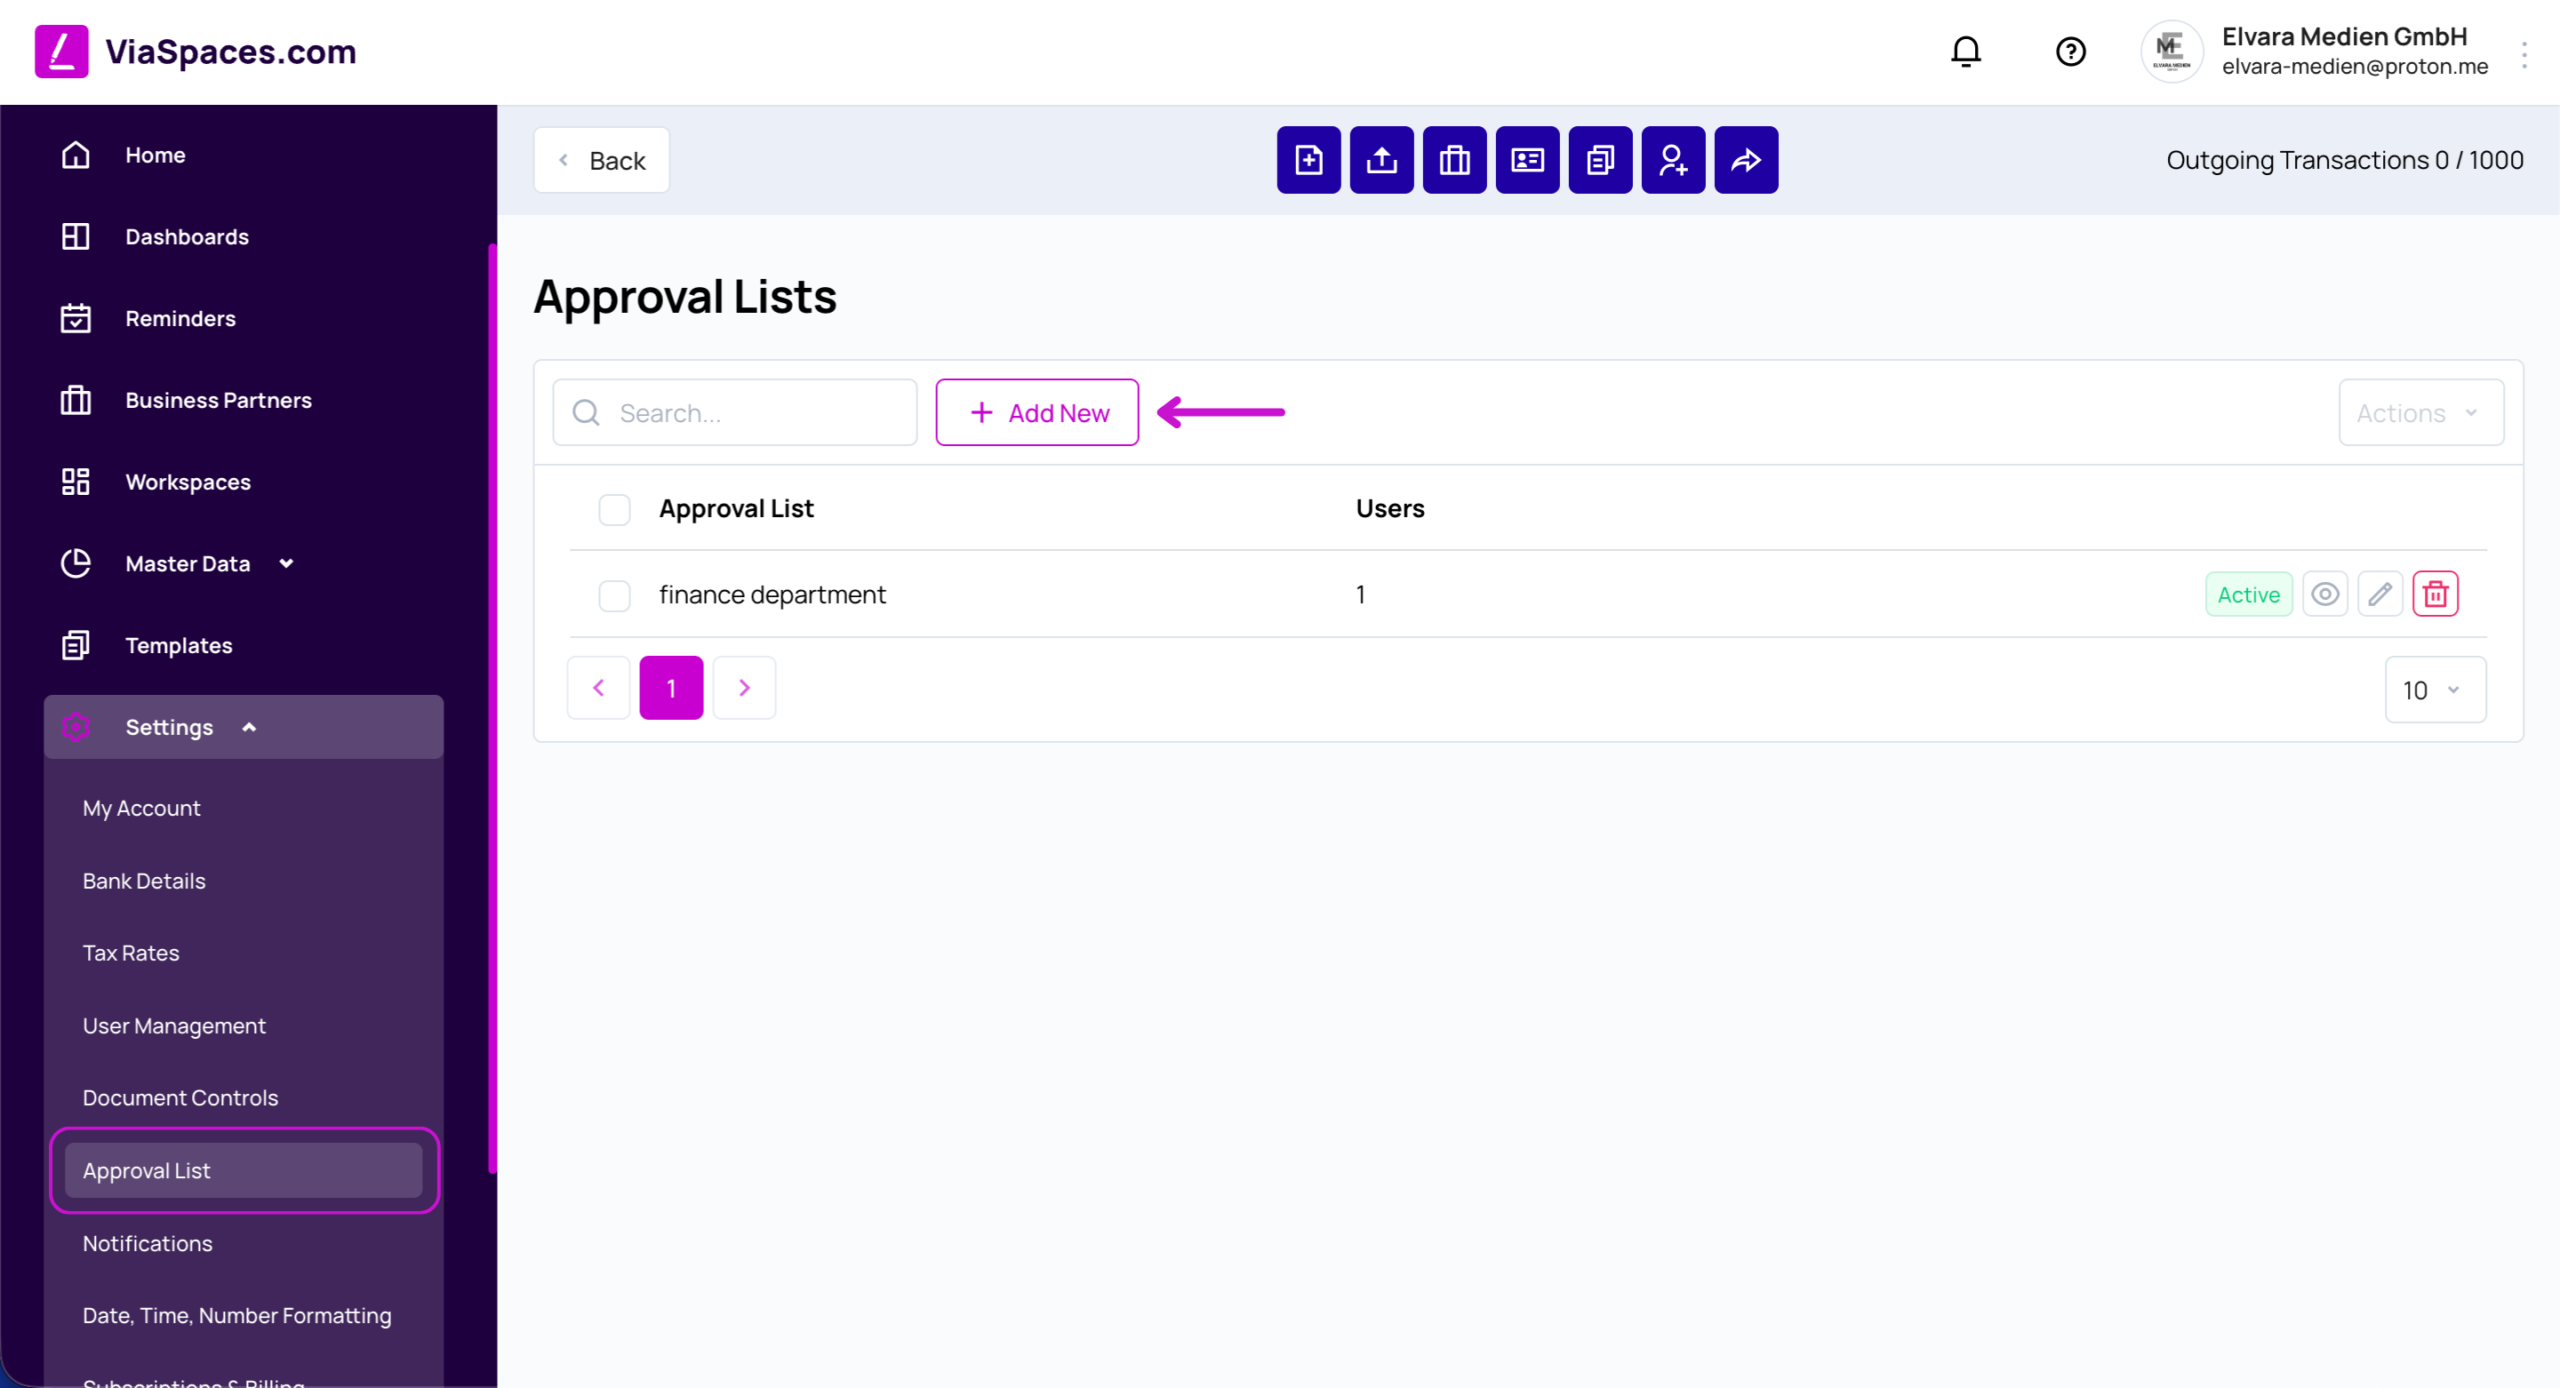
An Approval List is a reusable, named group of approvers applied to documents. Each list has an Approval List Name, a Users count, and a status of Active or Inactive. Inactive lists are not offered when approvers are set on a document.
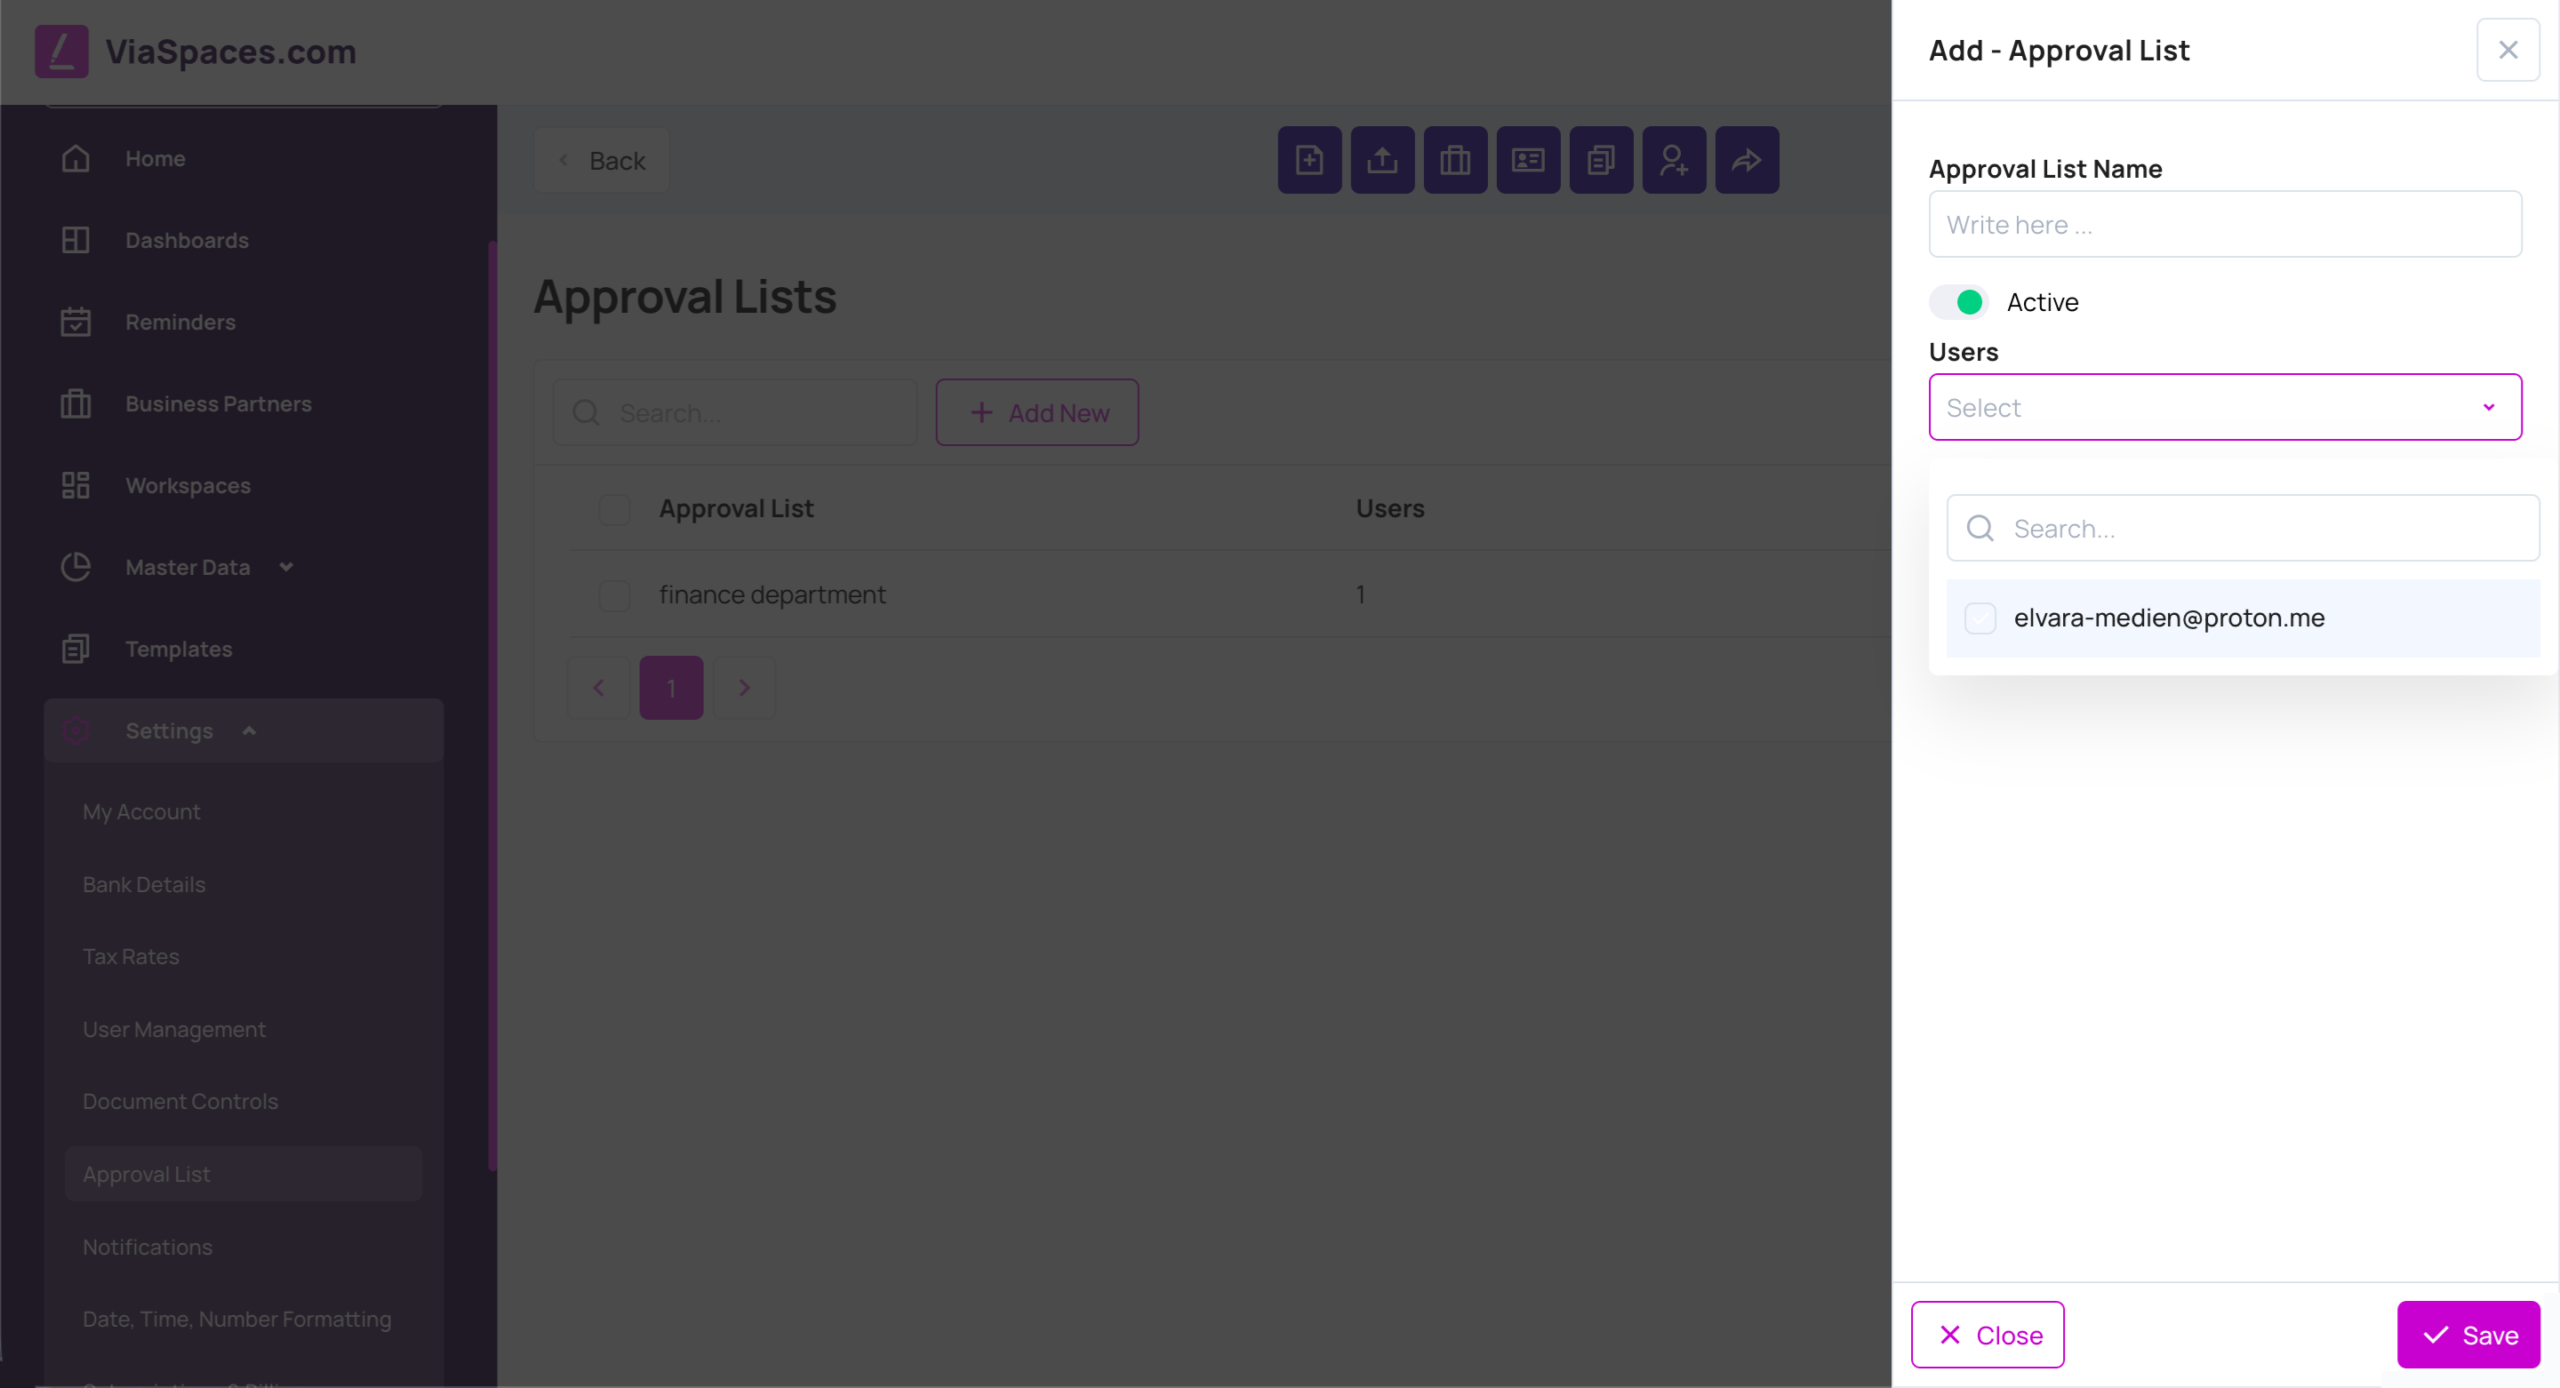
Create or edit a list:
- Click Add New or edit an existing list.
- Enter the Approval List Name.
- Set the Active toggle.
- Select Users for the list.
- Save.
Note: Applying an approval list to a document is done when sending. See the Sending and Receiving Documents page.
Notifications #
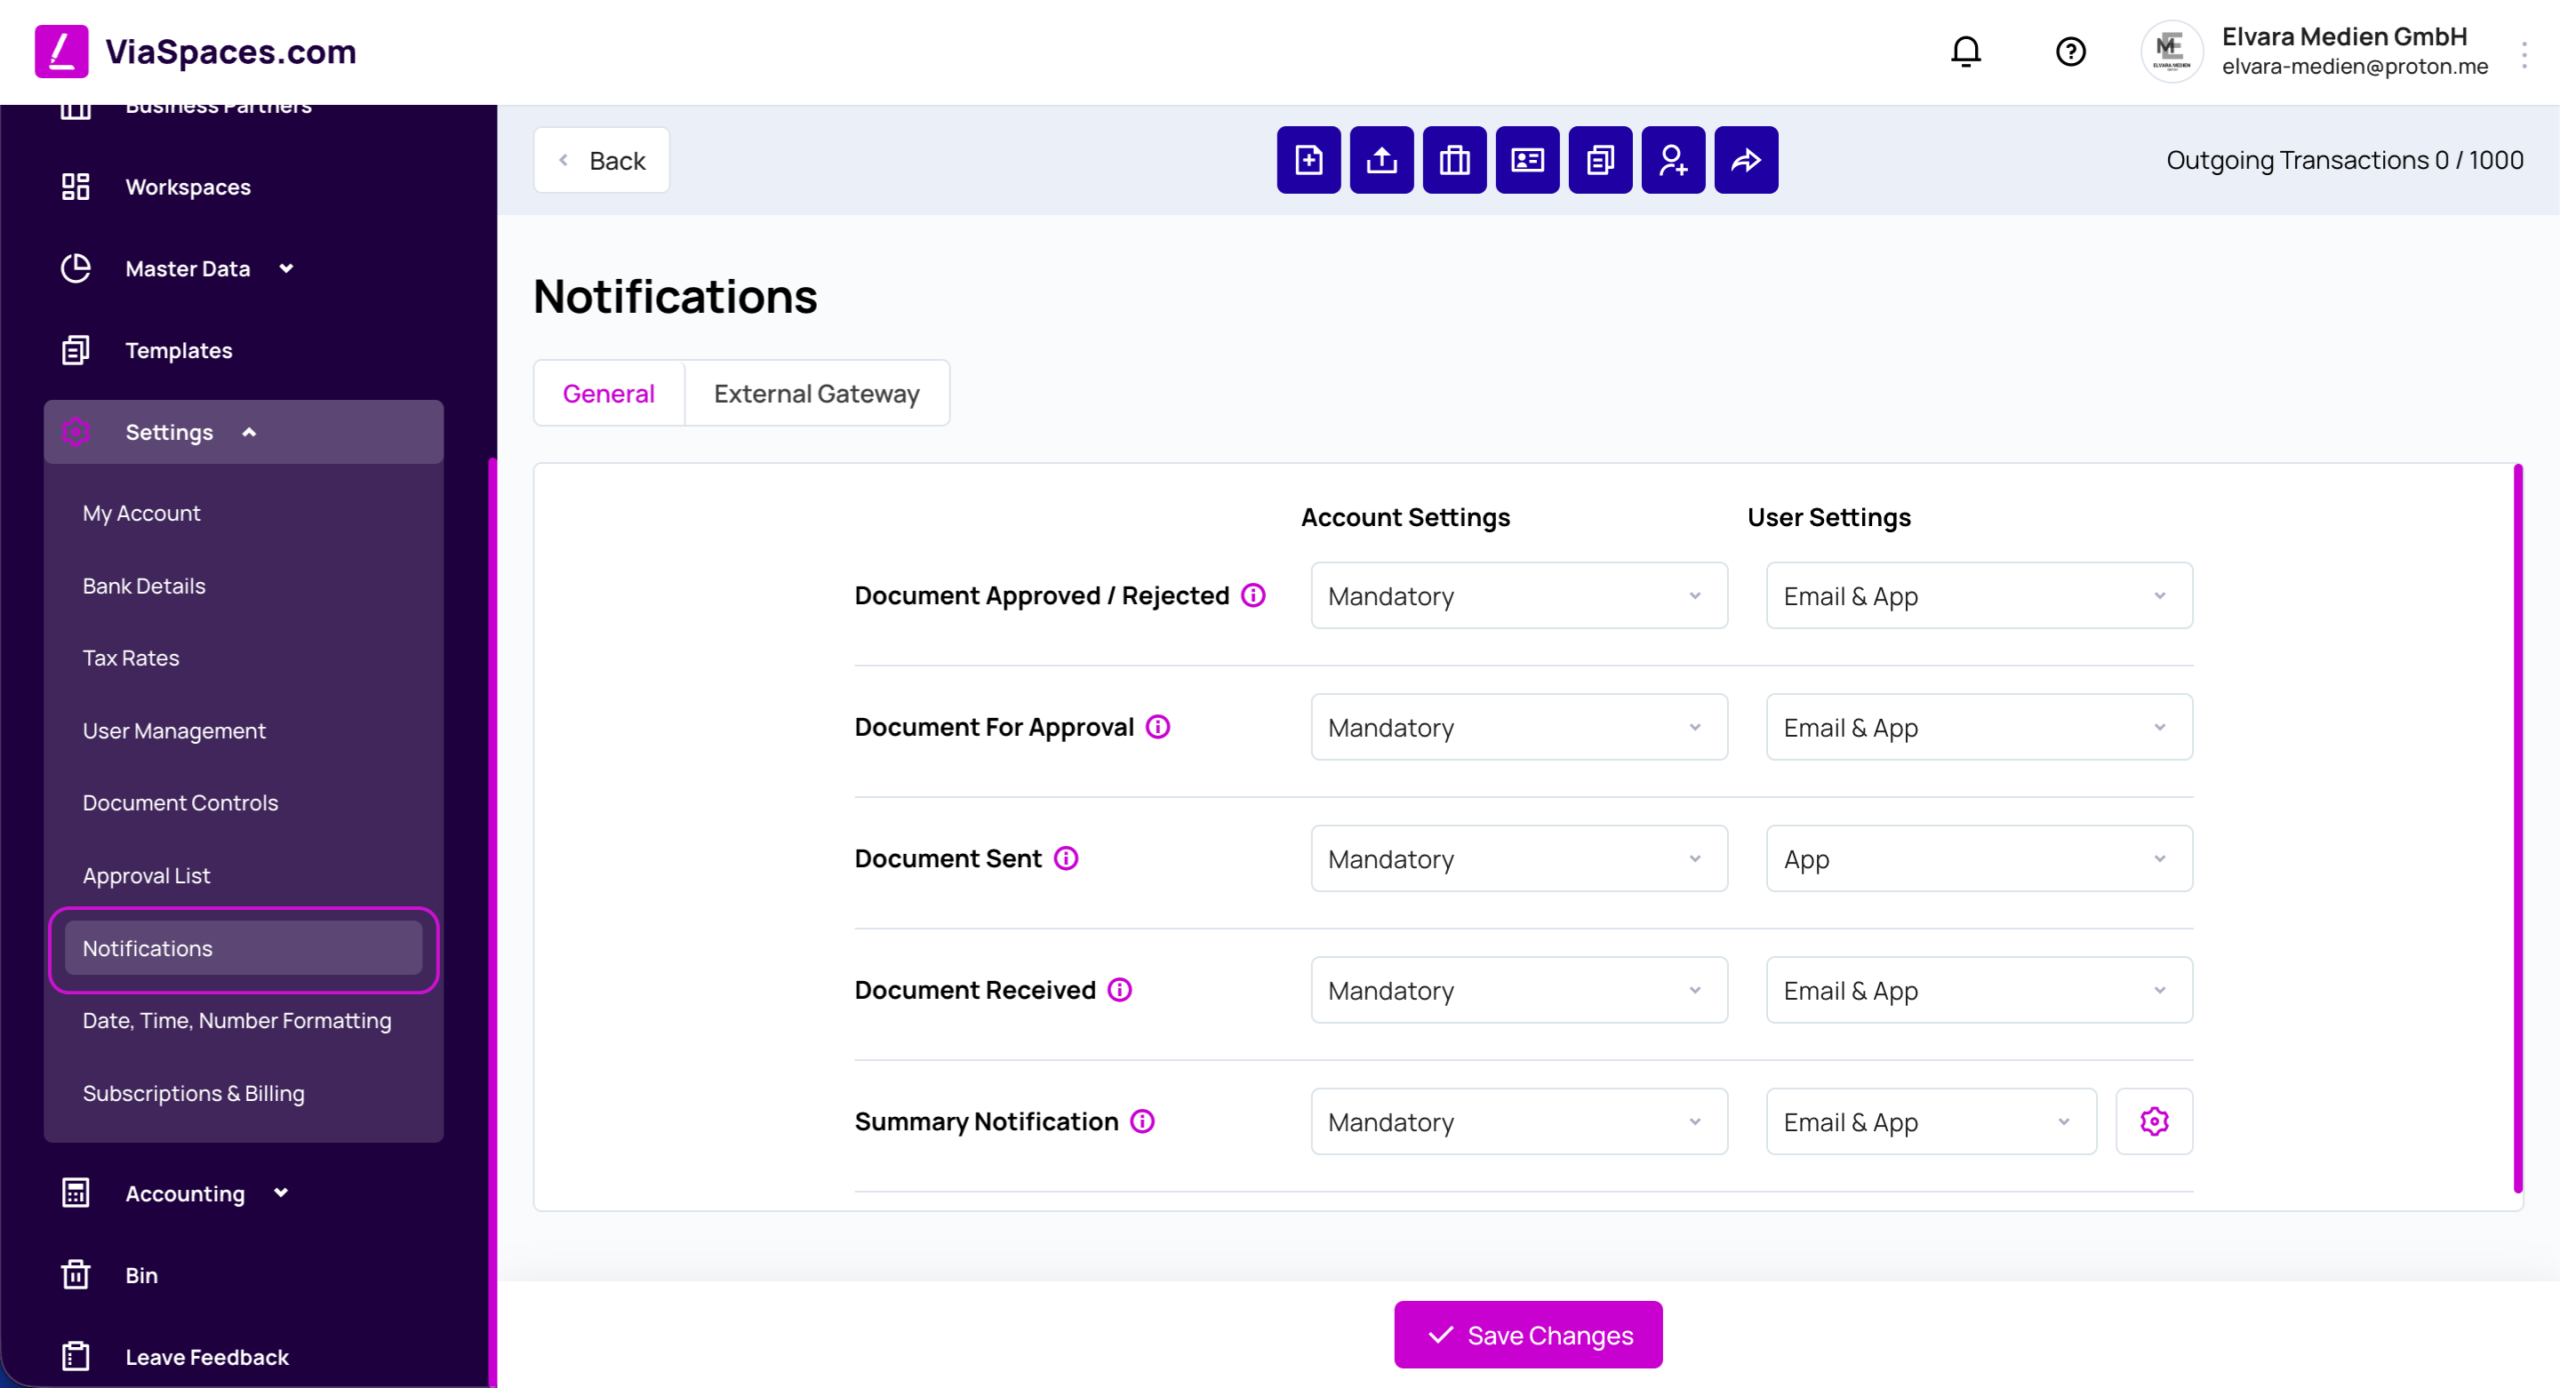
Notifications control which document events send an alert and how. It has two tabs: General and External Gateway.
Each event has two controls:
| Control | Options | Set by |
|---|---|---|
| Account Settings | Mandatory, Enabled, Disabled | Administrator |
| User Settings | Email & App, App | User |
Account Settings and User Settings work together:
| Account Settings | Result |
|---|---|
| Mandatory | The notification is always on. Users cannot turn it off. |
| Enabled | The notification is on. Each user chooses the channel in User Settings. |
| Disabled | The notification is off for everyone. |
Events on the General tab: Document Approved / Rejected, Document For Approval, Document Sent, Document Received, and Summary Notification. Summary Notification has a frequency setting of Daily, Weekly, or Monthly.
Save with Save Changes.
Note: Delivery follows each user’s own settings within the limits set by the Administrator.
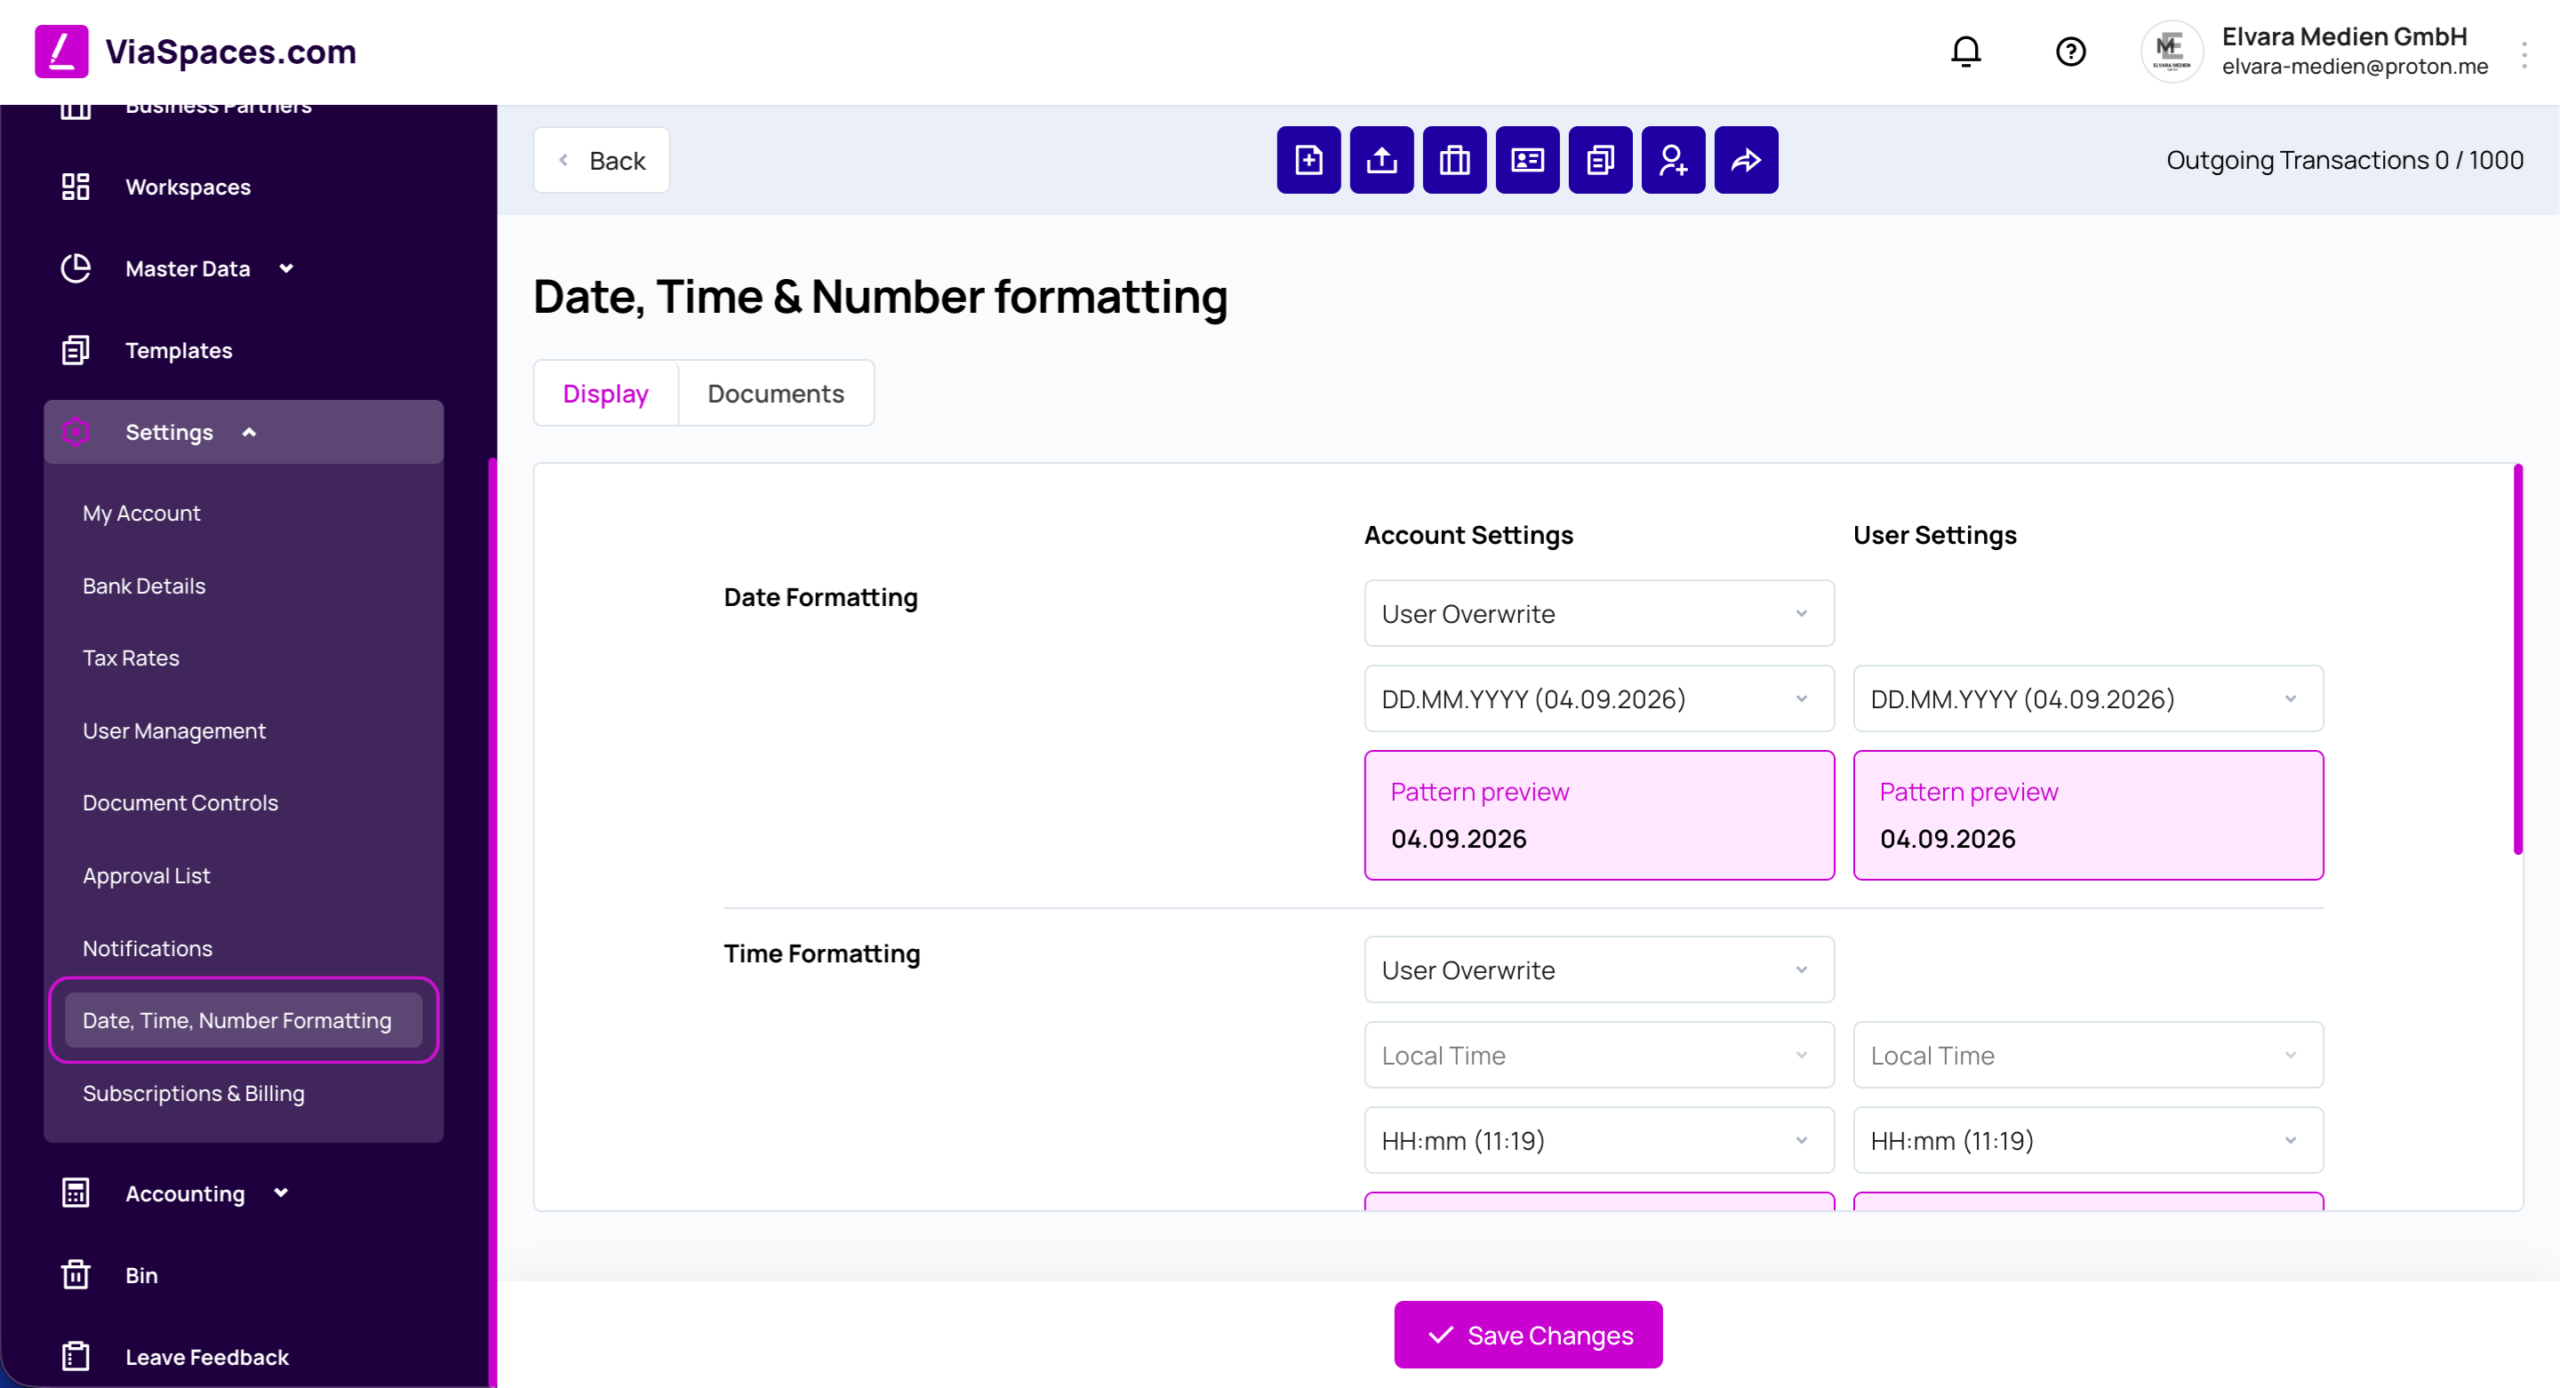
Date, Time, Number Formatting #
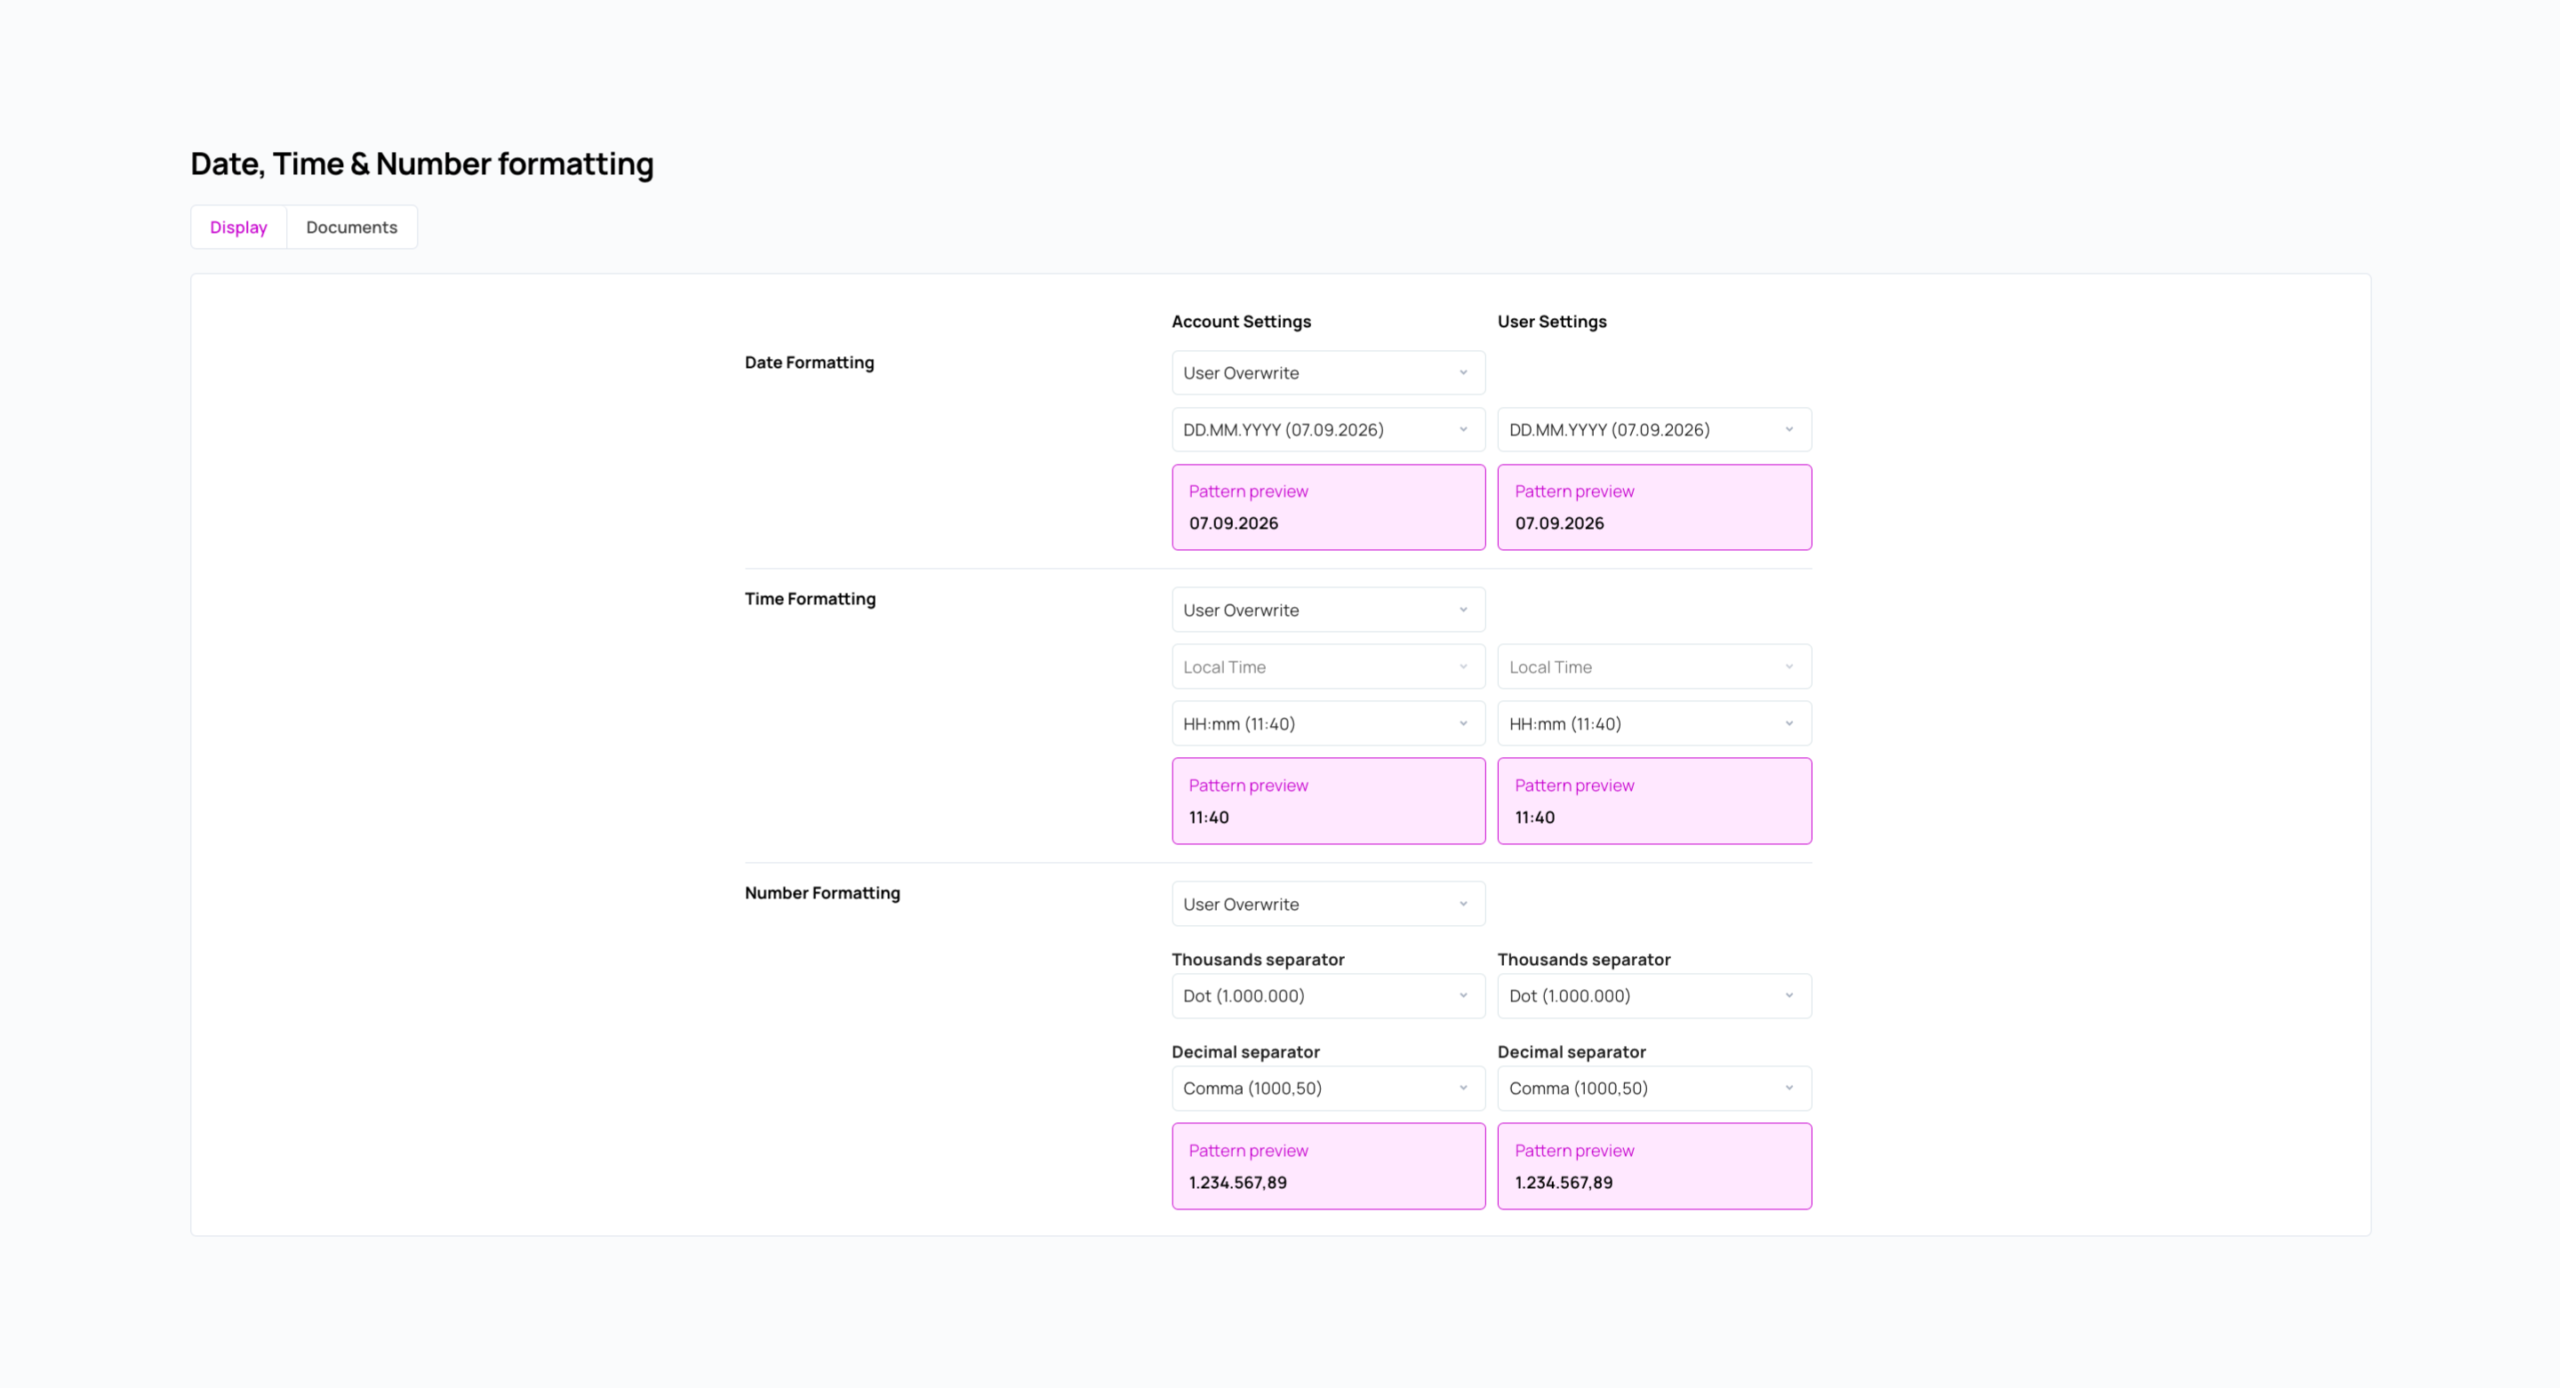
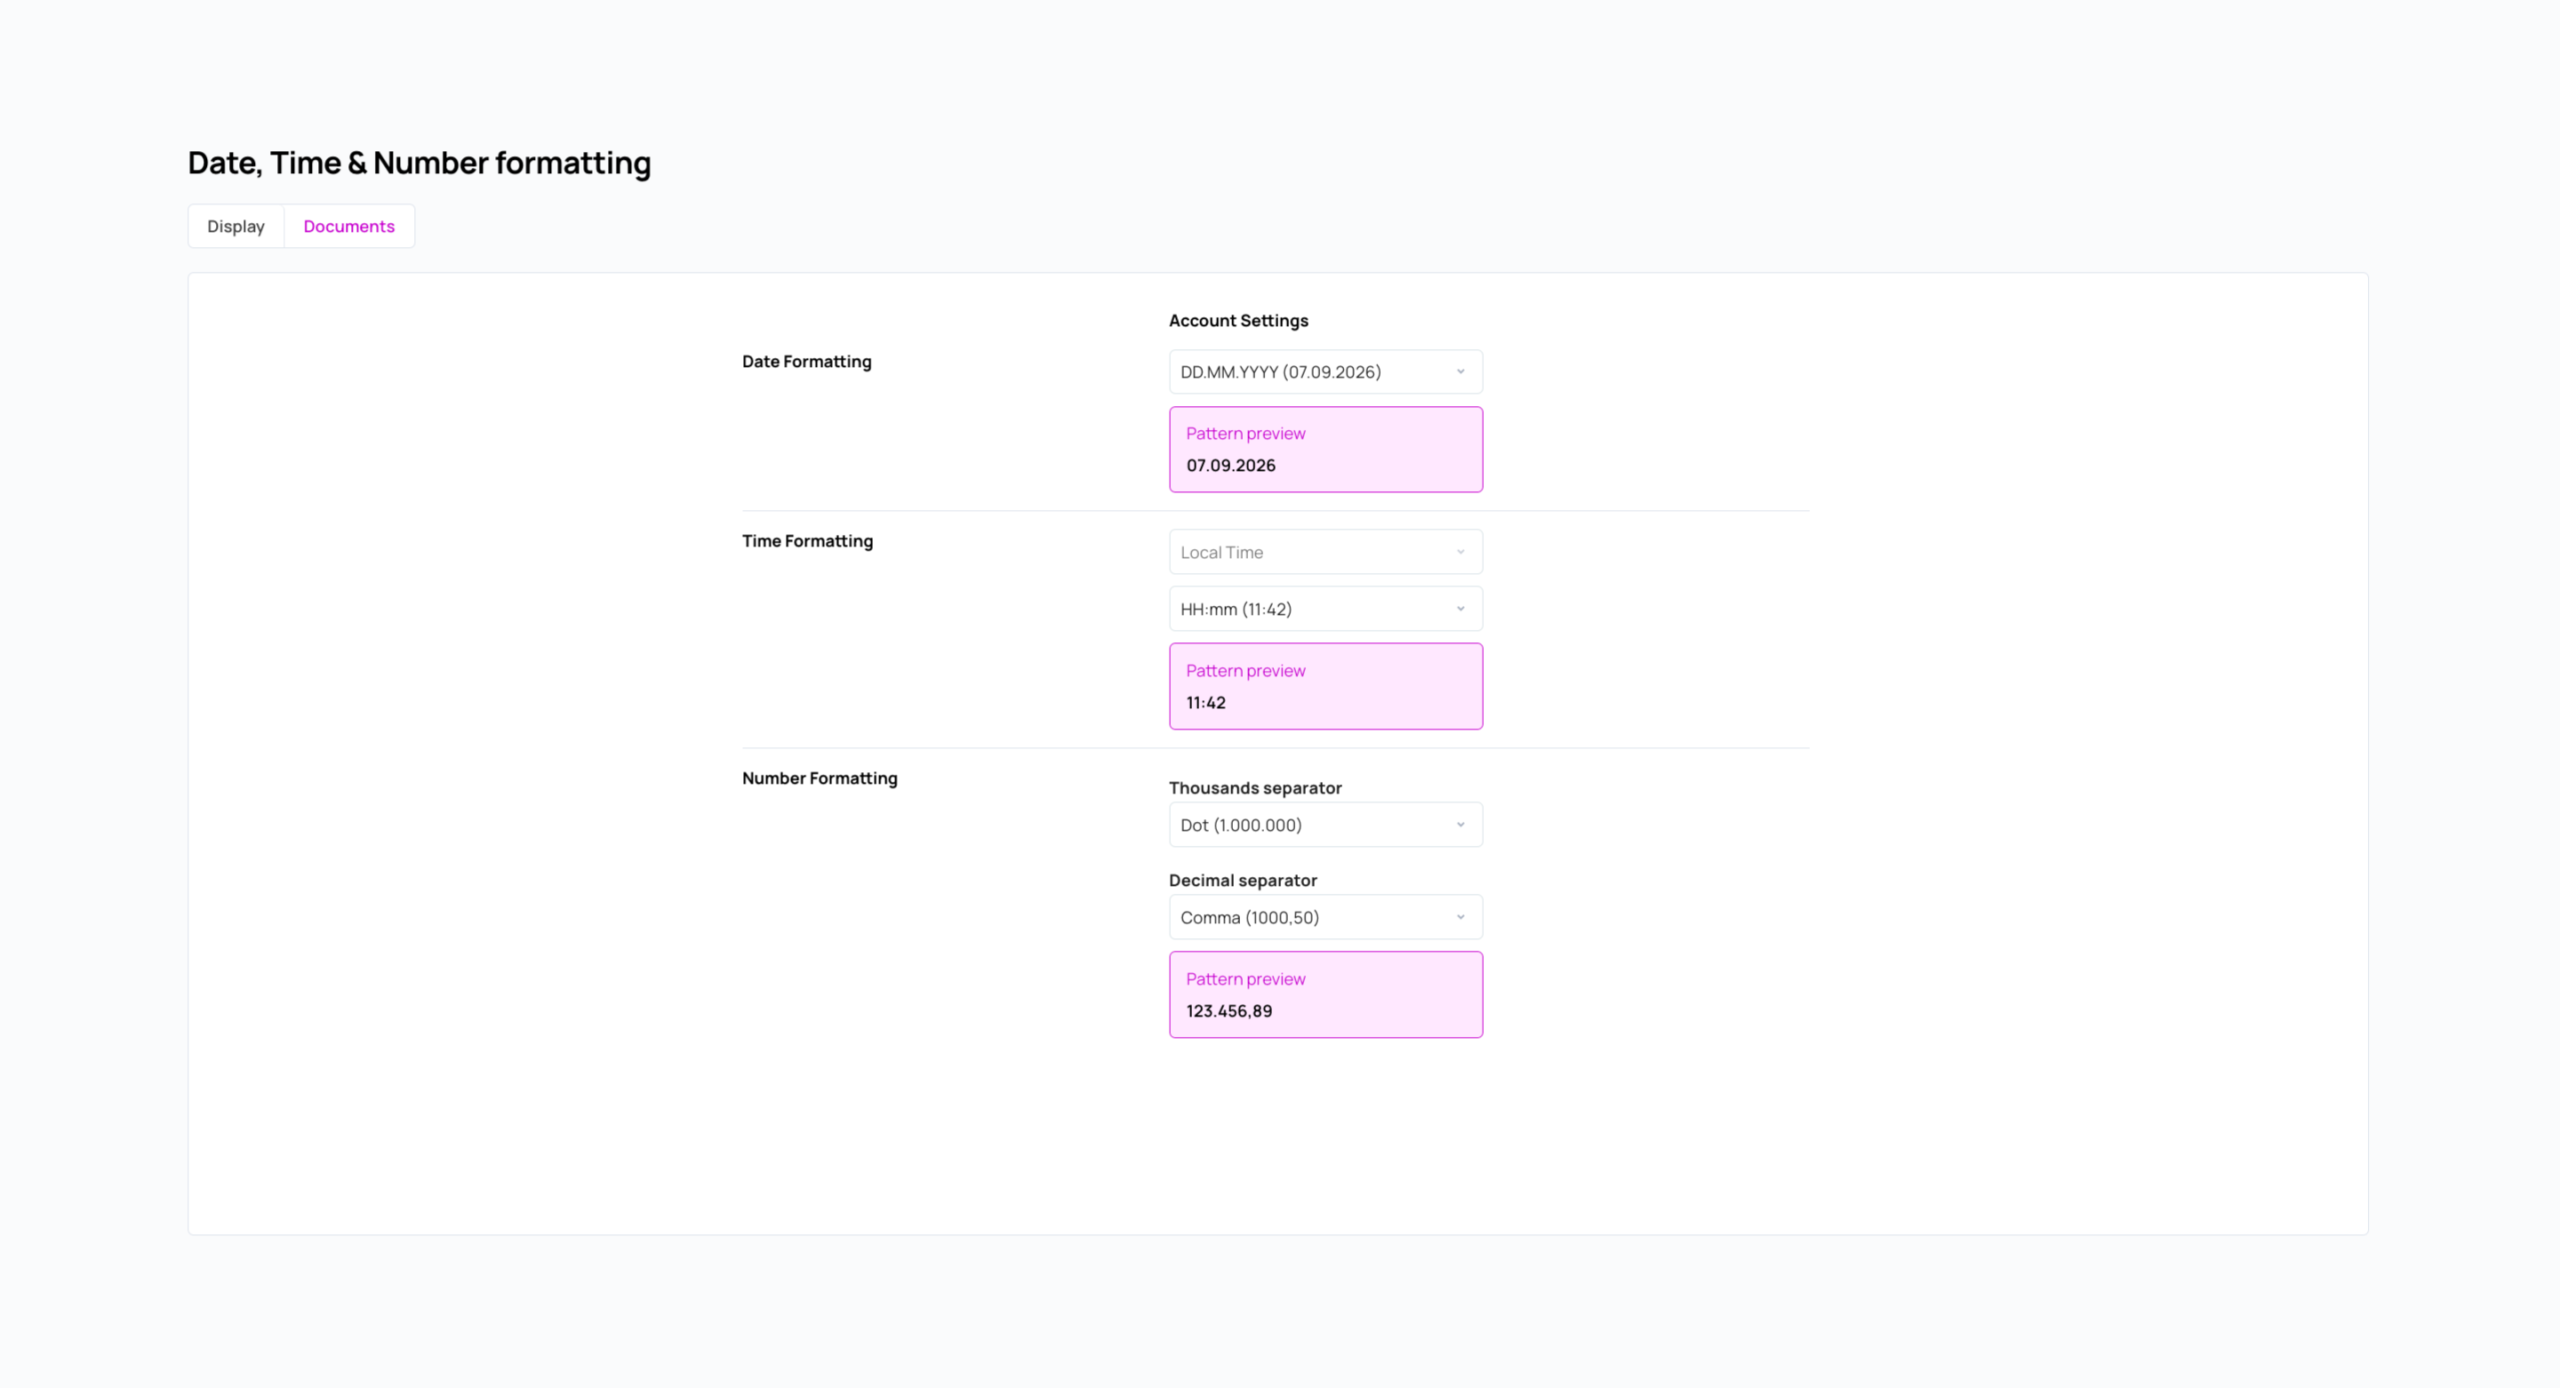
This area sets how dates, times, and numbers display. It has two tabs: Display (the application interface) and Documents (generated documents).
| Group | Options |
|---|---|
| Date Formatting | Date pattern, for example D. M. YYYY. |
| Time Formatting | Local Time and time pattern, for example H:mm. |
| Number Formatting | Thousands separator and decimal separator. |
Each group shows a Pattern preview. The Account Settings column sets the account default. When it is set to User Overwrite, a User Settings column appears and each user can set their own format.
Save with Save Changes.
Subscriptions & Billing #
Subscriptions & Billing manages the account’s plan and billing cycle. Each account carries its own subscription.
| Control | Function |
|---|---|
| Business / Personal | Selects the plan family. |
| Monthly / Annual | Sets the billing cycle. |
| Select | Applies a plan. |
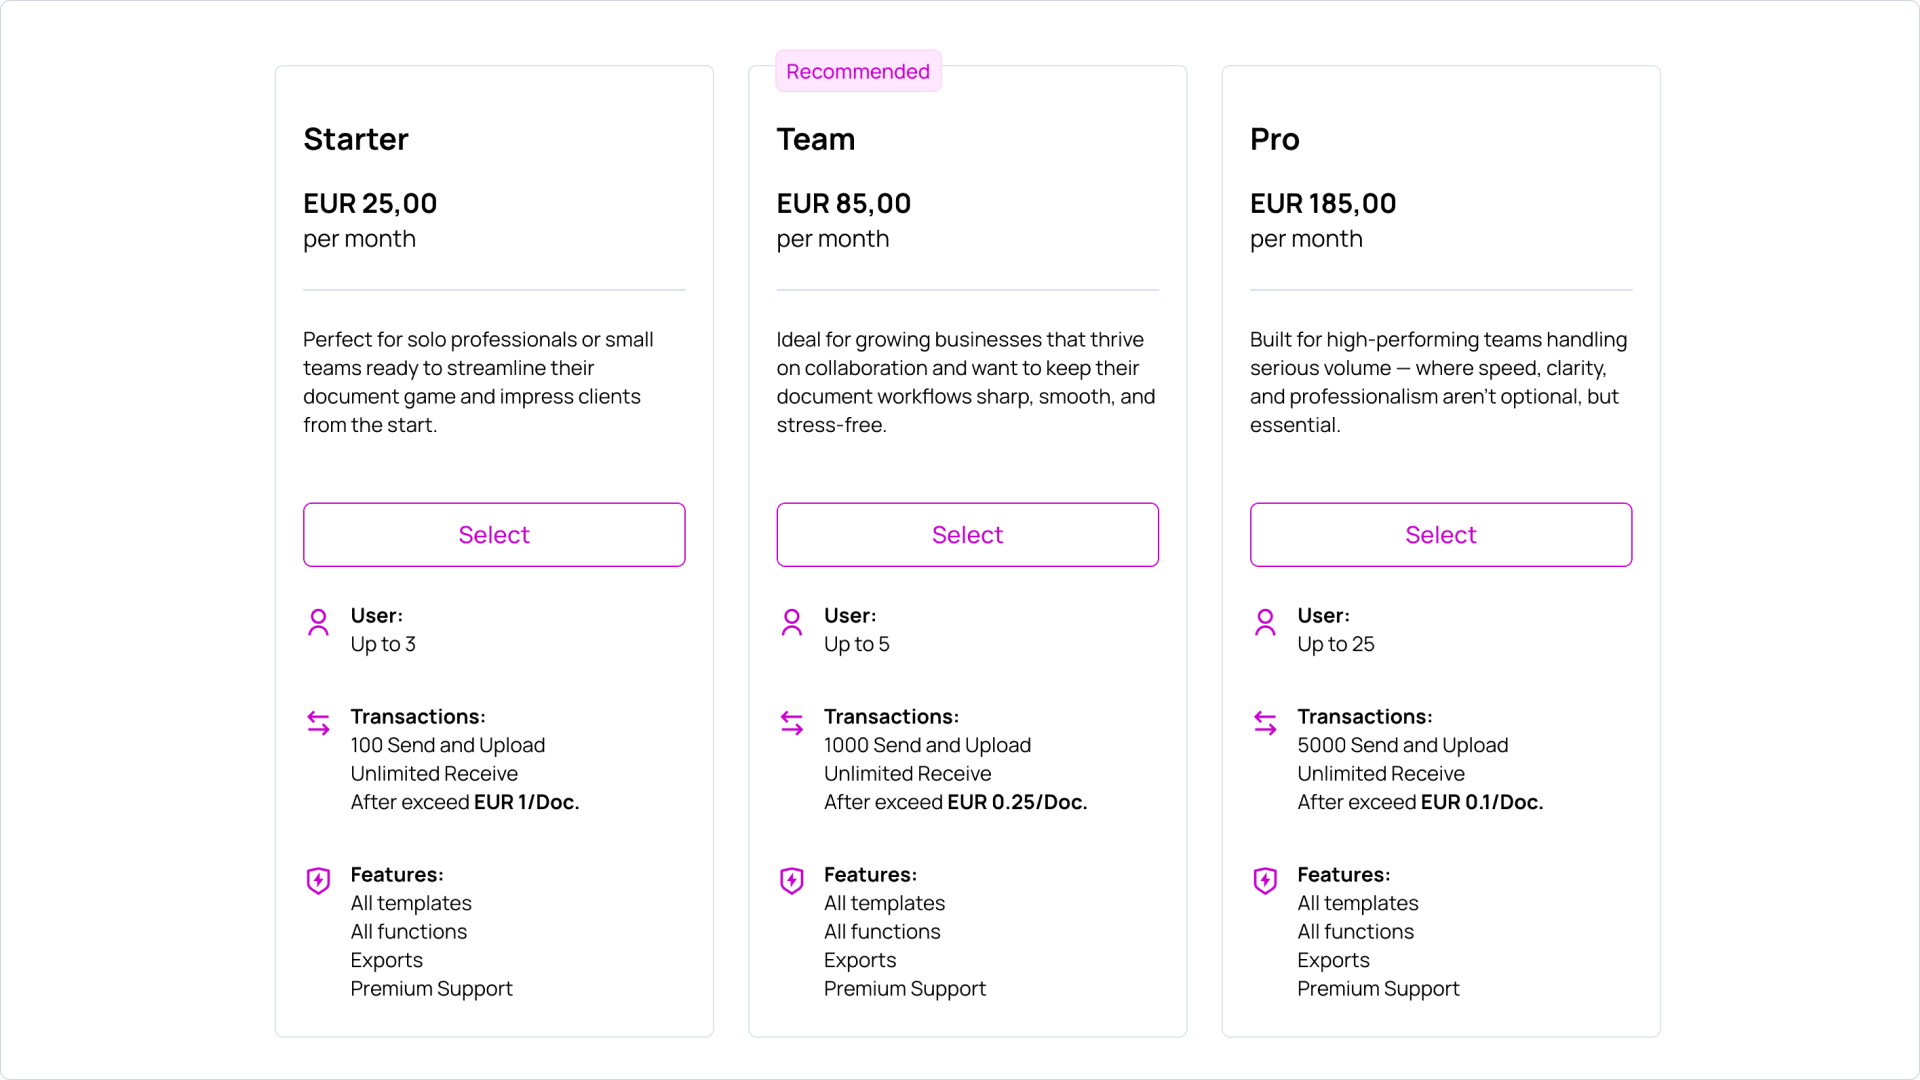
The plan sets the account limits — the number of users and the number of transactions (Send & Upload). Receiving is unlimited on all plans, and transactions over the limit are billed per transaction. When the user limit is reached, adding a user shows an Update plan option.
Note: For current plans, limits, and prices, see pricing.