
In this help doc: the actions and tools that support documents outside creating and sending them — recall, delete, the Bin, export, upload, reminders, and mass copy.
These functions apply to documents already in the account. They cover withdrawing a sent document, removing and restoring documents, exporting, importing external files, setting reminders, and copying a document in bulk.
Recall #
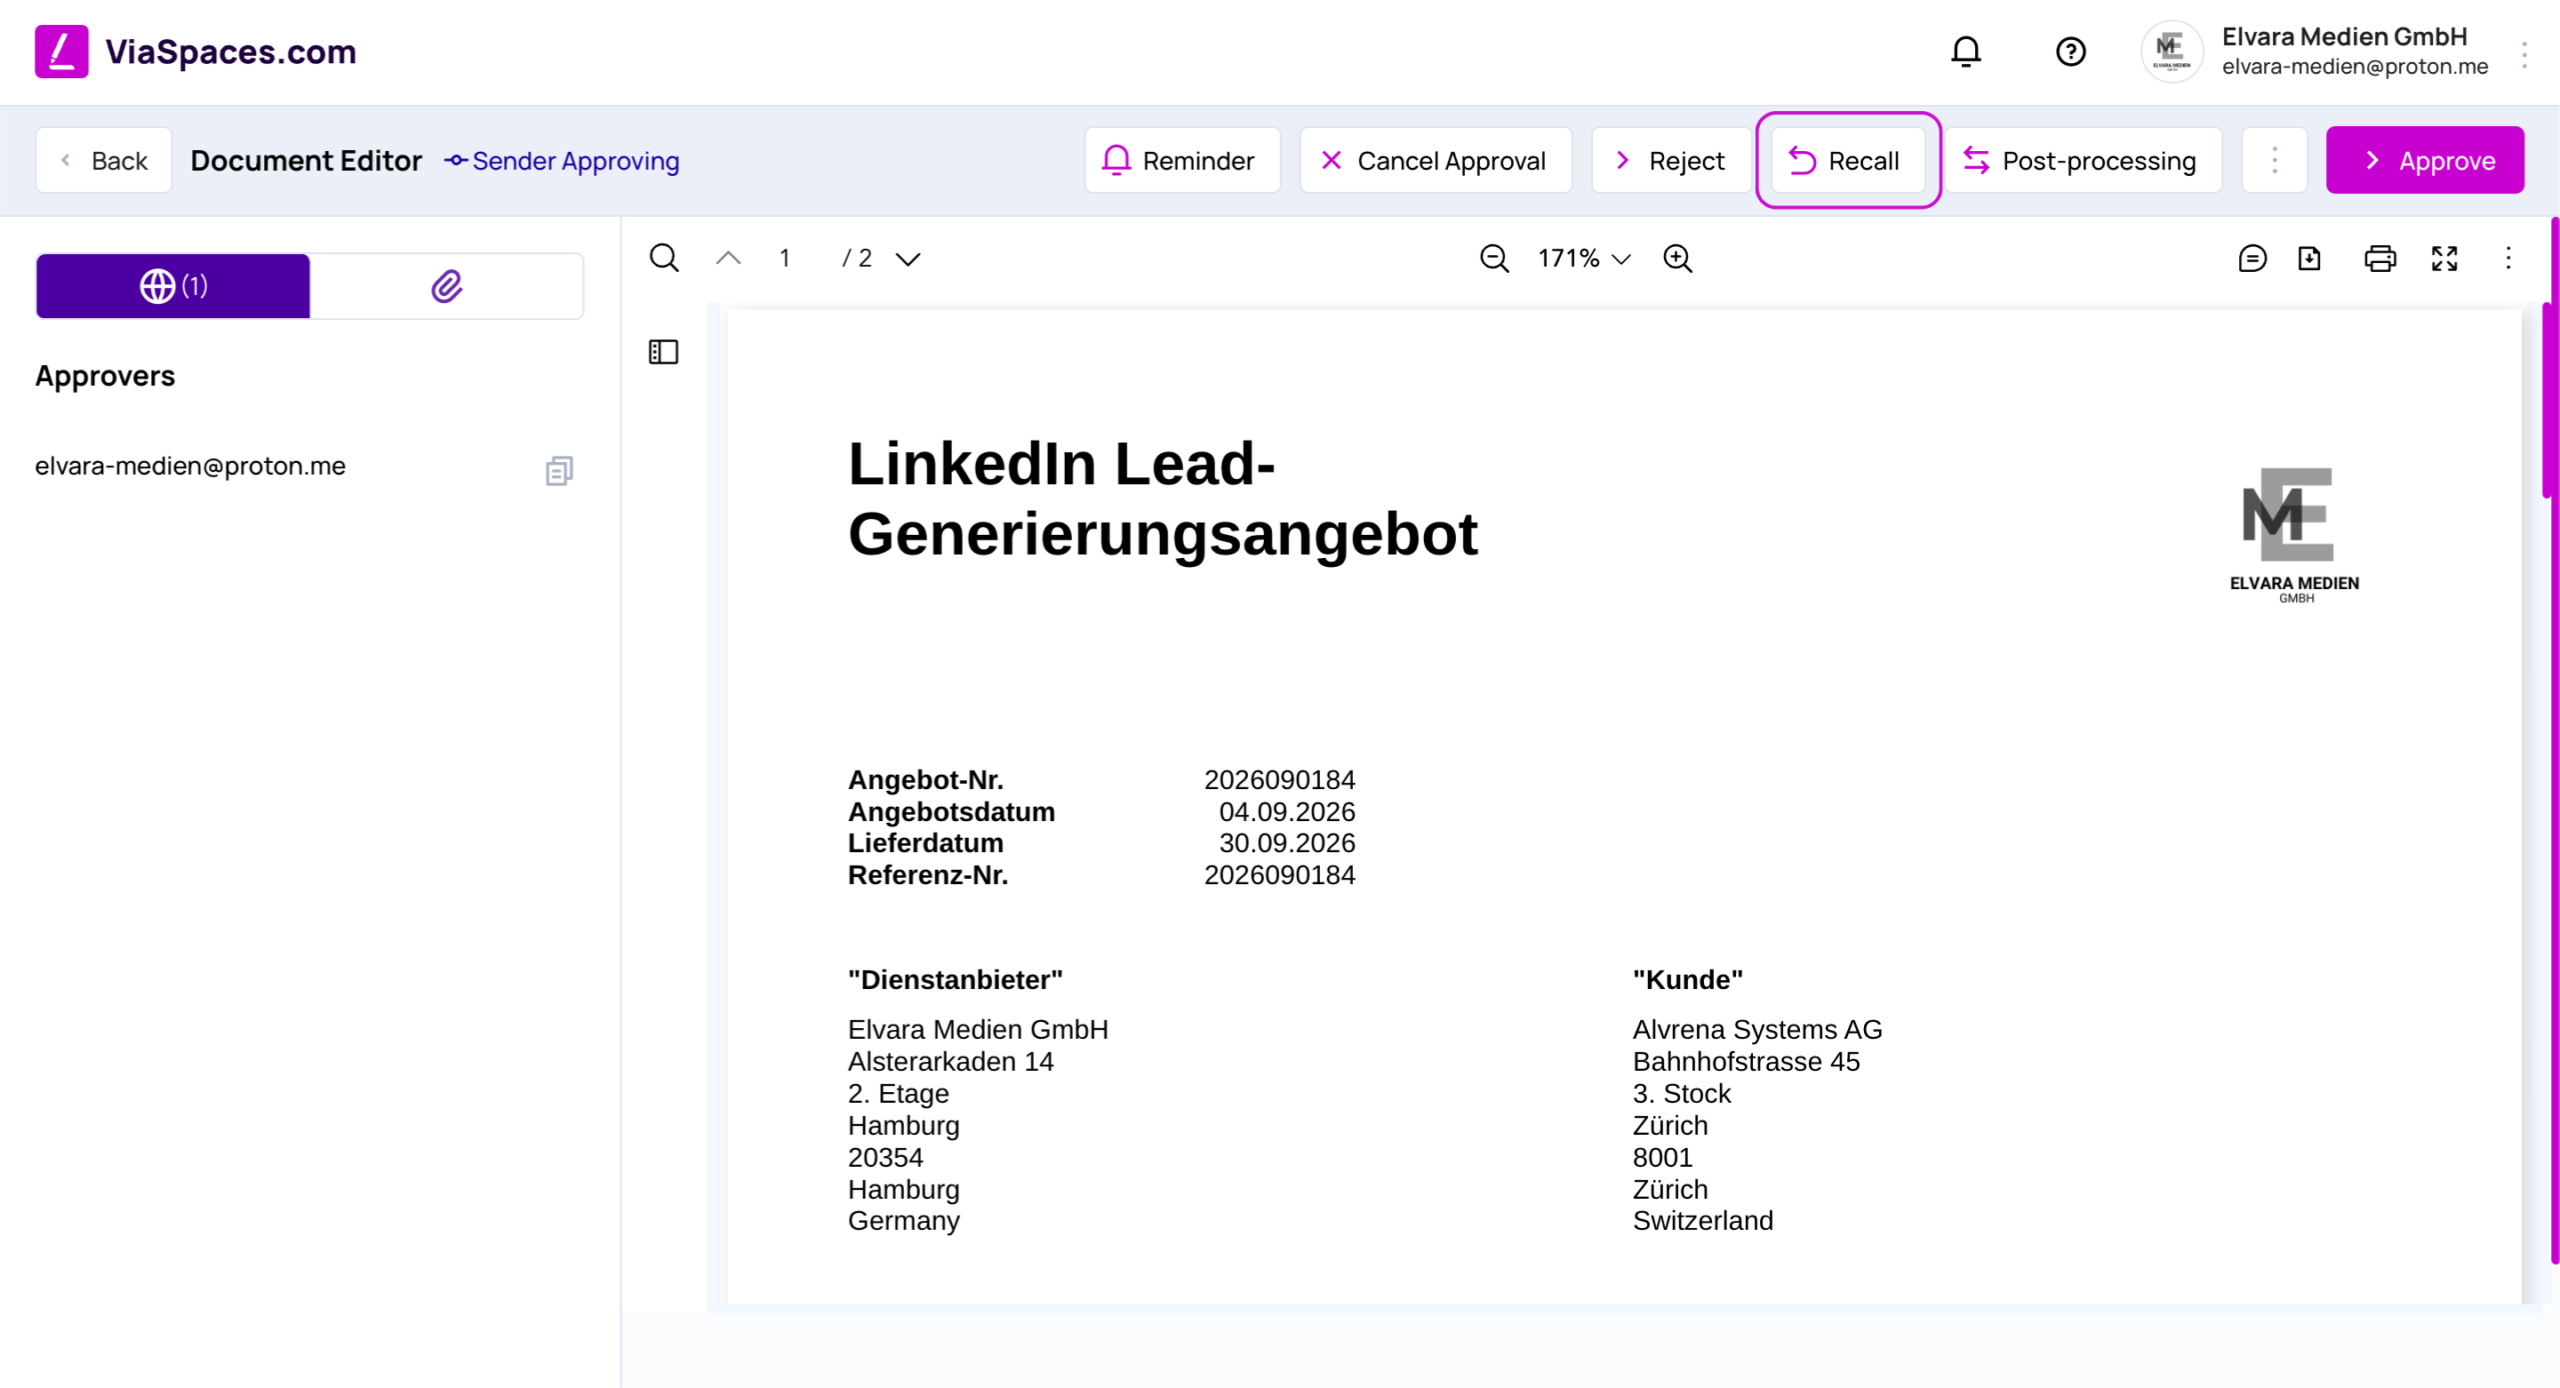
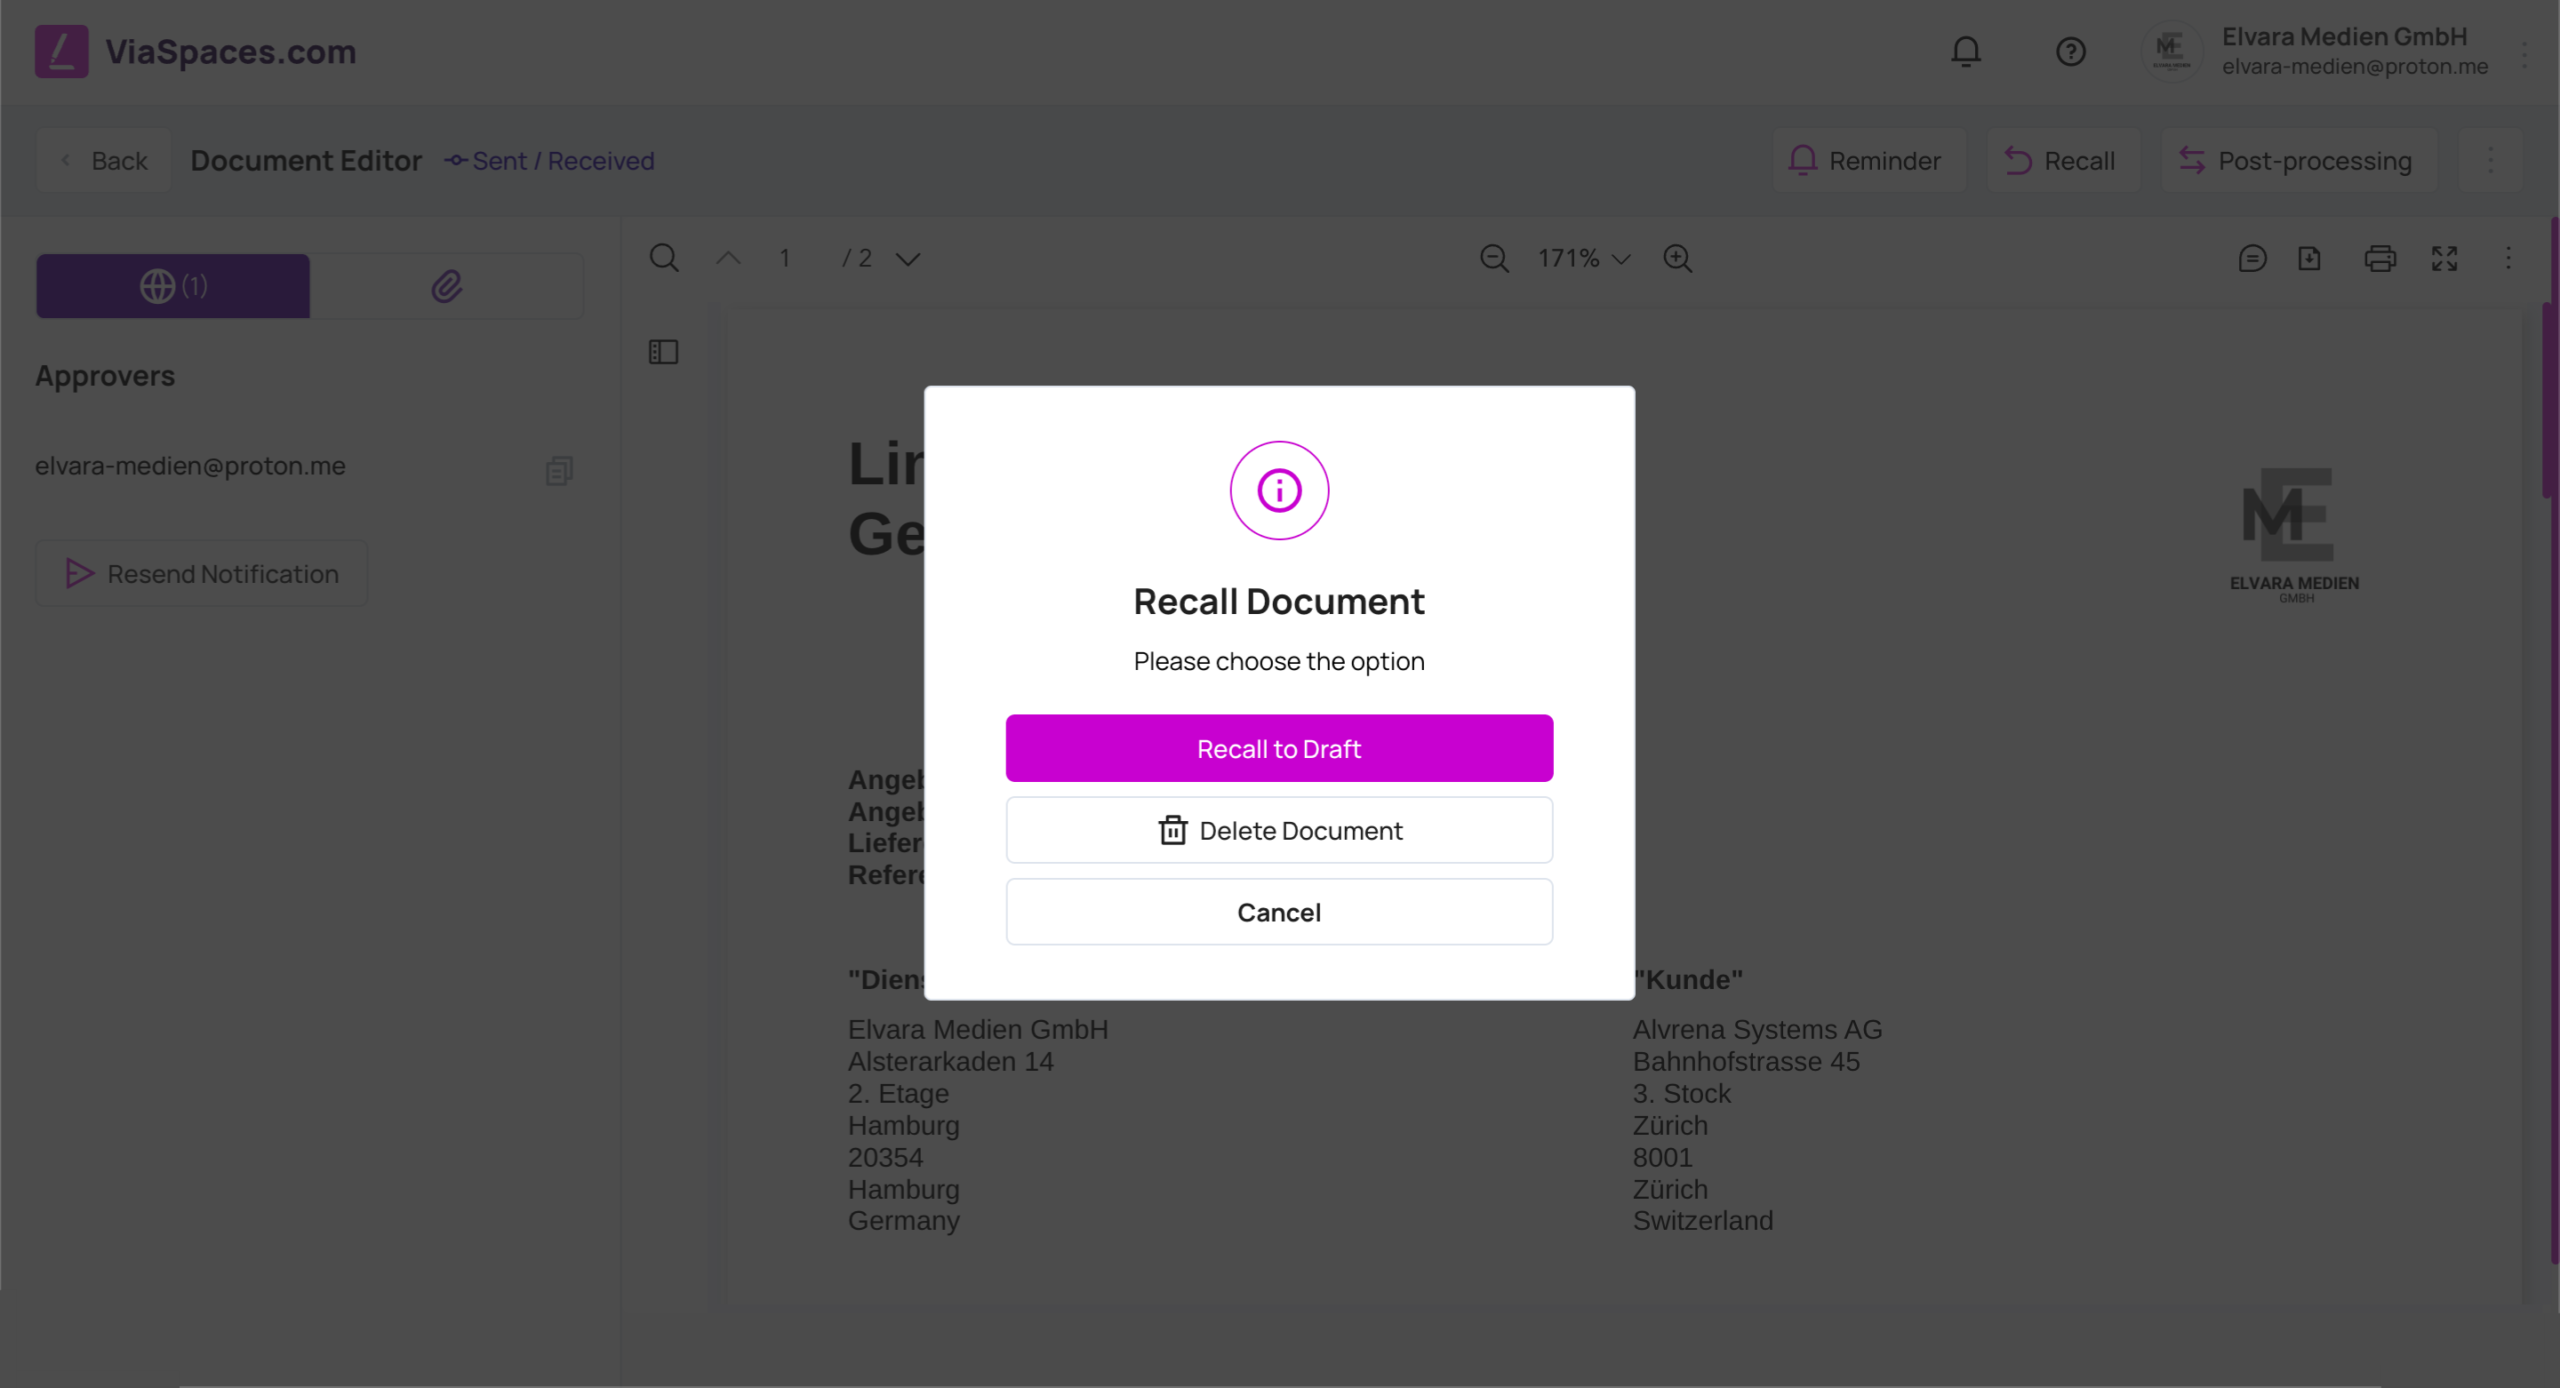
Recall returns a sent document to Draft before it is approved, so it can be corrected or cancelled. It is available to the sender for documents delivered through ViaSpaces.com and for Sign In Person delivery, and it is managed only from the sender side. After a recall, the document is a draft again and can be edited and resent.
Delete #
A draft is removed with Delete Draft, and a completed document with Delete Completed. A deleted document is moved to the Bin, from where it can be restored. Deletion does not remove the document permanently while it is in the Bin.
The Bin #
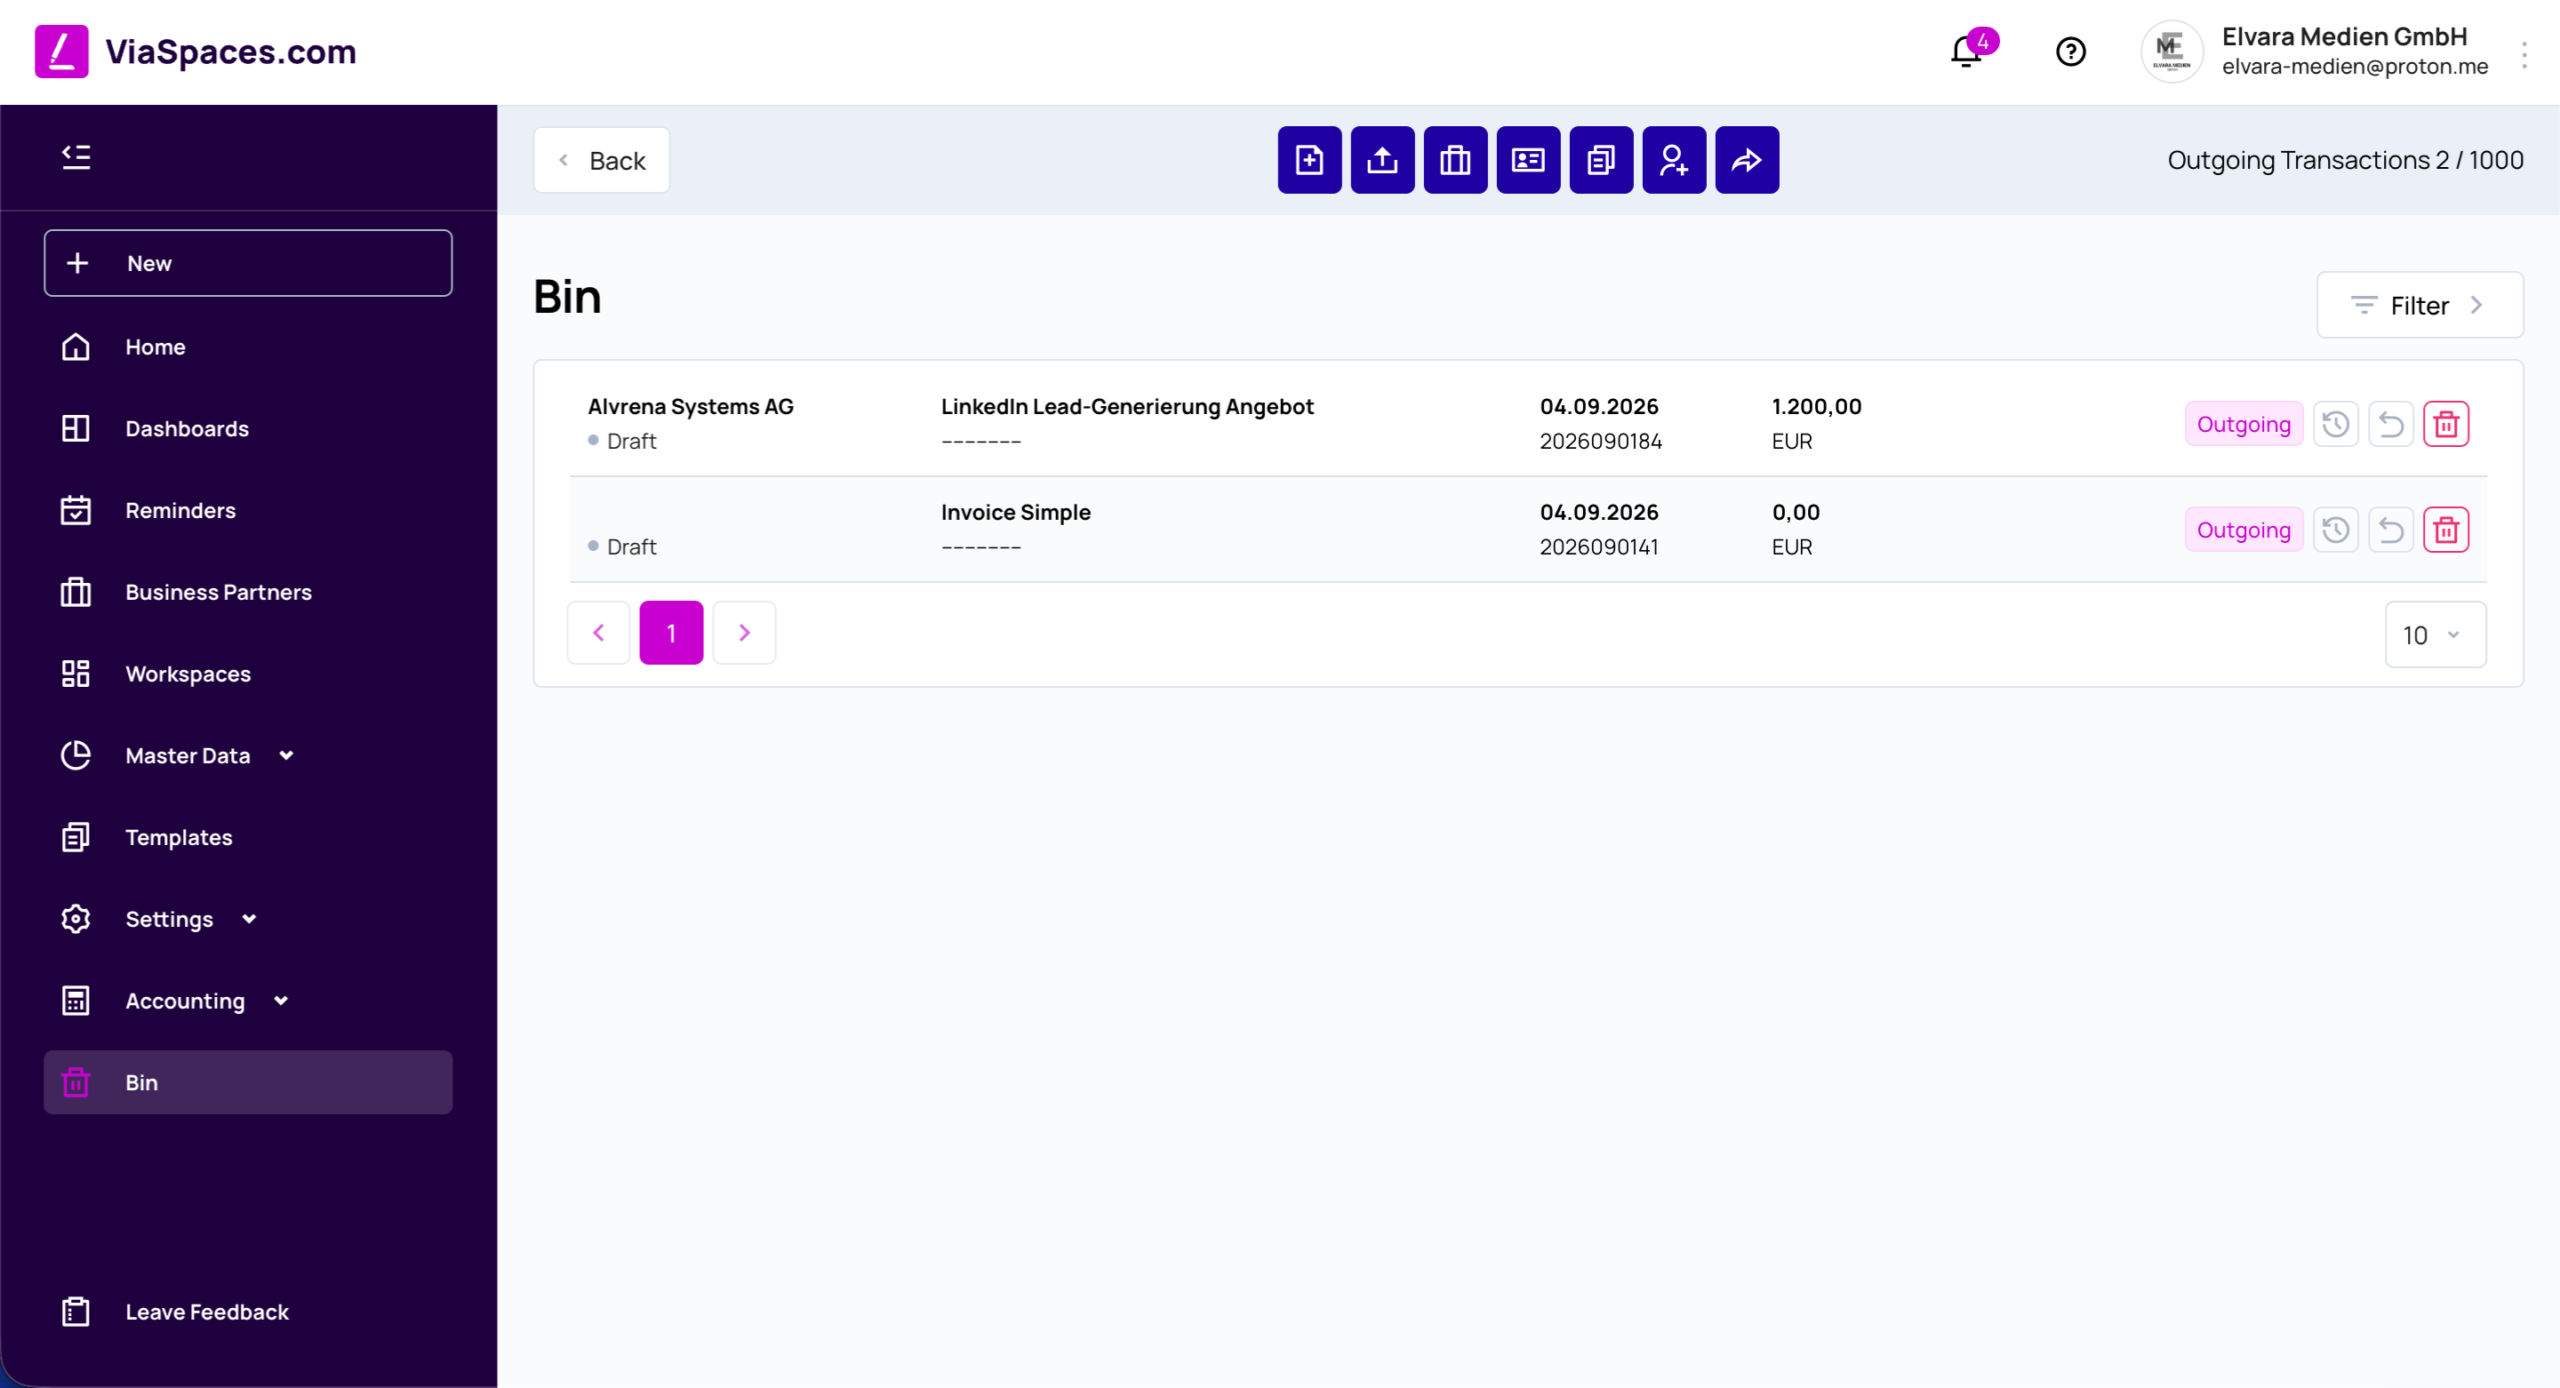
The Bin, opened from the sidebar, lists removed documents with their status, subtype, date, value, and direction (Outgoing or Incoming). A Filter narrows the list.
Each row offers:
- Restore — returns the document to its previous place.
- History — shows the document’s action log.
- Delete — removes the document.
Export #
Export saves documents from the Dashboard to a file. Export Documents packages the documents directly into a ZIP and prompts for a folder to save them. The export includes the documents currently shown to the user — that is, the documents matching the filter the user has applied.
Export options:
- Export Documents — the documents as a ZIP.
- Export Documents with Attachments — the documents together with their attachments.
- Export to .csv — the document data as a .csv file.

Note: Export follows the active filter. Only the filtered documents are exported. Export is run from the Dashboard; see the Overview and Navigation page.
Upload Document #
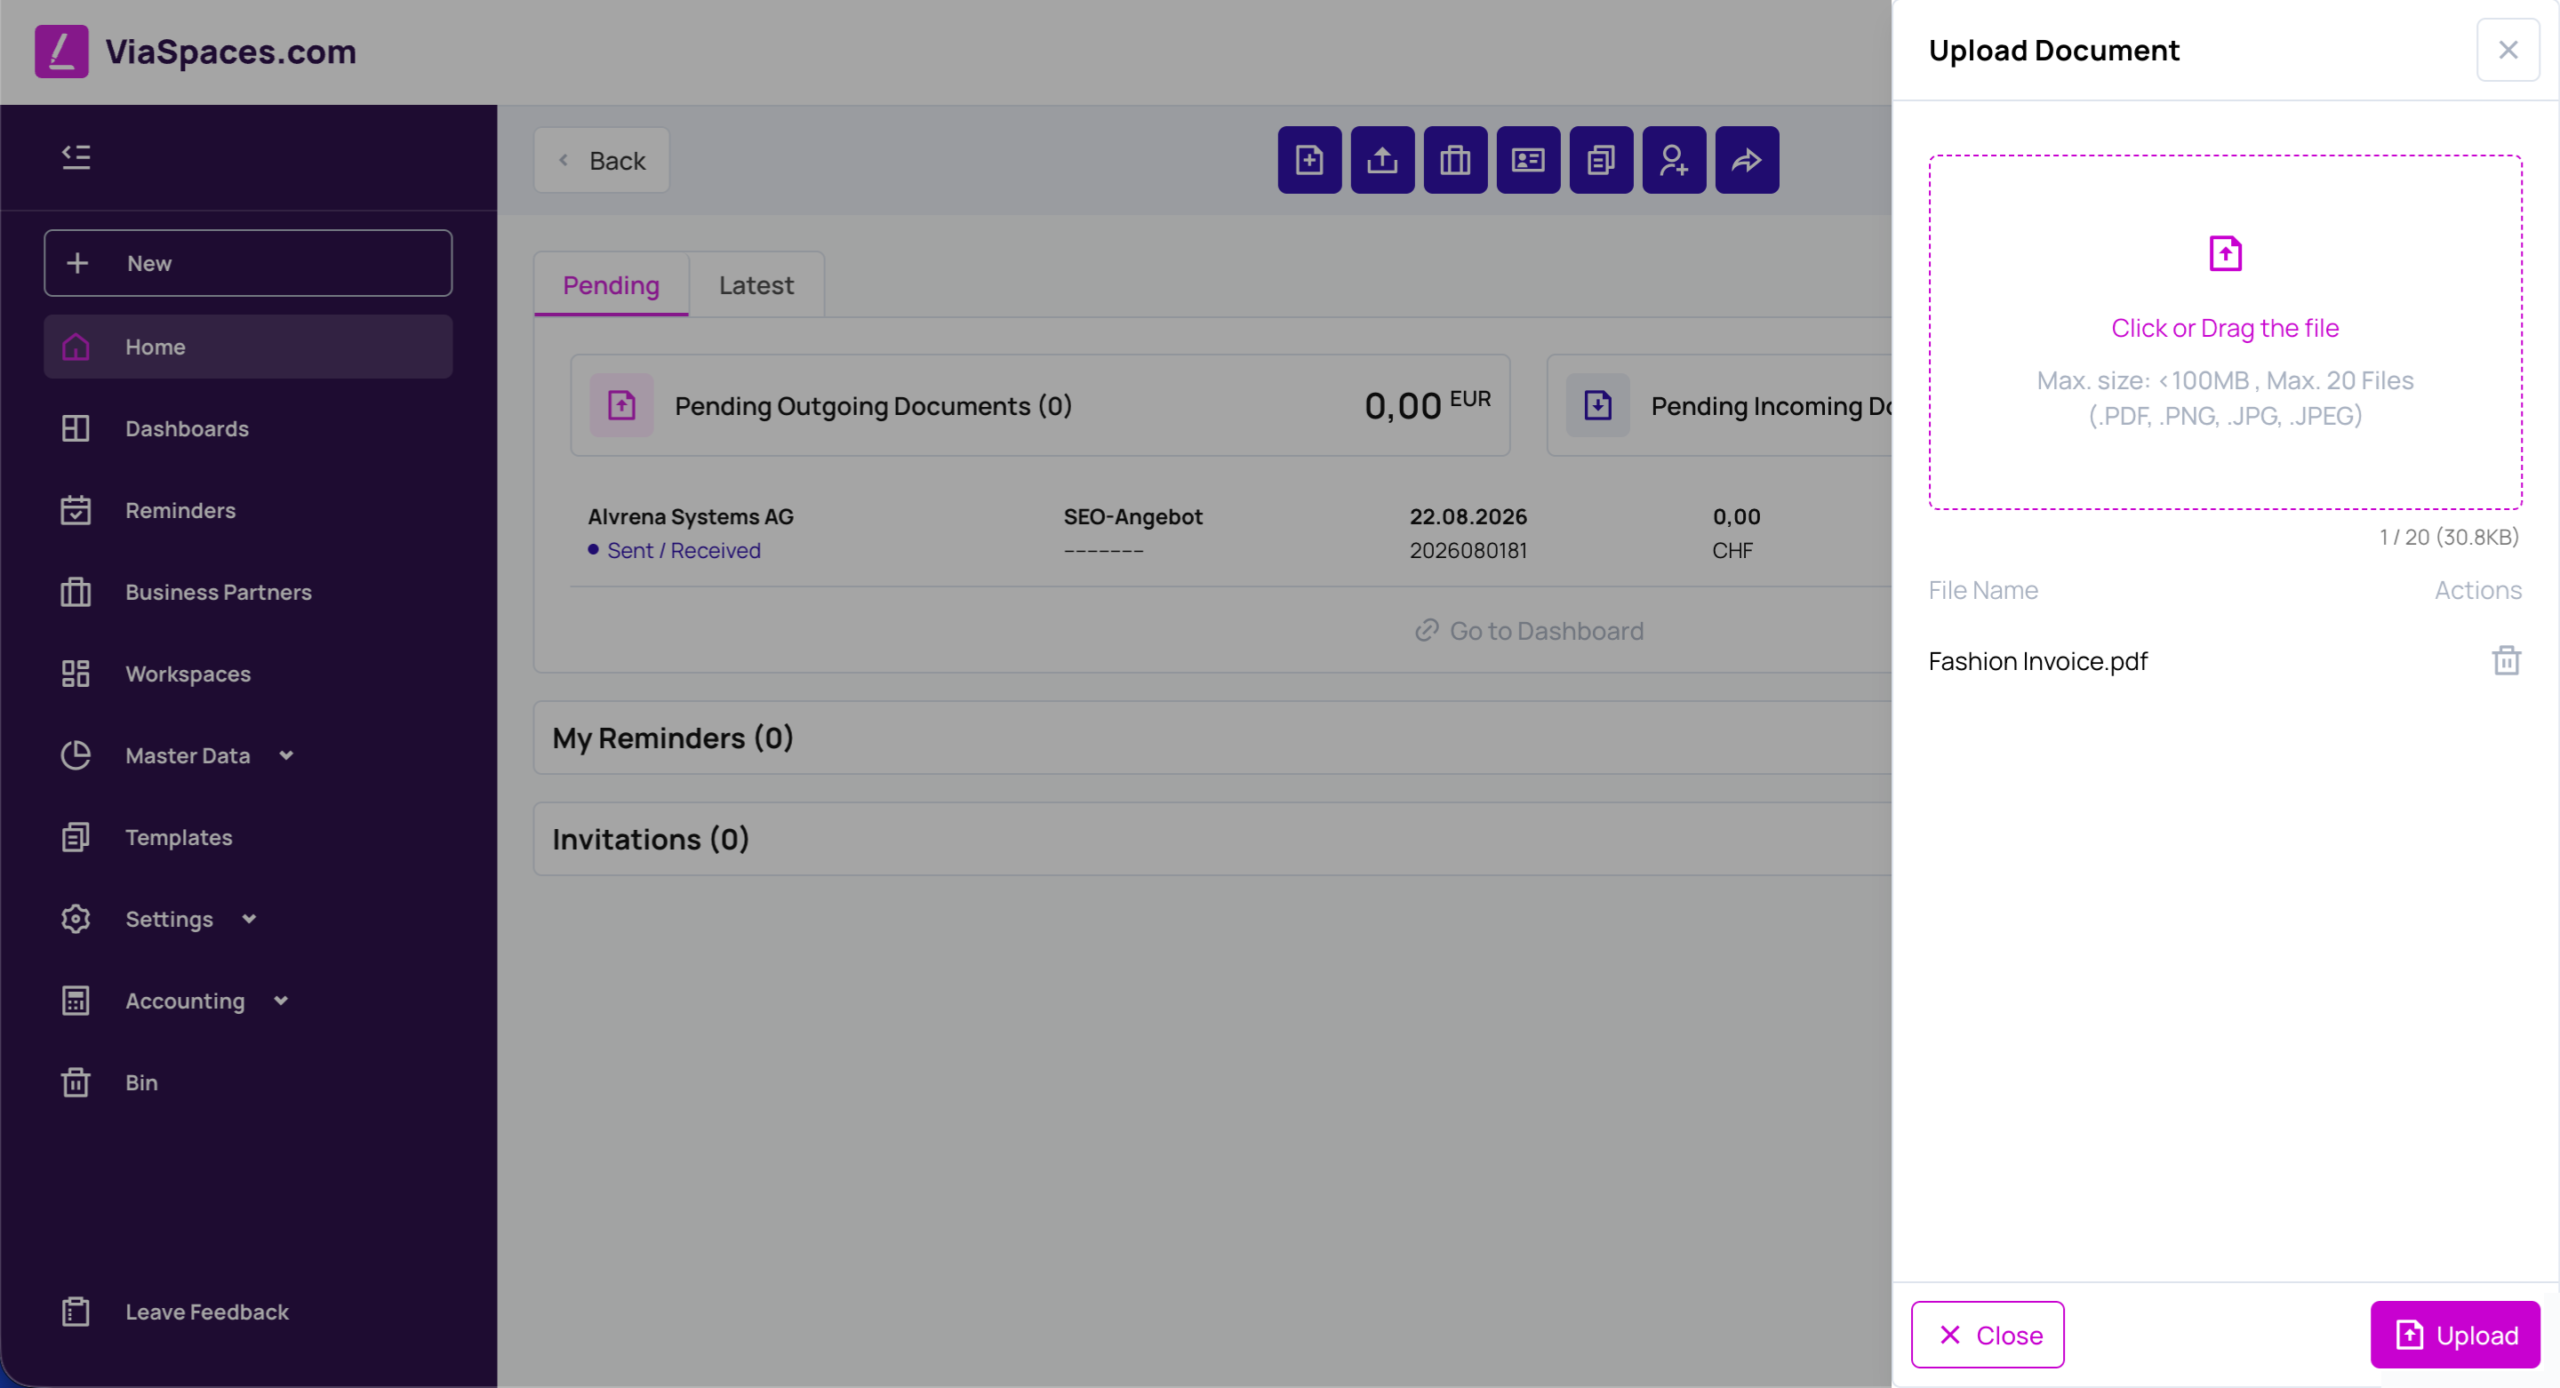
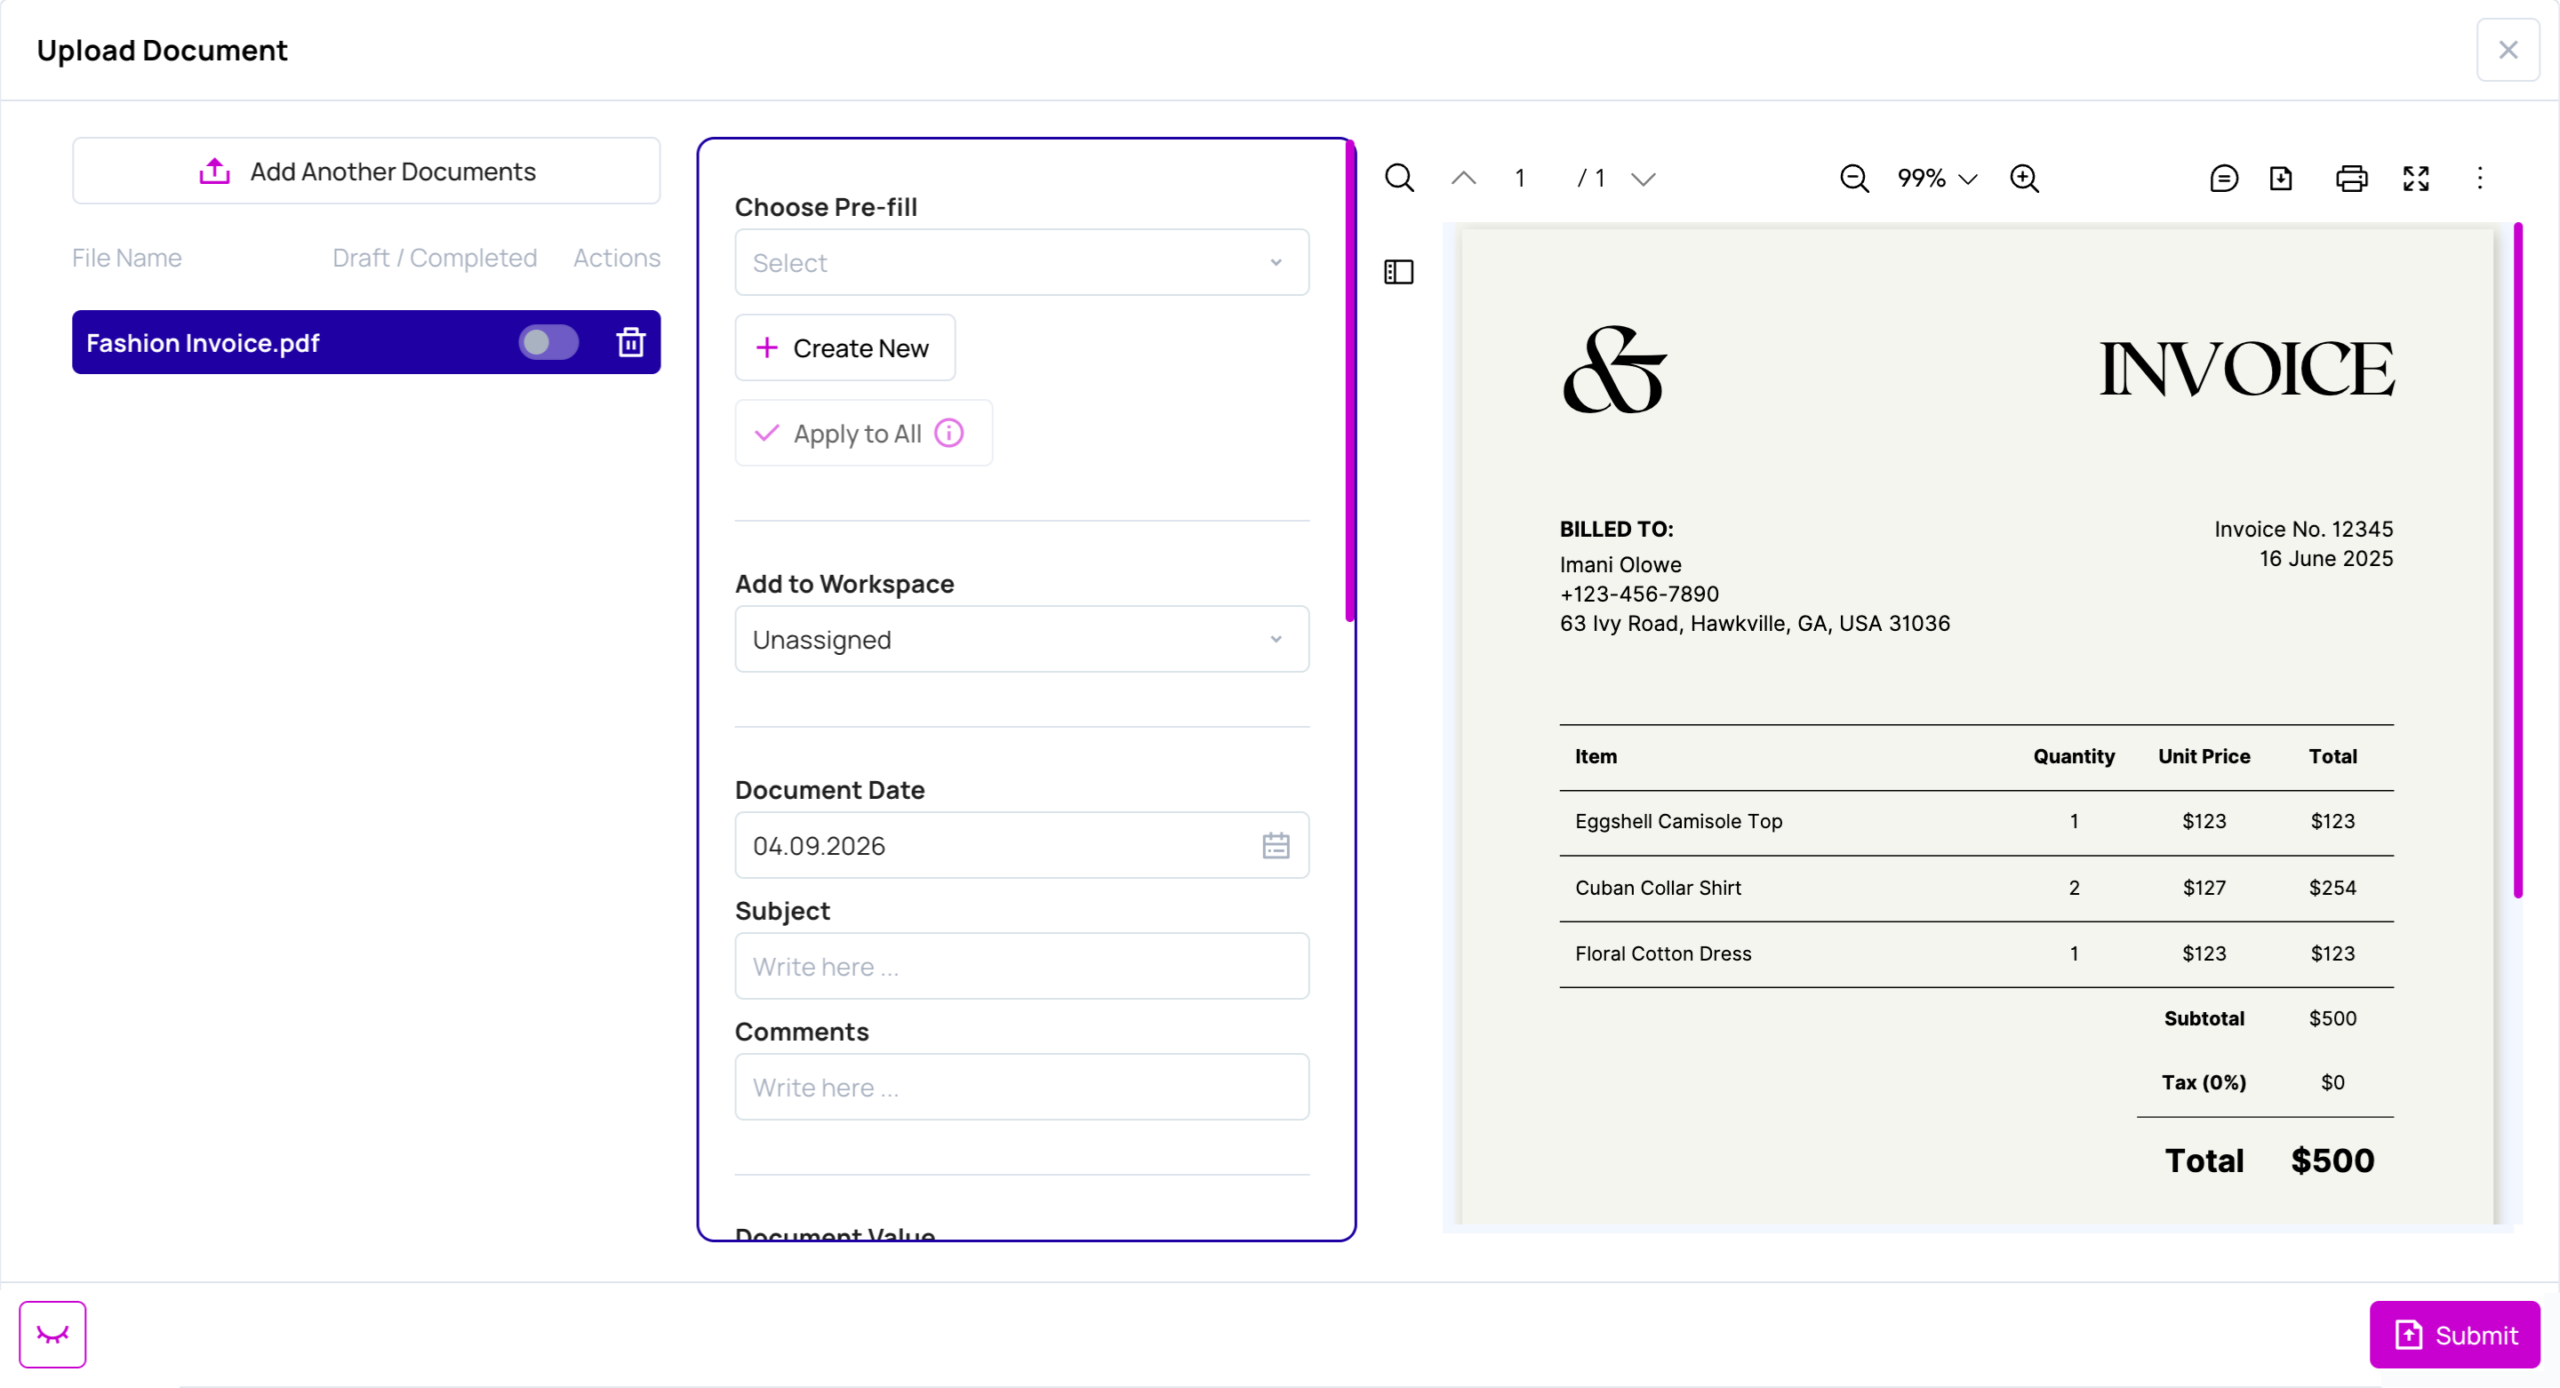
Upload Document imports external files as documents in the account. Open it from the New menu.
- Click or drag files into the upload area. Up to 20 files are accepted, each under 100 MB, in .PDF, .PNG, .JPG, or .JPEG.
- Click Upload.
- For each file, complete the document details.
- Click Submit.
The details panel holds:
- Choose Pre-fill — applies a saved prefill, or Create New to make one. Apply to All uses the same settings for every uploaded file.
- Add to Workspace — assigns the document to a workspace.
- Document Date, Subject, Comments.
- Document Value, Taxes, Excl. Tax, Currency.
- Business Partner, Inbound / Outbound (Incoming or Outgoing), Document Number, Reference.
- Document Type and Document Subtype.
- Additional Information — Case Number, Batch No., Insurance Policy, Shipping Number, Trade No., Certificate Number, Expiration Date, Due Date, Valid From, Valid To.
Add Another Documents adds more files to the same upload. Several files can be uploaded together as a batch.
Reminders #
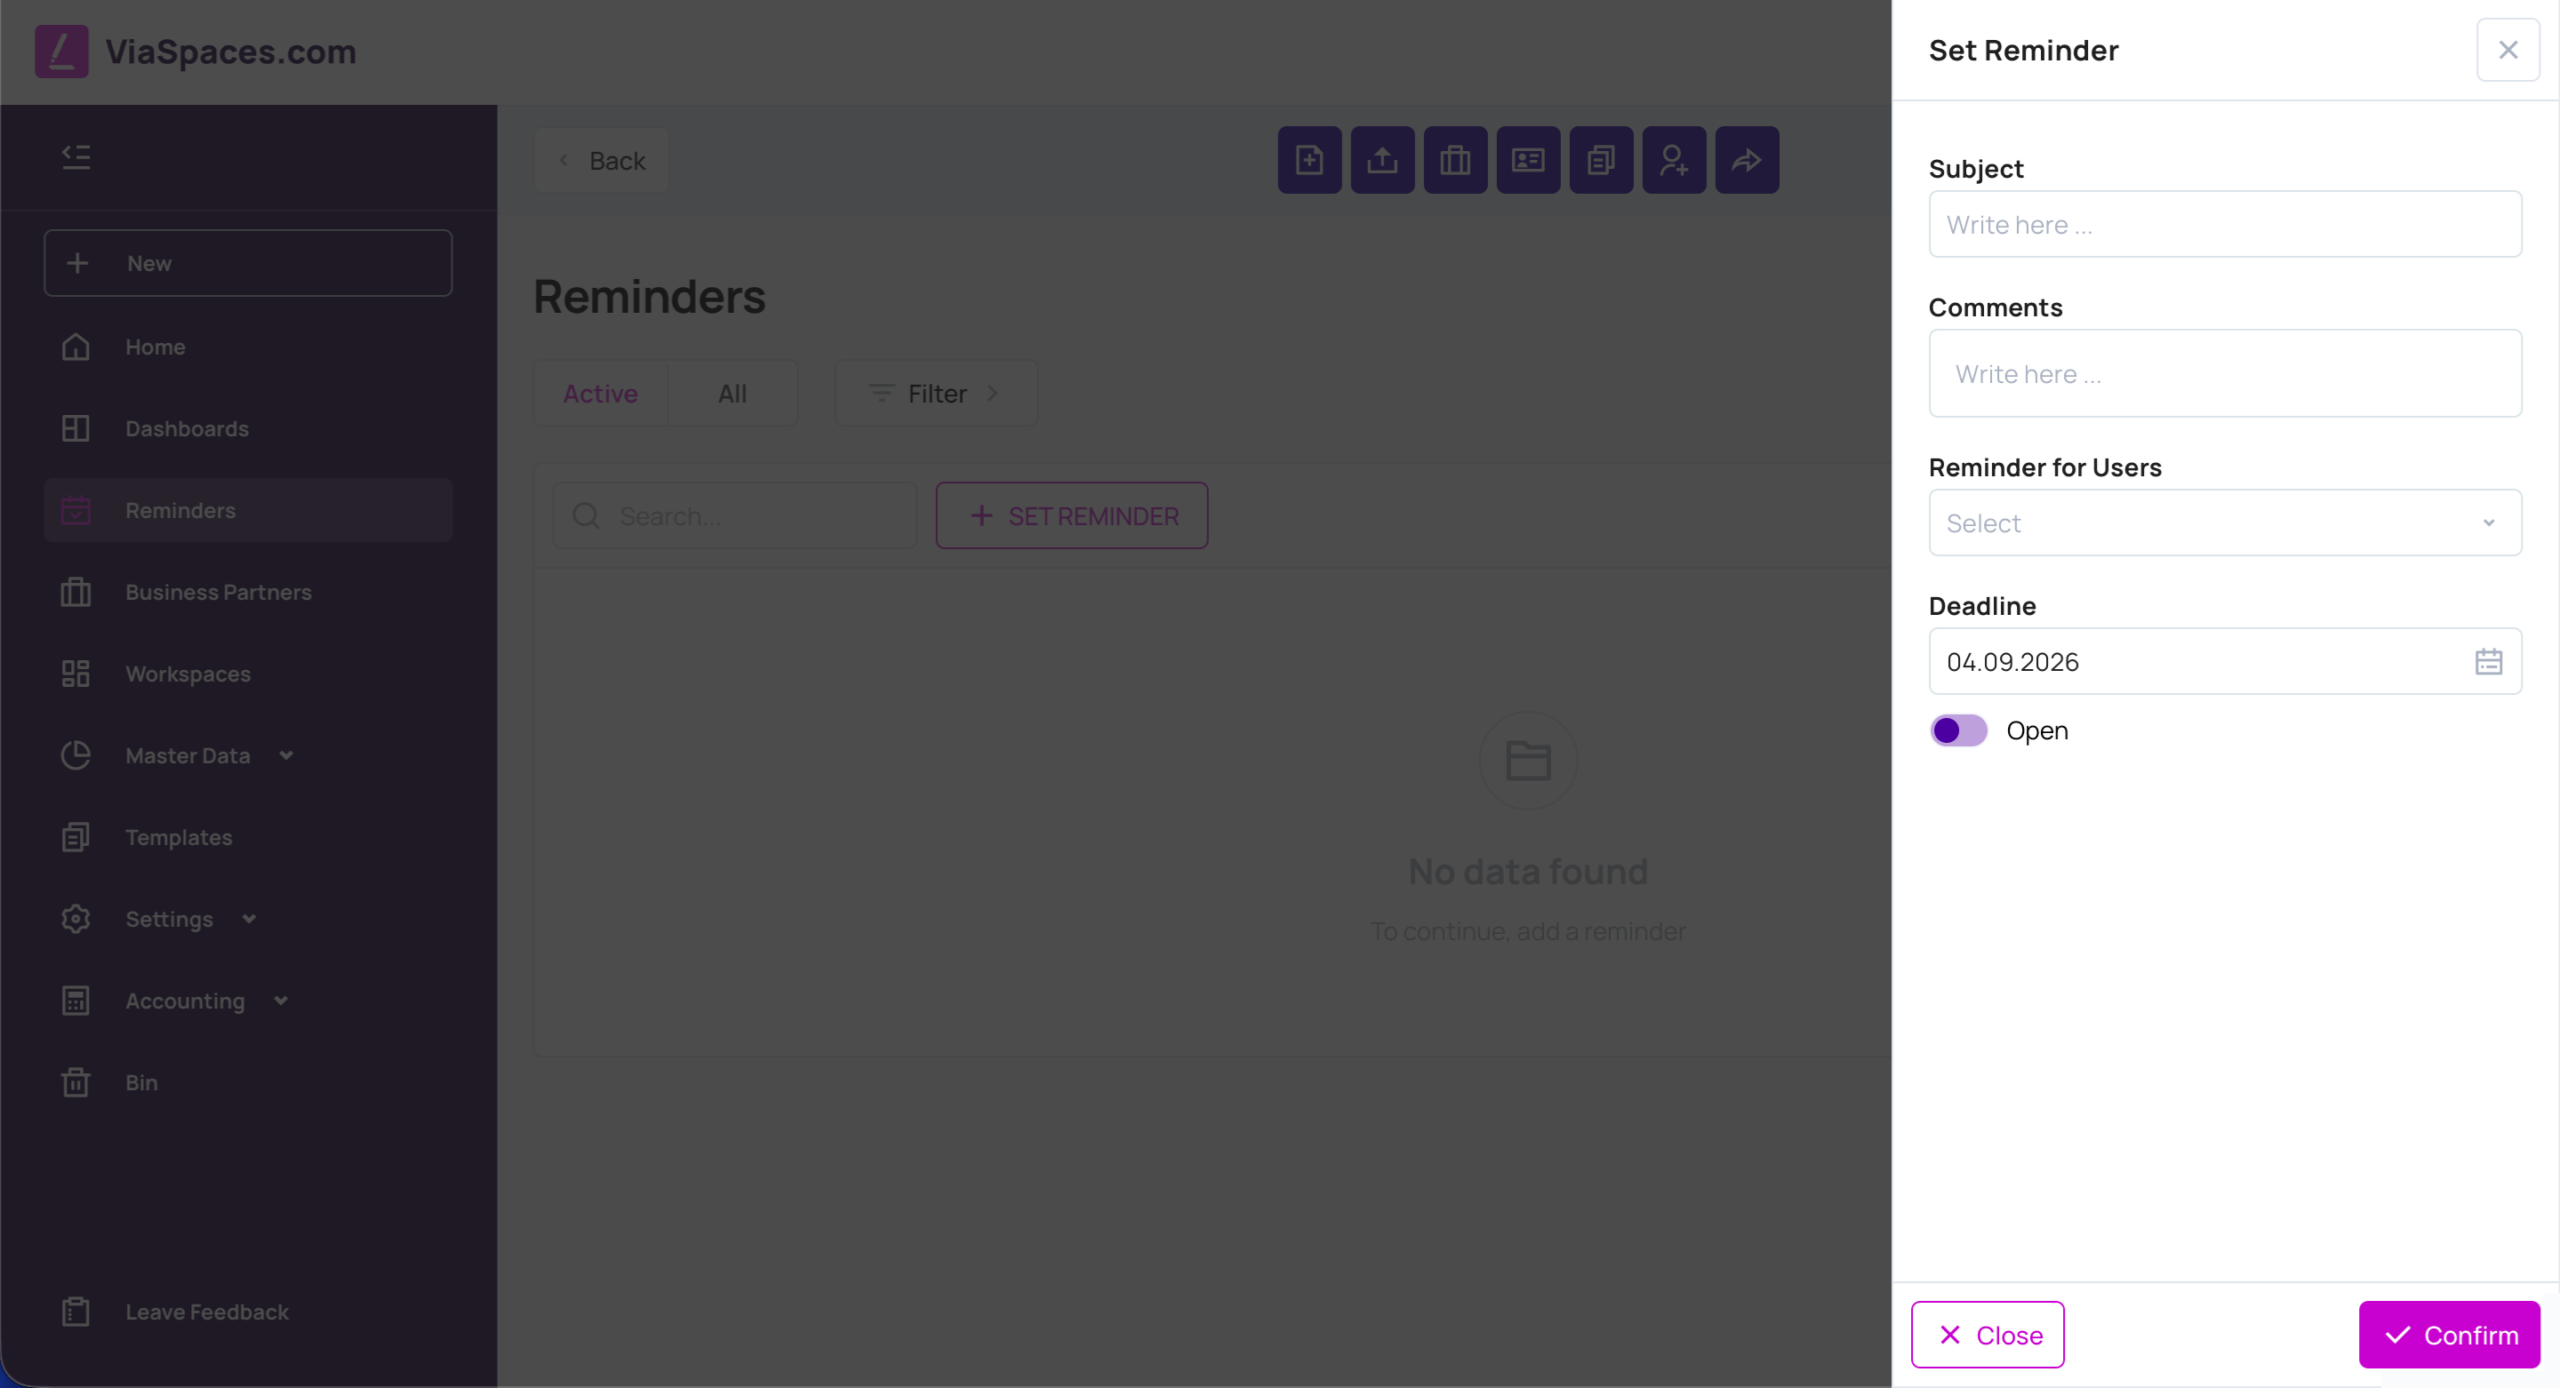
A reminder attaches a task with a deadline to a document. Create one with Reminder in the document, or Create Reminder from the Home page.
- Enter a Subject.
- Add Comments.
- Select Reminder for Users.
- Set a Deadline.
- Set the Open toggle.
- Click Confirm.
Reminders are listed under My Reminders on the Home page and on the Reminders page. Assigning a reminder to another user notifies that user of the task.
Mass Copy #
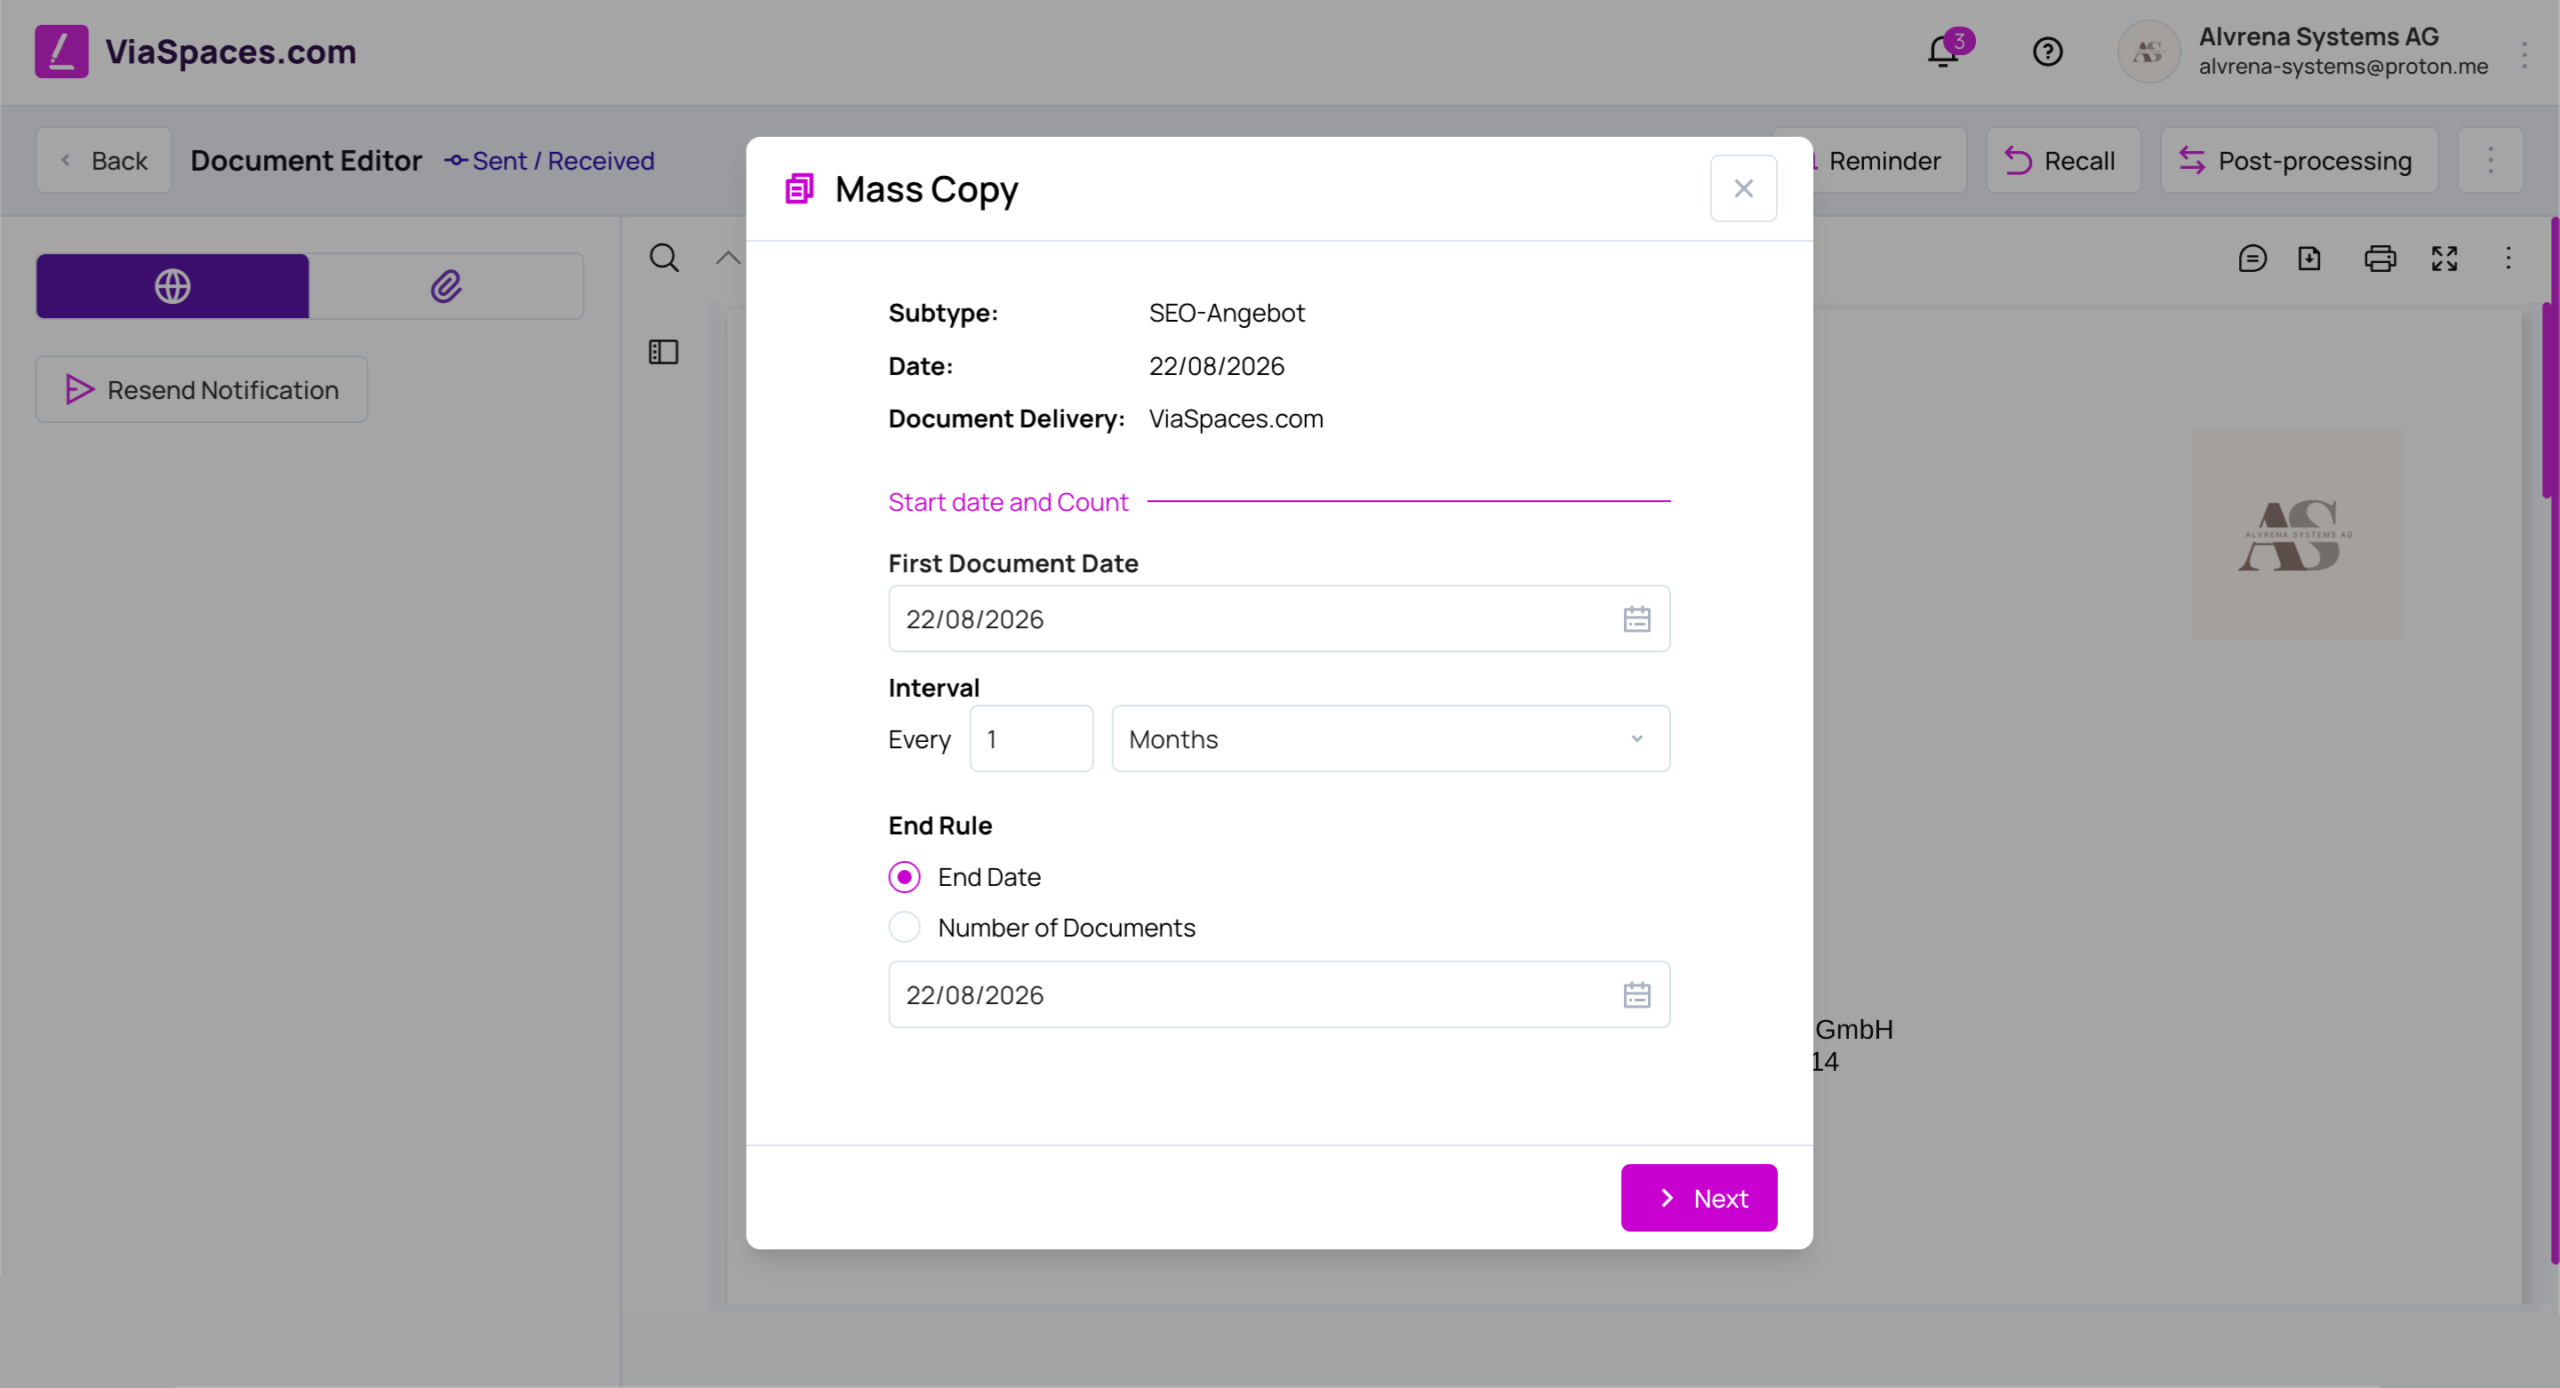
Mass Copy creates a series of copies of a document on a schedule — useful for a document that repeats on a regular cycle, such as a recurring invoice. Open it from the More or Post-processing menu.
The dialog runs in steps:
- Start date and count — set the First Document Date, an Interval (for example, every 1 month), and an End Rule: an End Date or a Number of Documents.
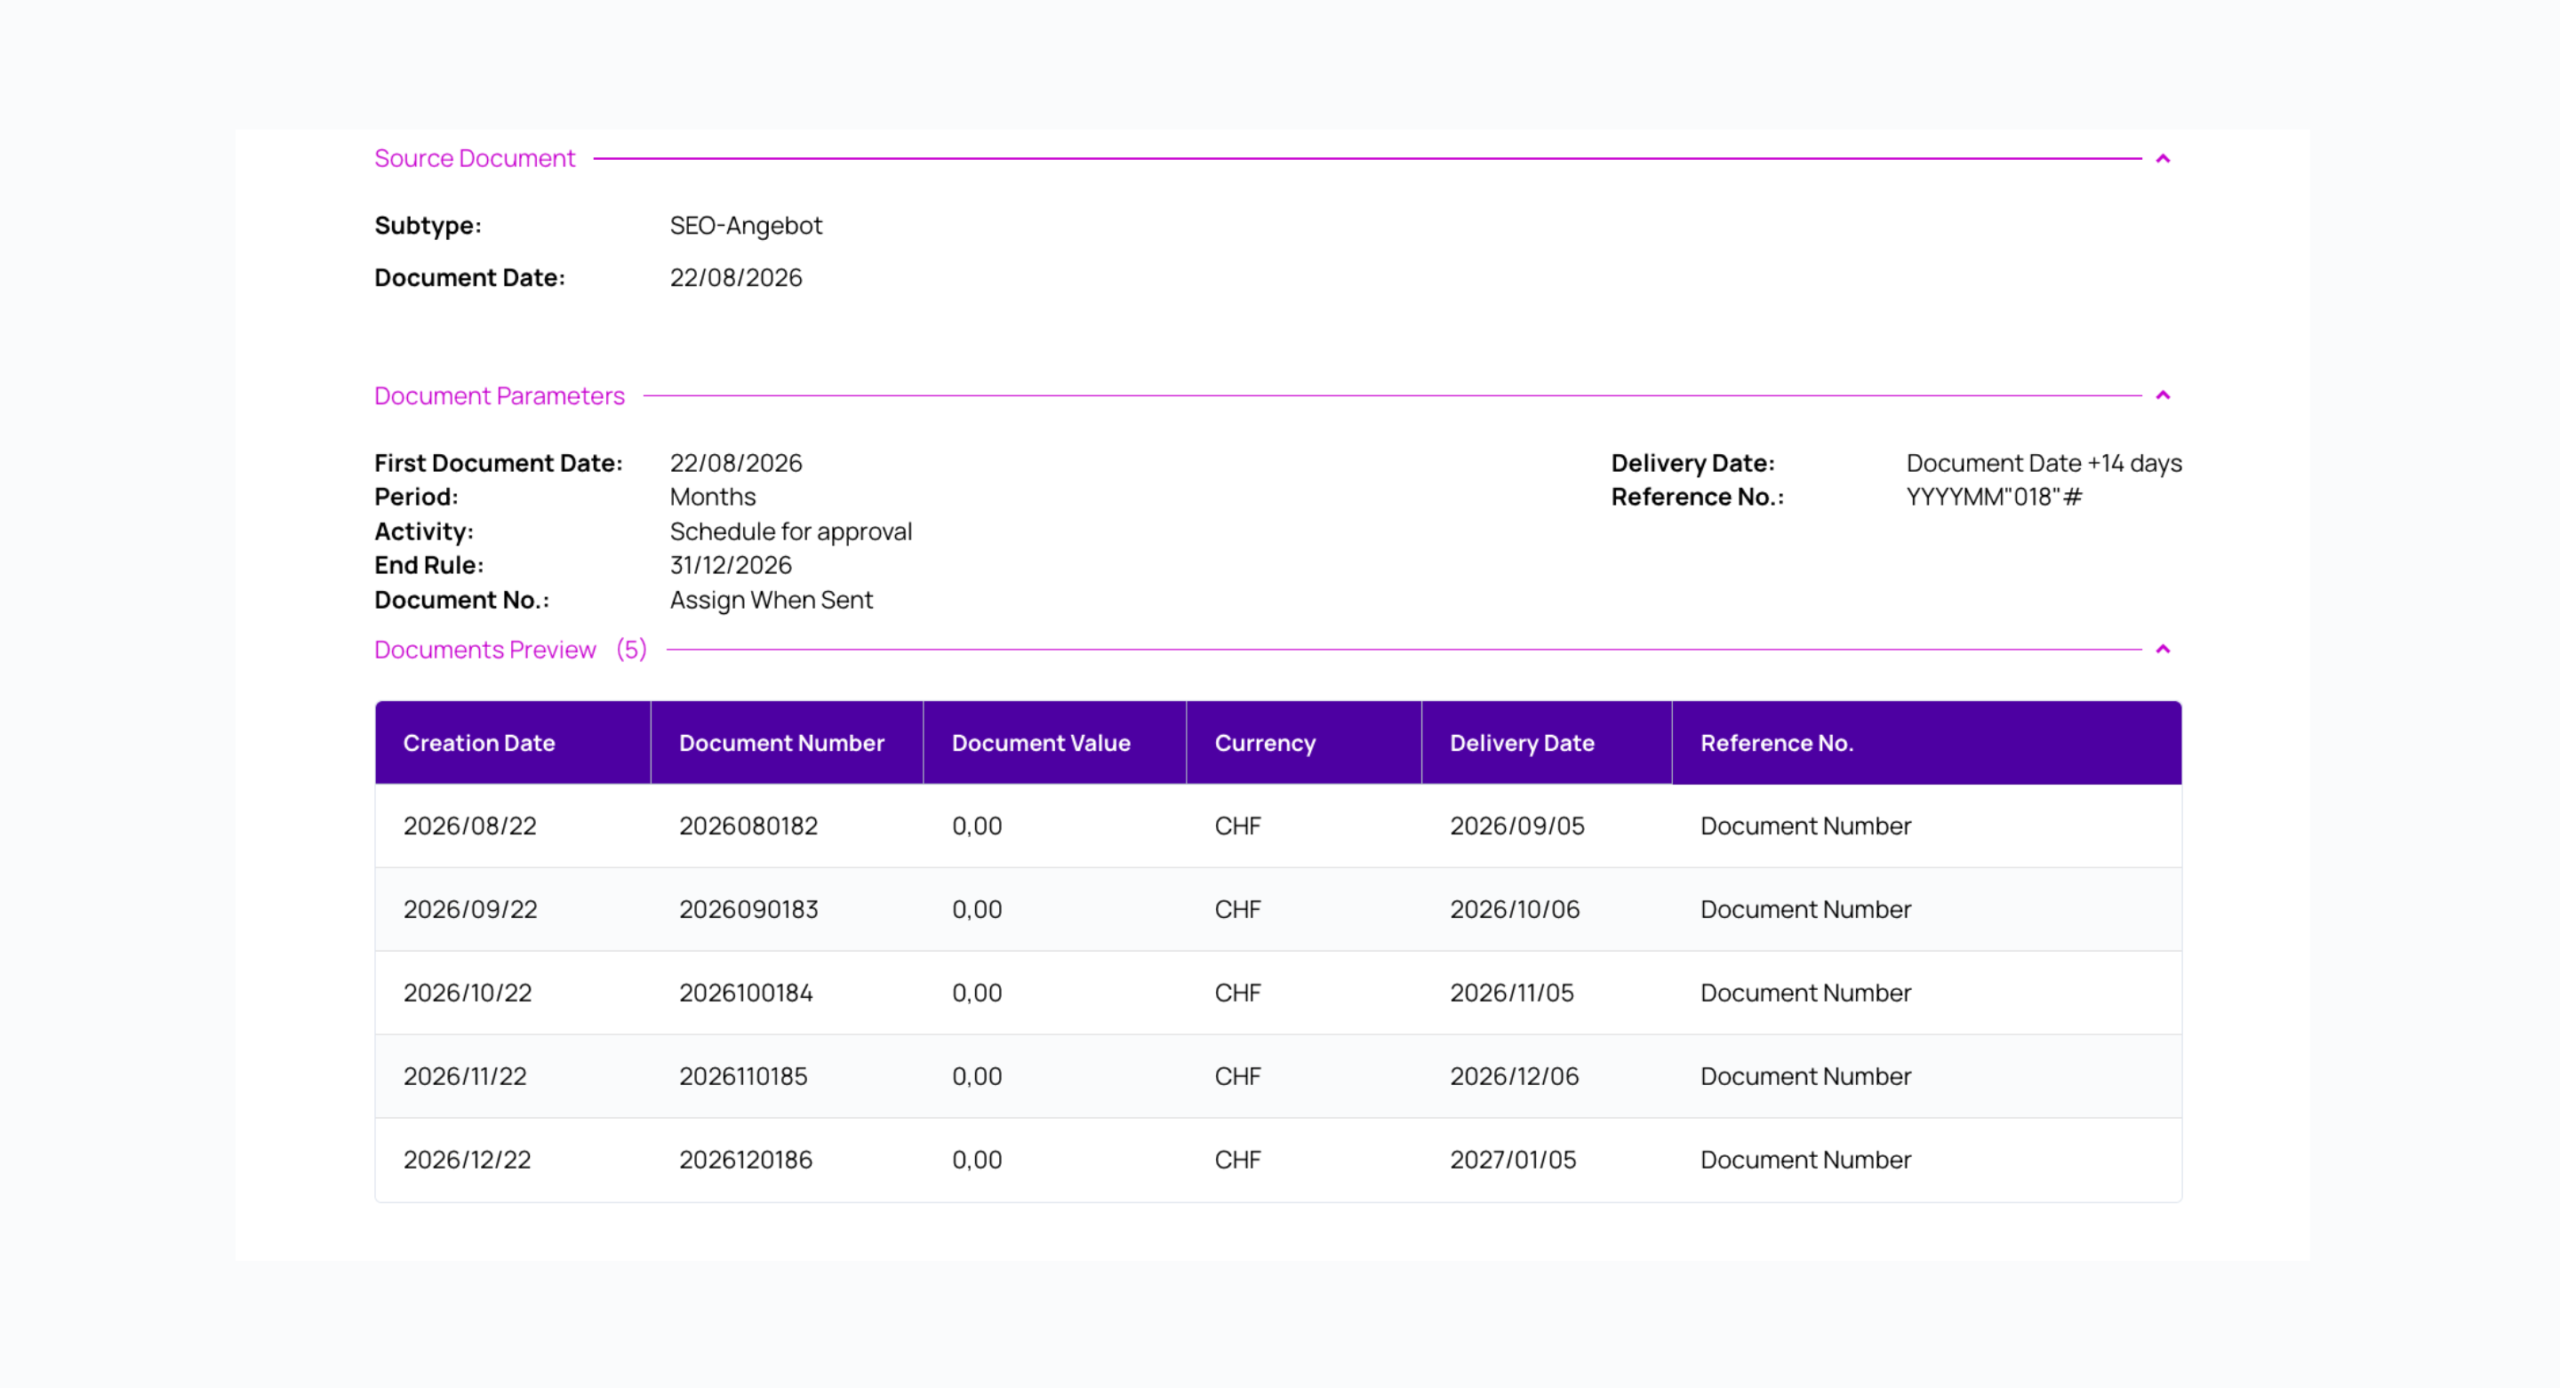
- Document number and validity — set Document No. to Assign Now or to assign when the document is sent, and set Valid From relative to the document date. A Documents Preview table lists the copies with Creation Date, Document Number, Document Value, Currency, and Valid From.
- Action — choose what happens to each copy: Save Draft, Schedule for approval, Schedule for Send, or Send Now. For a scheduled approval or send, set the approvers and the send date.
- Confirm — review the source document and parameters, then click Confirm & Create.
Each copy is generated with its own document number and validity dates according to the settings.
Copy #
Copy creates a single duplicate of a document. It is available in the document’s More and Post-processing menus.